
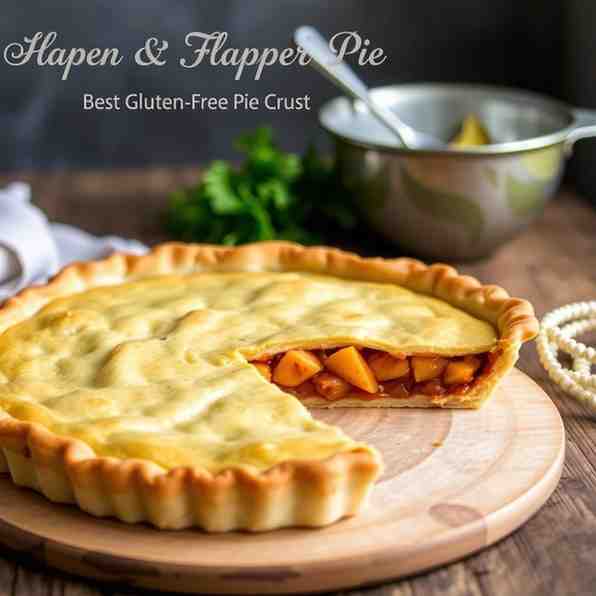
Best Gluten-Free Pie Crust Recipe for Flapper Pie
Best Gluten-Free Pie Crust Recipe for Flapper Pie
- Serves: 8 People
- Prepare Time: 45 minutes
- Cooking Time: 30-35 minut
- Calories: -
- Difficulty: Medium
Ever craved that classic, creamy, cinnamon-kissed Flapper Pie but worried about finding a gluten-free pie crust recipe that actually holds up? You're in the right place! Flapper Pie, a beloved Canadian prairie dessert, is pure nostalgic comfort: a rich vanilla custard nestled in a sweet graham cracker crust, all topped with a cloud of fluffy meringue. The only catch? Most traditional recipes rely on wheat-based graham crackers, and many gluten-free versions fall flat, crumbling into a sad mess or tasting "off."
But don't despair! We've meticulously tested and perfected this gluten-free graham cracker pie crust recipe, ensuring it's not only delicious but also slices cleanly without a fuss. We promise all the creamy, dreamy flavor of the original, built on a foundation that’s specifically designed for gluten-free graham cracker crumbs. Say goodbye to crumbly crusts and hello to a show-stopping dessert that everyone can enjoy.
Naturally nut-free (just omit any optional nut garnishes).
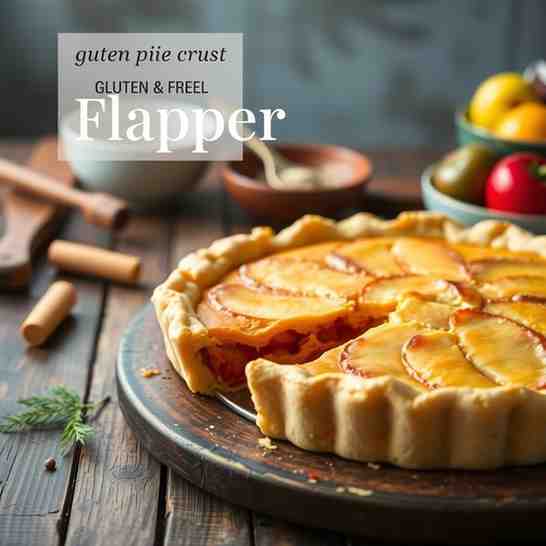
Uses widely available gluten-free graham crackers.
A fantastic make-ahead dessert for holidays, potlucks, or just a cozy night in, with practical storage tips.
This is the best gluten free pie crust recipe you'll find for a pie that tastes like home!
This isn't just another pie recipe; it's a solution! You'll absolutely adore this gluten-free Flapper Pie because:
Authentic Flavor: It truly tastes like the classic you remember – a perfectly spiced cinnamon-graham crust, luscious vanilla custard, and a light, airy meringue.
Gluten-Free by Design: We've built this recipe from the ground up to work with gluten-free graham cracker crumbs, eliminating the guesswork often involved in adapting traditional recipes.
Flexible Crust Options: Whether you want to make your gluten-free graham cracker crust from scratch or use a gluten-free pre made pie crust, we've got you covered with minimal adjustments.
Simple Equipment: You only need basic kitchen tools: a saucepan, a hand mixer (or stand mixer), and a 9-inch pie plate.
Make-Ahead Friendly: The crust and custard can be prepared in advance, making your baking day much smoother. Just add the meringue closer to serving for peak freshness.
Flapper Pie is a true gem from the Canadian prairies, a dessert steeped in history and comfort. Imagine a rich, silky vanilla custard baked into a crisp graham cracker crust, all crowned with a tall, fluffy meringue. It’s often compared to lemon or key lime meringue pie, but its distinct vanilla custard and warm cinnamon-spiced graham crust set it apart, offering a unique, comforting flavor profile.
Traditional versions, however, almost exclusively rely on wheat-based graham crackers. That’s where our recipe shines! We've meticulously crafted this version to deliver that exact nostalgic taste and texture using gluten-free graham cracker crumbs, ensuring you don't miss out on a single bite of this cherished classic. This isn't just a gluten free pie recipe; it's a piece of history, reimagined.
Ingredients
Directions
- Make and Bake the Gluten-Free Graham Cracker Crust
- Prepare the Crumbs: If starting with whole gluten-free graham crackers, crush them finely. A food processor works best for even crumbs, but you can also place them in a zip-top bag and crush with a rolling pin. You're aiming for fine, sandy crumbs, not chunky pieces.
- Combine Ingredients: In a medium bowl, mix the gluten-free graham cracker crumbs, sugar, cinnamon, and salt. Pour in the melted butter and stir until everything is evenly moistened and resembles wet sand.
- Press into Pan: Transfer the crumb mixture to a 9-inch pie plate. Use the bottom of a measuring cup or a flat-bottomed glass to firmly press the mixture onto the bottom and up the sides of the pie plate. Be sure to press firmly and evenly to avoid any thin spots that could crumble later.
- Bake the Crust: Bake in a preheated oven at 350°F (175°C) for 8-10 minutes, or until the edges are lightly golden and fragrant. Remove from the oven and let it cool slightly while you prepare the filling.
- Inline note for pre-made or mix crusts:
- Using a store-bought gluten-free pre made pie crust or a gluten-free pie crust mix? Simply pre-bake it as directed on the package, let it cool completely, and then skip straight to Step 3 for the custard filling.
- Cook the Vanilla Custard Filling
- Whisk Dry Ingredients: In a medium saucepan (off the heat), whisk together the ½ cup sugar, cornstarch, and pinch of salt.
- Temper Egg Yolks: In a separate small bowl, whisk the egg yolks. Warm the milk gently in a microwave or small saucepan until it's steamy but not boiling. Slowly drizzle about half of the warm milk into the whisked egg yolks, whisking constantly to temper them (this prevents the eggs from scrambling).
- Combine & Cook: Pour the tempered yolk mixture back into the saucepan with the remaining milk and dry ingredients. Whisk everything together until smooth. Place the saucepan over medium heat and cook, stirring constantly with a whisk or rubber spatula, until the mixture thickens significantly, bubbles gently, and coats the back of a spoon. You should be able to draw a visible trail with your whisk. This usually takes about 8-12 minutes.
- Finish Custard: Remove the saucepan from the heat. Stir in the vanilla extract. Let the custard cool for a few minutes in the pan, stirring occasionally, to prevent it from melting the crust when poured in.
- Whip the Meringue
- Prepare for Meringue: Ensure your mixing bowl (preferably glass or metal) and beaters are absolutely spotless and free of any grease or fat. Even a tiny speck can prevent the egg whites from whipping properly.
- Whip Whites: In the clean bowl, beat the egg whites with the cream of tartar (or lemon juice) on medium speed until soft peaks form. This means when you lift the beaters, the peaks gently flop over.
- Add Sugar: With the mixer still running on medium speed, slowly stream in the ½ cup of granulated sugar, a tablespoon at a time. Continue beating on medium-high speed until the meringue is glossy, thick, and forms stiff peaks. Stiff peaks will hold their shape firmly when the beaters are lifted and have a shiny appearance. Be careful not to over-beat, which can make the meringue grainy or clumpy. If using, gently fold in the optional vanilla or almond extract.
- Assemble & Bake
- Fill the Crust: Pour the warm (not boiling hot) vanilla custard into the slightly cooled gluten-free graham cracker crust.
- Top with Meringue: Carefully spread the whipped meringue over the hot custard, making sure to seal the meringue all the way to the edges of the crust. This helps prevent the meringue from shrinking or "weeping" during baking.
- Optional Garnish: If desired, sprinkle a spoonful of reserved gluten-free graham cracker crumbs over the top of the meringue for a decorative touch.
- Bake to Perfection: Bake the pie in a preheated oven at 350°F (175°C) for 15-20 minutes, or until the meringue is beautifully golden brown and set. Keep a close eye on it, as meringue can brown quickly.
- Cool, Chill & Slice
- Cool Gradually: Once baked, remove the pie from the oven and let it cool completely at room temperature, away from drafts, for at least 1-2 hours.
- Chill Thoroughly: Once barely warm, transfer the pie to the refrigerator and chill for at least 4 hours, or preferably overnight, until the custard is fully set.
- Slice & Serve: For clean slices, use a sharp knife and wipe the blade clean with a damp cloth between each cut. This pie is best served the same day or within 24 hours for the best meringue texture.
Best Gluten-Free Pie Crust Recipe for Flapper Pie
- Serves: 8 People
- Prepare Time: 45 minutes
- Cooking Time: 30-35 minut
- Calories: -
- Difficulty: Medium
Ever craved that classic, creamy, cinnamon-kissed Flapper Pie but worried about finding a gluten-free pie crust recipe that actually holds up? You're in the right place! Flapper Pie, a beloved Canadian prairie dessert, is pure nostalgic comfort: a rich vanilla custard nestled in a sweet graham cracker crust, all topped with a cloud of fluffy meringue. The only catch? Most traditional recipes rely on wheat-based graham crackers, and many gluten-free versions fall flat, crumbling into a sad mess or tasting "off."
But don't despair! We've meticulously tested and perfected this gluten-free graham cracker pie crust recipe, ensuring it's not only delicious but also slices cleanly without a fuss. We promise all the creamy, dreamy flavor of the original, built on a foundation that’s specifically designed for gluten-free graham cracker crumbs. Say goodbye to crumbly crusts and hello to a show-stopping dessert that everyone can enjoy.
Naturally nut-free (just omit any optional nut garnishes).
Uses widely available gluten-free graham crackers.
A fantastic make-ahead dessert for holidays, potlucks, or just a cozy night in, with practical storage tips.
This is the best gluten free pie crust recipe you'll find for a pie that tastes like home!
This isn't just another pie recipe; it's a solution! You'll absolutely adore this gluten-free Flapper Pie because:
Authentic Flavor: It truly tastes like the classic you remember – a perfectly spiced cinnamon-graham crust, luscious vanilla custard, and a light, airy meringue.
Gluten-Free by Design: We've built this recipe from the ground up to work with gluten-free graham cracker crumbs, eliminating the guesswork often involved in adapting traditional recipes.
Flexible Crust Options: Whether you want to make your gluten-free graham cracker crust from scratch or use a gluten-free pre made pie crust, we've got you covered with minimal adjustments.
Simple Equipment: You only need basic kitchen tools: a saucepan, a hand mixer (or stand mixer), and a 9-inch pie plate.
Make-Ahead Friendly: The crust and custard can be prepared in advance, making your baking day much smoother. Just add the meringue closer to serving for peak freshness.
Flapper Pie is a true gem from the Canadian prairies, a dessert steeped in history and comfort. Imagine a rich, silky vanilla custard baked into a crisp graham cracker crust, all crowned with a tall, fluffy meringue. It’s often compared to lemon or key lime meringue pie, but its distinct vanilla custard and warm cinnamon-spiced graham crust set it apart, offering a unique, comforting flavor profile.
Traditional versions, however, almost exclusively rely on wheat-based graham crackers. That’s where our recipe shines! We've meticulously crafted this version to deliver that exact nostalgic taste and texture using gluten-free graham cracker crumbs, ensuring you don't miss out on a single bite of this cherished classic. This isn't just a gluten free pie recipe; it's a piece of history, reimagined.
Ingredients
Directions
- Make and Bake the Gluten-Free Graham Cracker Crust
- Prepare the Crumbs: If starting with whole gluten-free graham crackers, crush them finely. A food processor works best for even crumbs, but you can also place them in a zip-top bag and crush with a rolling pin. You're aiming for fine, sandy crumbs, not chunky pieces.
- Combine Ingredients: In a medium bowl, mix the gluten-free graham cracker crumbs, sugar, cinnamon, and salt. Pour in the melted butter and stir until everything is evenly moistened and resembles wet sand.
- Press into Pan: Transfer the crumb mixture to a 9-inch pie plate. Use the bottom of a measuring cup or a flat-bottomed glass to firmly press the mixture onto the bottom and up the sides of the pie plate. Be sure to press firmly and evenly to avoid any thin spots that could crumble later.
- Bake the Crust: Bake in a preheated oven at 350°F (175°C) for 8-10 minutes, or until the edges are lightly golden and fragrant. Remove from the oven and let it cool slightly while you prepare the filling.
- Inline note for pre-made or mix crusts:
- Using a store-bought gluten-free pre made pie crust or a gluten-free pie crust mix? Simply pre-bake it as directed on the package, let it cool completely, and then skip straight to Step 3 for the custard filling.
- Cook the Vanilla Custard Filling
- Whisk Dry Ingredients: In a medium saucepan (off the heat), whisk together the ½ cup sugar, cornstarch, and pinch of salt.
- Temper Egg Yolks: In a separate small bowl, whisk the egg yolks. Warm the milk gently in a microwave or small saucepan until it's steamy but not boiling. Slowly drizzle about half of the warm milk into the whisked egg yolks, whisking constantly to temper them (this prevents the eggs from scrambling).
- Combine & Cook: Pour the tempered yolk mixture back into the saucepan with the remaining milk and dry ingredients. Whisk everything together until smooth. Place the saucepan over medium heat and cook, stirring constantly with a whisk or rubber spatula, until the mixture thickens significantly, bubbles gently, and coats the back of a spoon. You should be able to draw a visible trail with your whisk. This usually takes about 8-12 minutes.
- Finish Custard: Remove the saucepan from the heat. Stir in the vanilla extract. Let the custard cool for a few minutes in the pan, stirring occasionally, to prevent it from melting the crust when poured in.
- Whip the Meringue
- Prepare for Meringue: Ensure your mixing bowl (preferably glass or metal) and beaters are absolutely spotless and free of any grease or fat. Even a tiny speck can prevent the egg whites from whipping properly.
- Whip Whites: In the clean bowl, beat the egg whites with the cream of tartar (or lemon juice) on medium speed until soft peaks form. This means when you lift the beaters, the peaks gently flop over.
- Add Sugar: With the mixer still running on medium speed, slowly stream in the ½ cup of granulated sugar, a tablespoon at a time. Continue beating on medium-high speed until the meringue is glossy, thick, and forms stiff peaks. Stiff peaks will hold their shape firmly when the beaters are lifted and have a shiny appearance. Be careful not to over-beat, which can make the meringue grainy or clumpy. If using, gently fold in the optional vanilla or almond extract.
- Assemble & Bake
- Fill the Crust: Pour the warm (not boiling hot) vanilla custard into the slightly cooled gluten-free graham cracker crust.
- Top with Meringue: Carefully spread the whipped meringue over the hot custard, making sure to seal the meringue all the way to the edges of the crust. This helps prevent the meringue from shrinking or "weeping" during baking.
- Optional Garnish: If desired, sprinkle a spoonful of reserved gluten-free graham cracker crumbs over the top of the meringue for a decorative touch.
- Bake to Perfection: Bake the pie in a preheated oven at 350°F (175°C) for 15-20 minutes, or until the meringue is beautifully golden brown and set. Keep a close eye on it, as meringue can brown quickly.
- Cool, Chill & Slice
- Cool Gradually: Once baked, remove the pie from the oven and let it cool completely at room temperature, away from drafts, for at least 1-2 hours.
- Chill Thoroughly: Once barely warm, transfer the pie to the refrigerator and chill for at least 4 hours, or preferably overnight, until the custard is fully set.
- Slice & Serve: For clean slices, use a sharp knife and wipe the blade clean with a damp cloth between each cut. This pie is best served the same day or within 24 hours for the best meringue texture.
You may also like

Hey there! I’m just someone who seriously loves good food and believes that cooking doesn’t have to be complicated to be amazing. Whether it’s a quick weeknight dinner or a cozy weekend meal, I’m all about sharing easy, tasty recipes that actually work.


