
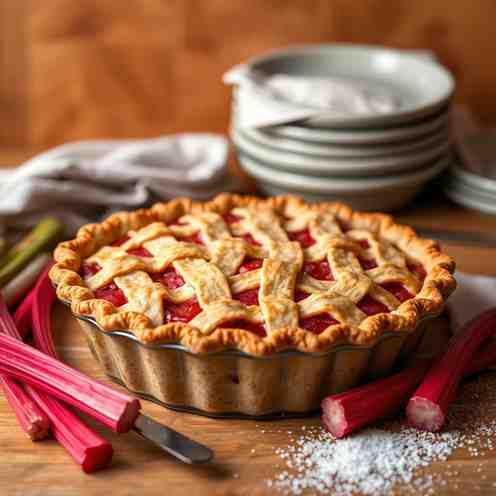
Classic Rhubarb Pie - Baking From Scratch Today
Classic Rhubarb Pie - Baking From Scratch Today
- Serves: 8 People
- Prepare Time: 45 minutes
- Cooking Time: 60-75 minut
- Calories: -
- Difficulty: Medium
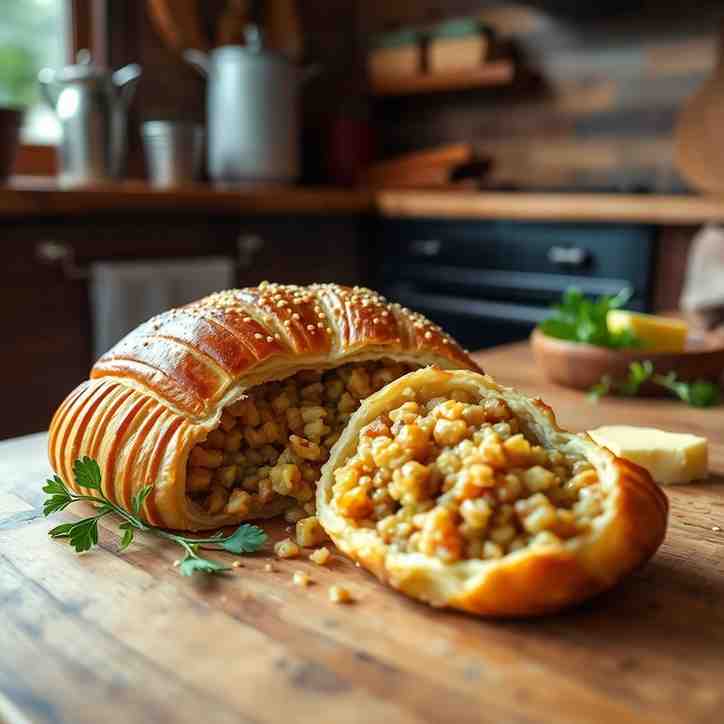
There's nothing quite like the warmth and comfort of a homemade pie, and our Classic Rhubarb Pie is a true testament to the joy of baking recipes from scratch. Forget complicated techniques; this recipe is designed to help you create a show-stopping dessert with a perfectly buttery, flaky crust and a sweet-tart rhubarb filling that sets beautifully every time—no more runny slices! Whether you're a seasoned baker looking to perfect your technique or just starting your journey into baking from scratch, this guide will walk you through every step.
Why This Recipe Works: We guarantee a crisp bottom crust and a perfectly set, vibrant filling, making it a reliable favorite.
Ingredients
Directions
- 1) Make the Dough
- Combine Dry Ingredients: In a large mixing bowl, whisk together the all-purpose flour, salt, and sugar.
- Cut in Butter: Add the cold, cubed unsalted butter to the dry ingredients. Use a pastry blender, two knives, or your fingertips to cut the butter into the flour until the mixture resembles coarse meal with some pea-sized pieces of butter remaining.
- Add Ice Water: Gradually add the ice water, 1 tablespoon at a time, mixing lightly with a fork or your hands until the dough just comes together. Be careful not to overmix.
- Checkpoint: The dough should hold together when squeezed but still have visible streaks of butter. There should be no dry, floury patches. If it's too dry, add a tiny bit more water, half a teaspoon at a time.
- Chill Dough: Divide the dough in half, flatten each half into a disk, wrap tightly in plastic wrap, and refrigerate for at least 30 minutes (or up to 2 days). This chilling period is crucial for a tender, flaky crust.
- 2) Prep Rhubarb Filling
- Slice Rhubarb: While the dough chills, prepare your rhubarb. Trim the ends and slice the stalks into ½-inch pieces. If using frozen rhubarb, thaw it completely and drain off any excess liquid thoroughly.
- Toss Filling Ingredients: In a large bowl, combine the sliced rhubarb, granulated sugar, cornstarch (or tapioca starch), lemon zest, lemon juice, vanilla extract, and a pinch of salt. Toss gently until the rhubarb is evenly coated.
- Rest Briefly: Let the mixture rest for about 15-20 minutes.
- Checkpoint: The rhubarb should look glossy, and some liquid will start to form at the bottom of the bowl. This is normal and helps create a saucy filling.
- 3) Roll + Build the Pie
- Preheat Oven: Preheat your oven to 425°F (220°C). Place a sheet pan on the lowest rack to catch any drips and help achieve a crisp bottom crust.
- Roll Bottom Crust: On a lightly floured surface, roll out one disk of chilled dough into a 12-inch circle, about ⅛-inch thick.
- Fit into Pie Plate: Carefully transfer the rolled dough into a 9-inch standard pie plate. Gently press it into the bottom and up the sides without stretching the dough. Trim any excess dough, leaving about a ½-inch overhang.
- Add Filling: Pour the prepared rhubarb filling into the pie crust, spreading it evenly.
- Add Top Crust: Roll out the second disk of dough into another 12-inch circle. Place it over the filling. Trim the edges, leaving a ½-inch overhang.
- Crimp Edges: Fold the top overhang under the bottom crust's overhang. Crimp the edges together using your fingers or a fork to seal the pie.
- Vent & Finish: Cut several slits in the top crust to allow steam to escape during baking. For a golden, shiny crust, brush lightly with an egg wash (1 egg yolk whisked with 1 tablespoon water) and sprinkle with coarse sugar (optional).
- 4) Bake for a Crisp Bottom + Set Filling
- Initial High Heat Bake: Place the pie on the preheated sheet pan in the oven. Bake at 425°F (220°C) for 15 minutes. This initial high heat helps set the crust and create flakiness.
- Reduce Temperature: Reduce the oven temperature to 375°F (190°C) and continue baking for another 45-60 minutes, or until the crust is golden brown and the filling is bubbling thickly in the center.
- Use Foil Shield: If the crust edges start to brown too quickly, loosely cover them with aluminum foil or a pie shield.
- Checkpoint: The filling should be actively bubbling not just at the edges, but also in the center of the pie. This indicates the starches have fully thickened, preventing a runny filling.
- 5) Cool Properly (This is where most pies fail)
- Cooling Timeline: Transfer the baked pie to a wire rack and let it cool completely for at least 3-4 hours, or ideally, to room temperature.
- Checkpoint: Resist the urge to slice early! The filling needs this time to fully set.
- Safe to Slice: Once fully cooled, the filling will be firm and slice cleanly.
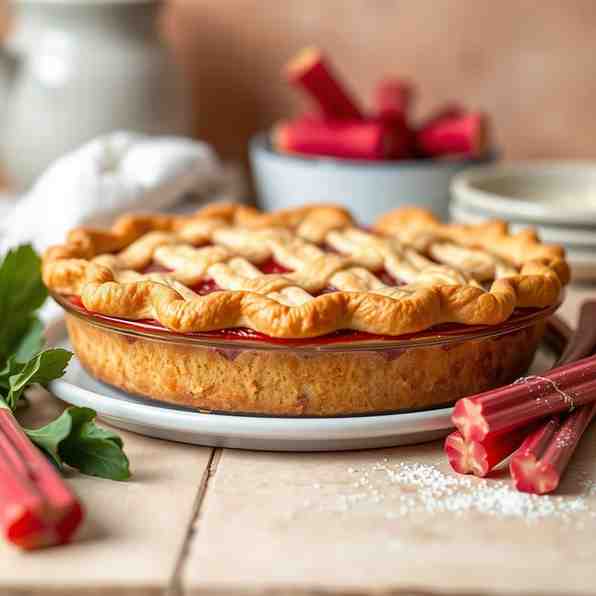
Classic Rhubarb Pie - Baking From Scratch Today
- Serves: 8 People
- Prepare Time: 45 minutes
- Cooking Time: 60-75 minut
- Calories: -
- Difficulty: Medium
There's nothing quite like the warmth and comfort of a homemade pie, and our Classic Rhubarb Pie is a true testament to the joy of baking recipes from scratch. Forget complicated techniques; this recipe is designed to help you create a show-stopping dessert with a perfectly buttery, flaky crust and a sweet-tart rhubarb filling that sets beautifully every time—no more runny slices! Whether you're a seasoned baker looking to perfect your technique or just starting your journey into baking from scratch, this guide will walk you through every step.
Why This Recipe Works: We guarantee a crisp bottom crust and a perfectly set, vibrant filling, making it a reliable favorite.
Ingredients
Directions
- 1) Make the Dough
- Combine Dry Ingredients: In a large mixing bowl, whisk together the all-purpose flour, salt, and sugar.
- Cut in Butter: Add the cold, cubed unsalted butter to the dry ingredients. Use a pastry blender, two knives, or your fingertips to cut the butter into the flour until the mixture resembles coarse meal with some pea-sized pieces of butter remaining.
- Add Ice Water: Gradually add the ice water, 1 tablespoon at a time, mixing lightly with a fork or your hands until the dough just comes together. Be careful not to overmix.
- Checkpoint: The dough should hold together when squeezed but still have visible streaks of butter. There should be no dry, floury patches. If it's too dry, add a tiny bit more water, half a teaspoon at a time.
- Chill Dough: Divide the dough in half, flatten each half into a disk, wrap tightly in plastic wrap, and refrigerate for at least 30 minutes (or up to 2 days). This chilling period is crucial for a tender, flaky crust.
- 2) Prep Rhubarb Filling
- Slice Rhubarb: While the dough chills, prepare your rhubarb. Trim the ends and slice the stalks into ½-inch pieces. If using frozen rhubarb, thaw it completely and drain off any excess liquid thoroughly.
- Toss Filling Ingredients: In a large bowl, combine the sliced rhubarb, granulated sugar, cornstarch (or tapioca starch), lemon zest, lemon juice, vanilla extract, and a pinch of salt. Toss gently until the rhubarb is evenly coated.
- Rest Briefly: Let the mixture rest for about 15-20 minutes.
- Checkpoint: The rhubarb should look glossy, and some liquid will start to form at the bottom of the bowl. This is normal and helps create a saucy filling.
- 3) Roll + Build the Pie
- Preheat Oven: Preheat your oven to 425°F (220°C). Place a sheet pan on the lowest rack to catch any drips and help achieve a crisp bottom crust.
- Roll Bottom Crust: On a lightly floured surface, roll out one disk of chilled dough into a 12-inch circle, about ⅛-inch thick.
- Fit into Pie Plate: Carefully transfer the rolled dough into a 9-inch standard pie plate. Gently press it into the bottom and up the sides without stretching the dough. Trim any excess dough, leaving about a ½-inch overhang.
- Add Filling: Pour the prepared rhubarb filling into the pie crust, spreading it evenly.
- Add Top Crust: Roll out the second disk of dough into another 12-inch circle. Place it over the filling. Trim the edges, leaving a ½-inch overhang.
- Crimp Edges: Fold the top overhang under the bottom crust's overhang. Crimp the edges together using your fingers or a fork to seal the pie.
- Vent & Finish: Cut several slits in the top crust to allow steam to escape during baking. For a golden, shiny crust, brush lightly with an egg wash (1 egg yolk whisked with 1 tablespoon water) and sprinkle with coarse sugar (optional).
- 4) Bake for a Crisp Bottom + Set Filling
- Initial High Heat Bake: Place the pie on the preheated sheet pan in the oven. Bake at 425°F (220°C) for 15 minutes. This initial high heat helps set the crust and create flakiness.
- Reduce Temperature: Reduce the oven temperature to 375°F (190°C) and continue baking for another 45-60 minutes, or until the crust is golden brown and the filling is bubbling thickly in the center.
- Use Foil Shield: If the crust edges start to brown too quickly, loosely cover them with aluminum foil or a pie shield.
- Checkpoint: The filling should be actively bubbling not just at the edges, but also in the center of the pie. This indicates the starches have fully thickened, preventing a runny filling.
- 5) Cool Properly (This is where most pies fail)
- Cooling Timeline: Transfer the baked pie to a wire rack and let it cool completely for at least 3-4 hours, or ideally, to room temperature.
- Checkpoint: Resist the urge to slice early! The filling needs this time to fully set.
- Safe to Slice: Once fully cooled, the filling will be firm and slice cleanly.
You may also like


Hey there! I’m just someone who seriously loves good food and believes that cooking doesn’t have to be complicated to be amazing. Whether it’s a quick weeknight dinner or a cozy weekend meal, I’m all about sharing easy, tasty recipes that actually work.


