
Creamy Coconut Popsicle Recipe - Easy Recipe
Creamy Coconut Popsicle Recipe - Easy Recipe
- Serves: 2 People
- Prepare Time: 10 minutes
- Cooking Time: 0 minutes
- Calories: -
- Difficulty: Easy
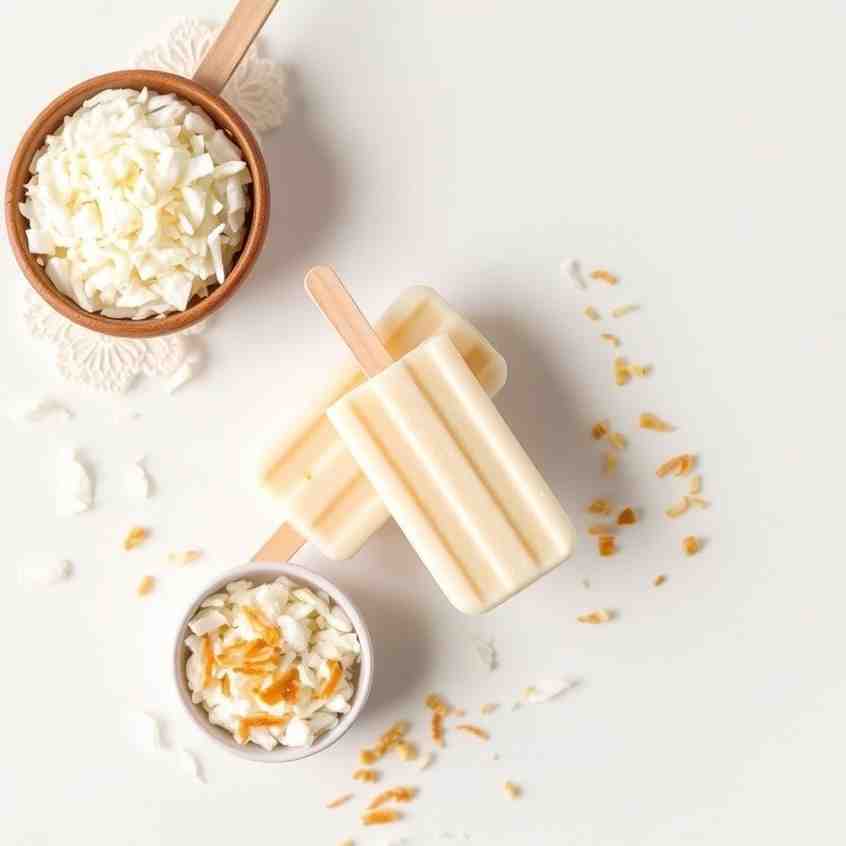
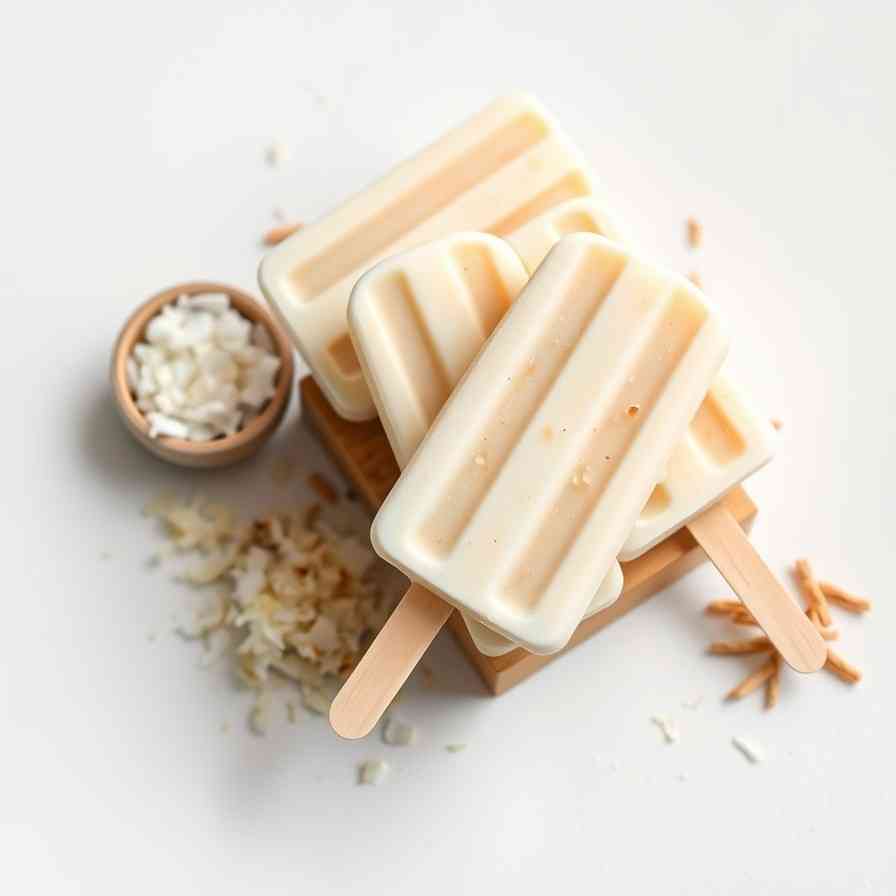
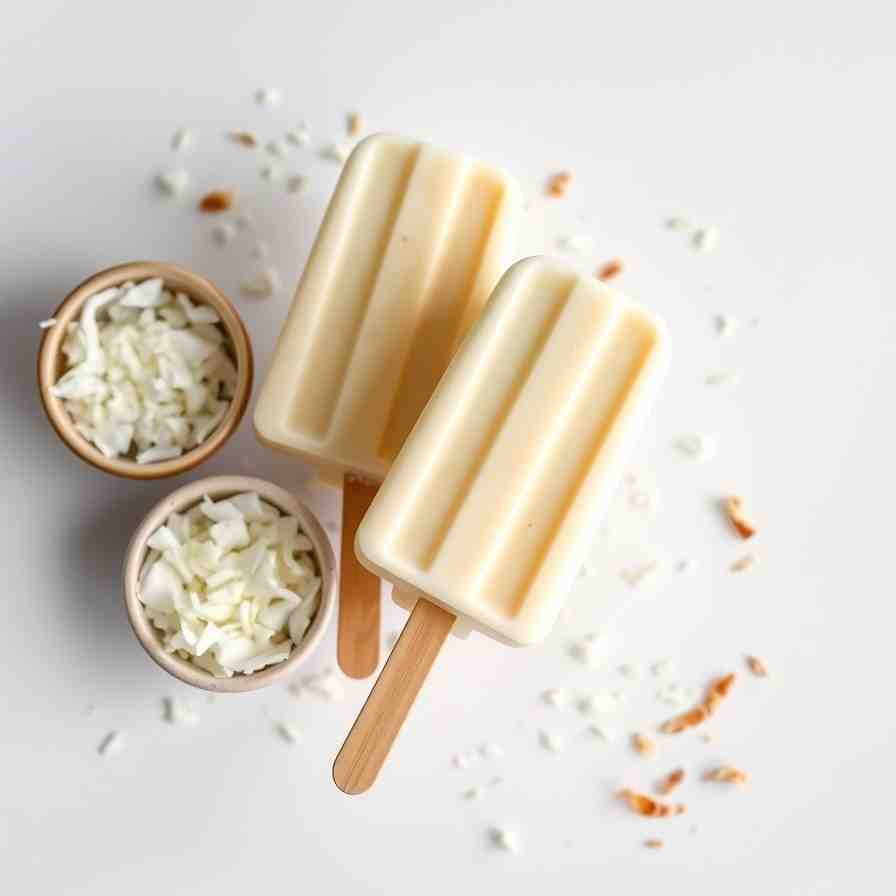
Craving a taste of the tropics without the fuss? You're in the right place! This coconut popsicle recipe is your ticket to a creamy, dreamy escape, no plane ticket required. We're talking minimal ingredients, maximum flavor, and absolutely no ice cream maker needed. Whether you're a seasoned chef or just dipping your toes into the world of homemade treats, these easy to make desserts with few ingredients are incredibly simple to whip up.
Get ready for a rich, velvety texture with just the right amount of real coconut bite. This recipe is specifically designed for a small batch, making it one of the best desserts for one (or two, if you're feeling generous!). We’ll show you how to use either `fresh coconut grated` or `shredded coconut`, so you can use whatever you have on hand. Let's dive into making these irresistible coconut ice pops!
Best for: A quick tropical dessert, a single-serving treat, or a refreshing cool-down
Ingredients
Directions
- Mix the Creamy Base: In a small bowl or measuring cup, combine the full-fat coconut milk, your chosen sweetener (honey or agave), and the pinch of salt. Whisk vigorously until the sweetener is fully dissolved and the mixture is smooth.
- Prepare Your Coconut:
- If using fresh coconut meat: Add the coconut milk mixture and the finely grated fresh coconut to a blender. Blend briefly (about 15-30 seconds) until the mixture is smooth. You want to break down the coconut a bit, but not completely pulverize it, to retain some texture.
- If using shredded coconut: Simply stir the shredded coconut directly into your prepared coconut milk base.
- Add Your Flavors (Optional): Now is the time to stir in any optional add-ins like lime zest, vanilla extract, or finely diced pineapple bits. If using toasted coconut flakes, you might reserve a spoonful to sprinkle into the molds later for a layered look.
- Fill the Molds: Carefully pour the coconut mixture into your popsicle molds, leaving a little space at the top (about 1/4 inch) as the mixture will expand slightly when frozen. If using paper cups, fill them similarly.
- Freeze & Insert Sticks: Place the filled molds in the freezer. After about 30-60 minutes (when the mixture has started to firm up but isn't completely solid), insert your popsicle sticks straight into the center of each popsicle. This timing helps the sticks stand upright.
- Freeze Until Solid: Continue freezing for at least 4-6 hours, or preferably overnight, until the popsicles are completely solid.
- How to Unmold Cleanly: When ready to enjoy, run the popsicle molds under warm water for just a few seconds. This will loosen the edges, allowing you to gently pull the popsicles out. If using paper cups, simply peel away the paper. Enjoy your tropical treat!
Creamy Coconut Popsicle Recipe - Easy Recipe
- Serves: 2 People
- Prepare Time: 10 minutes
- Cooking Time: 0 minutes
- Calories: -
- Difficulty: Easy
Craving a taste of the tropics without the fuss? You're in the right place! This coconut popsicle recipe is your ticket to a creamy, dreamy escape, no plane ticket required. We're talking minimal ingredients, maximum flavor, and absolutely no ice cream maker needed. Whether you're a seasoned chef or just dipping your toes into the world of homemade treats, these easy to make desserts with few ingredients are incredibly simple to whip up.
Get ready for a rich, velvety texture with just the right amount of real coconut bite. This recipe is specifically designed for a small batch, making it one of the best desserts for one (or two, if you're feeling generous!). We’ll show you how to use either `fresh coconut grated` or `shredded coconut`, so you can use whatever you have on hand. Let's dive into making these irresistible coconut ice pops!
Best for: A quick tropical dessert, a single-serving treat, or a refreshing cool-down
Ingredients
Directions
- Mix the Creamy Base: In a small bowl or measuring cup, combine the full-fat coconut milk, your chosen sweetener (honey or agave), and the pinch of salt. Whisk vigorously until the sweetener is fully dissolved and the mixture is smooth.
- Prepare Your Coconut:
- If using fresh coconut meat: Add the coconut milk mixture and the finely grated fresh coconut to a blender. Blend briefly (about 15-30 seconds) until the mixture is smooth. You want to break down the coconut a bit, but not completely pulverize it, to retain some texture.
- If using shredded coconut: Simply stir the shredded coconut directly into your prepared coconut milk base.
- Add Your Flavors (Optional): Now is the time to stir in any optional add-ins like lime zest, vanilla extract, or finely diced pineapple bits. If using toasted coconut flakes, you might reserve a spoonful to sprinkle into the molds later for a layered look.
- Fill the Molds: Carefully pour the coconut mixture into your popsicle molds, leaving a little space at the top (about 1/4 inch) as the mixture will expand slightly when frozen. If using paper cups, fill them similarly.
- Freeze & Insert Sticks: Place the filled molds in the freezer. After about 30-60 minutes (when the mixture has started to firm up but isn't completely solid), insert your popsicle sticks straight into the center of each popsicle. This timing helps the sticks stand upright.
- Freeze Until Solid: Continue freezing for at least 4-6 hours, or preferably overnight, until the popsicles are completely solid.
- How to Unmold Cleanly: When ready to enjoy, run the popsicle molds under warm water for just a few seconds. This will loosen the edges, allowing you to gently pull the popsicles out. If using paper cups, simply peel away the paper. Enjoy your tropical treat!
You may also like


Hey there! I’m just someone who seriously loves good food and believes that cooking doesn’t have to be complicated to be amazing. Whether it’s a quick weeknight dinner or a cozy weekend meal, I’m all about sharing easy, tasty recipes that actually work.


