
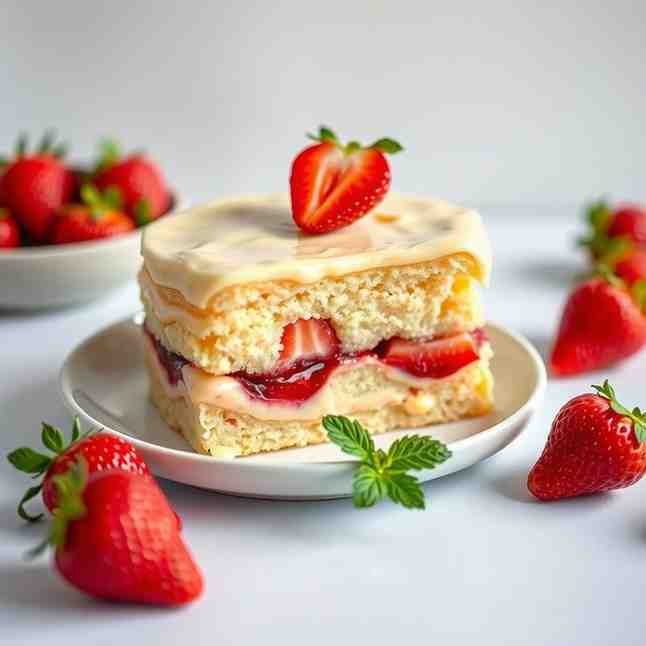
Easy Strawberry Custard Biscuit Cake - No-Bake Treat
Easy Strawberry Custard Biscuit Cake - No-Bake Treat

- Serves: 8 People
- Prepare Time: 30 minutes
- Cooking Time: 15 minutes
- Calories: -
- Difficulty: Easy
Craving a show-stopping dessert that’s unbelievably simple to make? Get ready to fall in love with our Strawberry Custard Biscuit Cake, one of the best easy cake recipes with strawberries you’ll ever find! Imagine layers of rich, creamy homemade vanilla custard nestled between crisp, lightly sweet "tea biscuits" and vibrant, juicy strawberries. This isn't your average strawberry cake homemade with complicated baking steps. Instead, it’s an elegant, no-bake wonder that comes together with minimal fuss, making it the ultimate easy recipe for making biscuits into a cake!
Now, for our American friends, a quick clarification: when we say "biscuit" in "biscuit cake," we're not talking about those fluffy, savory breakfast delights! We're talking about cookie-style biscuits, much like a shortbread or a digestive, that soften beautifully when layered with creamy fillings. This home made biscuits recipe concept transforms simple ingredients into a sophisticated dessert that slices like a dream after a good chill. It’s perfect for summer gatherings, potlucks, or just a sweet treat at home. Let's dive into making this delightful strawberry cake filling and strawberry on cake masterpiece!
Ingredients
Directions
- Prep the strawberries:
- Wash and thoroughly dry your strawberries. Hull them and slice them evenly. If your strawberries aren't super sweet or you like a little extra juiciness, you can lightly macerate them with 1-2 tablespoons of sugar for about 15 minutes. If they release a lot of juice, drain them gently before assembling to prevent a watery cake.
- Cook the homemade vanilla custard:
- In a medium saucepan, whisk together the egg yolks, granulated sugar, cornstarch, and salt until smooth.
- Gradually whisk in the whole milk until fully combined.
- Place the saucepan over medium heat, whisking constantly. Continue whisking, ensuring you scrape the bottom and sides of the pan, until the mixture thickens to a "thick pudding consistency." It should coat the back of a spoon and hold its shape slightly. This usually takes about 8-10 minutes.
- Remove from heat and stir in the vanilla extract.
- Immediately transfer the hot custard to a clean bowl. To prevent a "skin" from forming, press a piece of plastic wrap directly onto the surface of the custard, ensuring no air is trapped between the custard and the wrap. Let it cool completely at room temperature, then chill in the refrigerator for at least 1-2 hours until thoroughly cold. Custard must be fully cool or the cream melts/thins later!
- Cool, then lighten the custard with whipped cream:
- Once the custard is completely chilled, remove the plastic wrap.
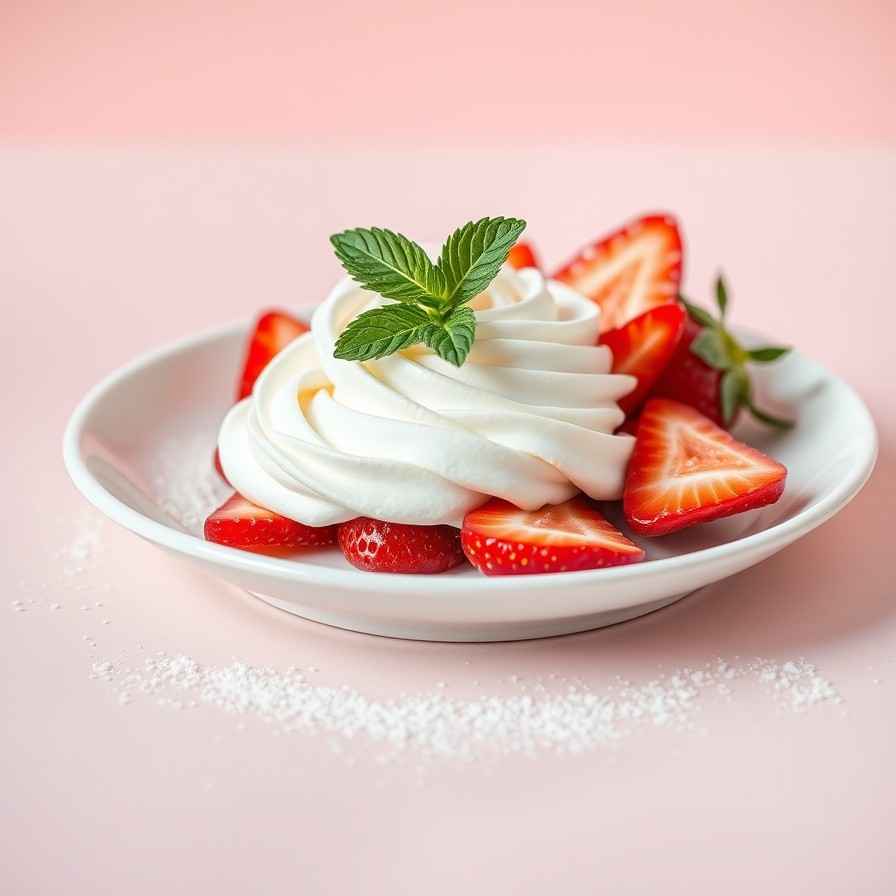
- In a separate, chilled bowl, whip the heavy cream (and optional powdered sugar) with an electric mixer until it forms soft peaks.
- Gently fold about one-third of the whipped cream into the chilled custard to lighten it. Then, fold in the remaining whipped cream until just combined, creating a lighter, airy custard. Be careful not to overmix.
- Assemble the biscuit cake:
- Line an 8x8 inch square pan or a loaf pan with plastic wrap, leaving an overhang on all sides. This makes unmolding super easy.
- Spread a thin layer of the lightened custard on the bottom of the prepared pan.
- Arrange a single layer of biscuits over the custard, breaking them as needed to fit snugly and cover the entire surface.
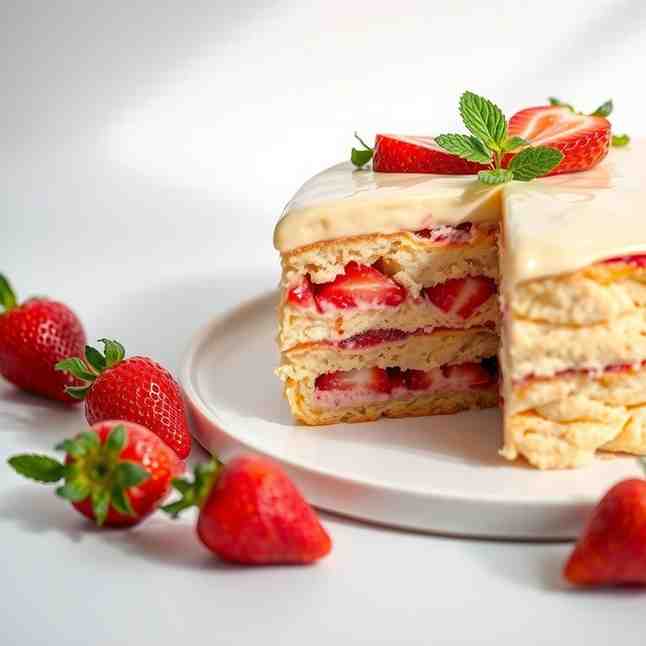
- Spread another layer of custard over the biscuits, then arrange a layer of sliced strawberries.
- Repeat the layers: biscuits, custard, strawberries. Finish with a final layer of biscuits, then a generous layer of custard. Gently press down on the top to ensure the layers are compact and level.
- Chill until sliceable:
- Cover the pan tightly with the overhanging plastic wrap or another piece of plastic wrap.
- Chill the cake in the refrigerator for a minimum of 6-8 hours, but for the very best results and cleanest slices, chill it overnight (12-24 hours). This allows the biscuits to soften beautifully and the flavors to meld.
- Finish + serve:
- When ready to serve, carefully unmold the cake by lifting the plastic wrap overhang. Remove the plastic wrap.
- If desired, gently warm the apricot jam or red currant jelly with a teaspoon of water until fluid. Lightly brush this glaze over the top layer of strawberries for a beautiful shine and to help prevent them from weeping.
- For clean slicing, use a sharp knife dipped in hot water and wiped clean between each cut. Slice and serve immediately.
Easy Strawberry Custard Biscuit Cake - No-Bake Treat
- Serves: 8 People
- Prepare Time: 30 minutes
- Cooking Time: 15 minutes
- Calories: -
- Difficulty: Easy
Craving a show-stopping dessert that’s unbelievably simple to make? Get ready to fall in love with our Strawberry Custard Biscuit Cake, one of the best easy cake recipes with strawberries you’ll ever find! Imagine layers of rich, creamy homemade vanilla custard nestled between crisp, lightly sweet "tea biscuits" and vibrant, juicy strawberries. This isn't your average strawberry cake homemade with complicated baking steps. Instead, it’s an elegant, no-bake wonder that comes together with minimal fuss, making it the ultimate easy recipe for making biscuits into a cake!
Now, for our American friends, a quick clarification: when we say "biscuit" in "biscuit cake," we're not talking about those fluffy, savory breakfast delights! We're talking about cookie-style biscuits, much like a shortbread or a digestive, that soften beautifully when layered with creamy fillings. This home made biscuits recipe concept transforms simple ingredients into a sophisticated dessert that slices like a dream after a good chill. It’s perfect for summer gatherings, potlucks, or just a sweet treat at home. Let's dive into making this delightful strawberry cake filling and strawberry on cake masterpiece!
Ingredients
Directions
- Prep the strawberries:
- Wash and thoroughly dry your strawberries. Hull them and slice them evenly. If your strawberries aren't super sweet or you like a little extra juiciness, you can lightly macerate them with 1-2 tablespoons of sugar for about 15 minutes. If they release a lot of juice, drain them gently before assembling to prevent a watery cake.
- Cook the homemade vanilla custard:
- In a medium saucepan, whisk together the egg yolks, granulated sugar, cornstarch, and salt until smooth.
- Gradually whisk in the whole milk until fully combined.
- Place the saucepan over medium heat, whisking constantly. Continue whisking, ensuring you scrape the bottom and sides of the pan, until the mixture thickens to a "thick pudding consistency." It should coat the back of a spoon and hold its shape slightly. This usually takes about 8-10 minutes.
- Remove from heat and stir in the vanilla extract.
- Immediately transfer the hot custard to a clean bowl. To prevent a "skin" from forming, press a piece of plastic wrap directly onto the surface of the custard, ensuring no air is trapped between the custard and the wrap. Let it cool completely at room temperature, then chill in the refrigerator for at least 1-2 hours until thoroughly cold. Custard must be fully cool or the cream melts/thins later!
- Cool, then lighten the custard with whipped cream:
- Once the custard is completely chilled, remove the plastic wrap.
- In a separate, chilled bowl, whip the heavy cream (and optional powdered sugar) with an electric mixer until it forms soft peaks.
- Gently fold about one-third of the whipped cream into the chilled custard to lighten it. Then, fold in the remaining whipped cream until just combined, creating a lighter, airy custard. Be careful not to overmix.
- Assemble the biscuit cake:
- Line an 8x8 inch square pan or a loaf pan with plastic wrap, leaving an overhang on all sides. This makes unmolding super easy.
- Spread a thin layer of the lightened custard on the bottom of the prepared pan.
- Arrange a single layer of biscuits over the custard, breaking them as needed to fit snugly and cover the entire surface.
- Spread another layer of custard over the biscuits, then arrange a layer of sliced strawberries.
- Repeat the layers: biscuits, custard, strawberries. Finish with a final layer of biscuits, then a generous layer of custard. Gently press down on the top to ensure the layers are compact and level.
- Chill until sliceable:
- Cover the pan tightly with the overhanging plastic wrap or another piece of plastic wrap.
- Chill the cake in the refrigerator for a minimum of 6-8 hours, but for the very best results and cleanest slices, chill it overnight (12-24 hours). This allows the biscuits to soften beautifully and the flavors to meld.
- Finish + serve:
- When ready to serve, carefully unmold the cake by lifting the plastic wrap overhang. Remove the plastic wrap.
- If desired, gently warm the apricot jam or red currant jelly with a teaspoon of water until fluid. Lightly brush this glaze over the top layer of strawberries for a beautiful shine and to help prevent them from weeping.
- For clean slicing, use a sharp knife dipped in hot water and wiped clean between each cut. Slice and serve immediately.
You may also like


Hey there! I’m just someone who seriously loves good food and believes that cooking doesn’t have to be complicated to be amazing. Whether it’s a quick weeknight dinner or a cozy weekend meal, I’m all about sharing easy, tasty recipes that actually work.


