
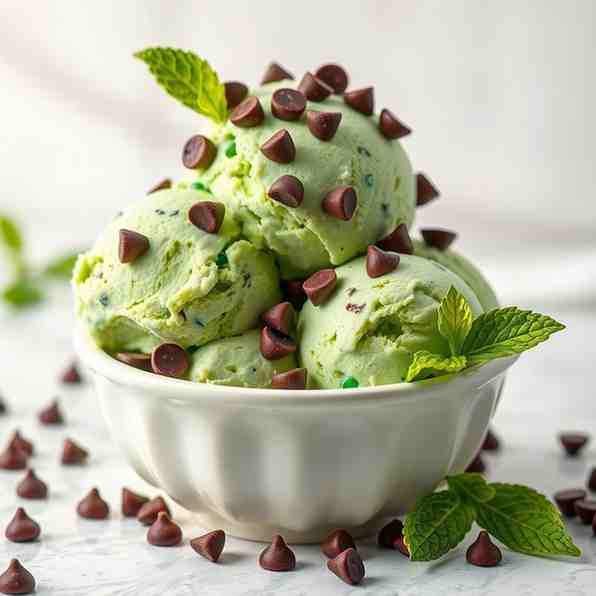
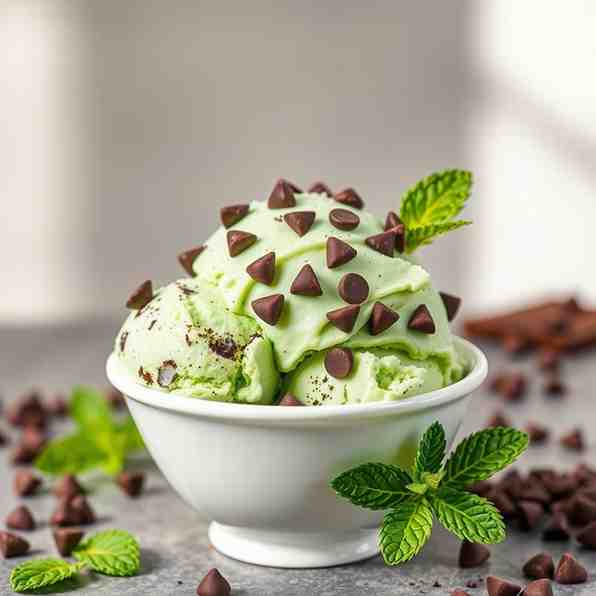
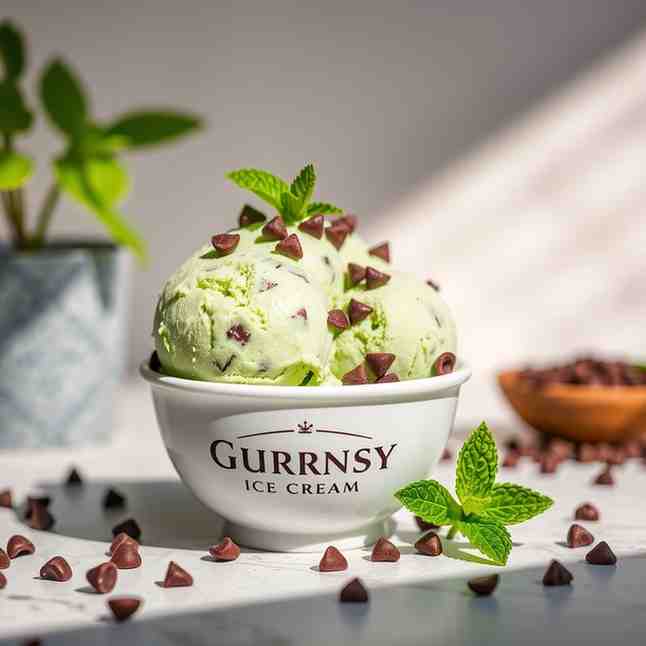
Guernsey Ice Cream - Mint Choc Chip Paradise
Guernsey Ice Cream - Mint Choc Chip Paradise
- Serves: 8 People
- Prepare Time: 20 minutes
- Cooking Time: 15 minutes
- Calories: -
- Difficulty: Medium
Ever dreamt of a truly indulgent `ice cream` experience right in your own kitchen? Get ready to whip up a batch of traditional Guernsey `ice cream`! Known for its incredibly rich, velvety texture and distinct, creamy flavor, Guernsey `ice cream` is a classic treat that hails from the beautiful island of Guernsey. What makes it so special? It all comes down to the quality of the `cream milk` from Guernsey cows, which is naturally higher in butterfat, giving it that luxurious feel.
While this recipe focuses on the pure, delightful taste of original Guernsey `ice cream`, it's also the perfect `milk cream` base for all your favorite flavor adventures. Imagine turning this simple, elegant foundation into something truly spectacular, like a vibrant `mint chocolate chip ice cream`, a decadent `chocolate ice cream`, or a fruity `strawberry ice cream`. Even a classic `vanilla ice cream` made with this base will taste extraordinary! Forget about bland, icy store-bought versions; this homemade `ice cream` is simple to make with just a few organic ingredients, making it an appealing treat for everyone, whether you're a beginner or an experienced baker. Let's dive into making this paradise of `ice cream`!
Ingredients
Directions
- Prepare the Custard Base : In a medium saucepan, gently heat the organic whole `milk` and organic heavy `cream` over medium-low heat until it's warm to the touch but not boiling. You'll see tiny bubbles forming around the edges. While the `milk` and `cream` are warming, whisk your organic egg yolks and organic sugar together in a separate, heatproof bowl until the mixture is pale yellow and smooth. This step is crucial for preventing scrambled eggs in your custard!
- Temper the Eggs : Slowly, and we mean slowly, ladle about half of the warm `milk` mixture into your egg yolk and sugar mixture, whisking constantly. This is called tempering, and it gradually brings the temperature of the eggs up without cooking them too quickly.
- Thicken the Custard : Pour the tempered egg mixture back into the saucepan with the remaining warm `milk` and `cream`. Continue to cook over low heat, stirring constantly with a wooden spoon or spatula. Do not let it boil! The custard is ready when it thickens enough to coat the back of your spoon (you should be able to draw a line across the spoon with your finger that holds). This usually takes about 8-12 minutes.
- Chill the Mixture : Immediately remove the saucepan from the heat. Pour the hot custard through a fine-mesh sieve into a clean bowl to catch any small bits of cooked egg, ensuring a super smooth `ice cream`. Let it cool down a bit at room temperature, then cover the bowl tightly with plastic wrap, pressing it directly onto the surface of the custard to prevent a skin from forming. Refrigerate for at least 4 hours, but ideally overnight, until it's thoroughly chilled. The colder the mixture, the better your `ice cream` will churn!
- Churn the `Ice Cream` : Once your custard base is perfectly chilled, transfer it to your `ice cream` maker. Churn according to your manufacturer's instructions. This usually takes about 20-30 minutes, depending on your machine. The `ice cream` will be soft-serve consistency at this stage.
- Freeze the `Ice Cream` : Carefully transfer the freshly churned, soft `ice cream` into a freezer-safe storage container. Press a piece of parchment paper or plastic wrap directly onto the surface of the `ice cream` to minimize `ice cream` crystal formation. Cover the container tightly and freeze for at least 4 hours, or until firm, before you scoop and enjoy your homemade delight!
You may also like


Hey there! I’m just someone who seriously loves good food and believes that cooking doesn’t have to be complicated to be amazing. Whether it’s a quick weeknight dinner or a cozy weekend meal, I’m all about sharing easy, tasty recipes that actually work.


