
Homemade Vanilla Ice Cream - Easy No-Churn Recipe
Homemade Vanilla Ice Cream - Easy No-Churn Recipe

- Serves: 6 People
- Prepare Time: 10 minutes
- Cooking Time: 0 minutes
- Calories: -
- Difficulty: Easy
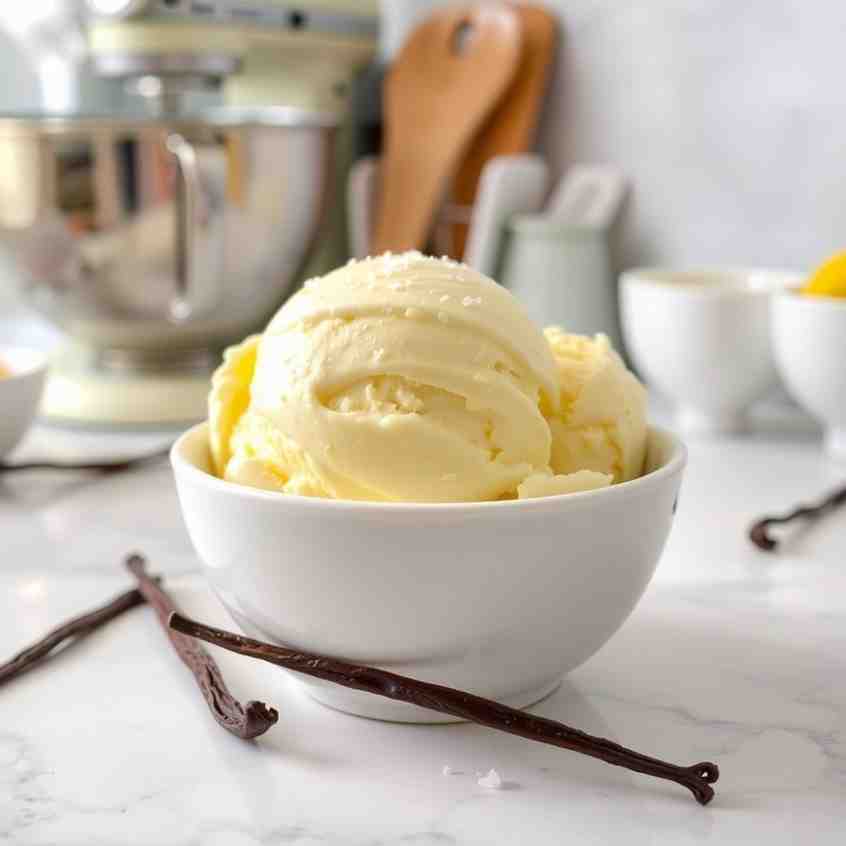
Get ready to discover your new `recipe for happiness`! Forget the fancy gadgets and the long waiting times – this `homemade no-churn vanilla ice cream` is about to become your go-to dessert. In just 5 minutes of mixing, without needing an `ice cream maker`, you can have `soft-serve ice cream` in a few hours, or perfectly `scoopable homemade vanilla ice cream` overnight. It's truly the `best vanilla ice cream` you can make with minimal effort, resulting in a wonderfully `creamy ice cream` every single time.
This isn't just an `easy homemade ice cream` recipe; it’s a promise of pure joy, whether you're a beginner or a seasoned baker. We’re going to show you how to achieve that dreamy, `creamy texture` without any fuss. From the simple steps to clever `troubleshooting tips`, we’ve got you covered.
Prep Time: 10 minutes
Freeze Time: 2-3 hours for soft-serve; 6+ hours (or overnight) for scoopable
Total Time: 6 hours 10 minutes (for scoopable)
What is "No-Churn"? It simply means you don't need an ice cream machine! We use clever techniques to achieve a smooth, creamy texture without constant churning.
Texture Expectations: Get ready for a delightful `soft-serve ice cream` experience in just 2-3 hours of freezing, or a firmer, `scoopable ice cream` after 6 hours or overnight.
Ready to dive in? Use our "Jump to Recipe" button below to get straight to the magic, or "Jump to Troubleshooting" if you're already a pro looking for quick fixes!
Ingredients
Directions
- Chill Your Bowl & Beaters: For the quickest and best whip, place your large mixing bowl and whisk attachments (for your hand mixer or stand mixer) in the freezer for 10-15 minutes before you start. This simple `pro tip` makes a big difference!
- Whip the Cream: Pour the cold heavy cream into your chilled bowl. Using a hand mixer or stand mixer, beat the cream on medium-high speed until it forms `medium-stiff peaks`. What does that look like? When you lift the beaters, the cream should hold its shape, with the peak bending over slightly, but not collapsing entirely. Don’t over-whip it into butter!
- Stir the Base: In a separate smaller bowl, combine the sweetened condensed milk, vanilla extract (or vanilla bean paste), and fine salt. Stir until well combined.
- Fold It In: This is the most crucial step for a `creamy ice cream` texture! Pour the condensed milk mixture over the whipped cream. Using a rubber spatula, gently `fold` the two mixtures together. Use an up-and-over motion, scraping from the bottom of the bowl and folding it over the top, rotating the bowl as you go. Be careful not to deflate the whipped cream – we want to keep all that beautiful air you just whipped in! Stop folding as soon as no streaks of condensed milk remain. Over-mixing can make your ice cream less airy and more icy.
- Add Mix-ins (Optional): If you're using any optional add-ins like `cookies and cream ice cream` bits or `ice cream with chocolate chips`, gently fold them in now. For swirls, dollop the jam or caramel over the mixture and gently swirl with a knife or spoon, again, being careful not to overmix.
- Freeze: Transfer the mixture to a 9x5 inch loaf pan or a shallow, freezer-safe container. Press a piece of parchment paper or plastic wrap directly onto the surface of the ice cream to prevent `freezer burn`.
- 2-3 hours: You'll have a delightful `soft-serve ice cream` texture, perfect for immediate gratification!
- 6+ hours / Overnight: For a firmer, `scoopable ice cream` that holds its shape beautifully.
- Serve: When ready to serve, if your ice cream is very firm, let it temper on the counter for 5-10 minutes. For cleaner scoops, dip your ice cream scoop in warm water between scoops. Enjoy your `homemade vanilla ice cream`!
Homemade Vanilla Ice Cream - Easy No-Churn Recipe

- Serves: 6 People
- Prepare Time: 10 minutes
- Cooking Time: 0 minutes
- Calories: -
- Difficulty: Easy
Get ready to discover your new `recipe for happiness`! Forget the fancy gadgets and the long waiting times – this `homemade no-churn vanilla ice cream` is about to become your go-to dessert. In just 5 minutes of mixing, without needing an `ice cream maker`, you can have `soft-serve ice cream` in a few hours, or perfectly `scoopable homemade vanilla ice cream` overnight. It's truly the `best vanilla ice cream` you can make with minimal effort, resulting in a wonderfully `creamy ice cream` every single time.
This isn't just an `easy homemade ice cream` recipe; it’s a promise of pure joy, whether you're a beginner or a seasoned baker. We’re going to show you how to achieve that dreamy, `creamy texture` without any fuss. From the simple steps to clever `troubleshooting tips`, we’ve got you covered.
Prep Time: 10 minutes
Freeze Time: 2-3 hours for soft-serve; 6+ hours (or overnight) for scoopable
Total Time: 6 hours 10 minutes (for scoopable)
What is "No-Churn"? It simply means you don't need an ice cream machine! We use clever techniques to achieve a smooth, creamy texture without constant churning.
Texture Expectations: Get ready for a delightful `soft-serve ice cream` experience in just 2-3 hours of freezing, or a firmer, `scoopable ice cream` after 6 hours or overnight.
Ready to dive in? Use our "Jump to Recipe" button below to get straight to the magic, or "Jump to Troubleshooting" if you're already a pro looking for quick fixes!
Ingredients
Directions
- Chill Your Bowl & Beaters: For the quickest and best whip, place your large mixing bowl and whisk attachments (for your hand mixer or stand mixer) in the freezer for 10-15 minutes before you start. This simple `pro tip` makes a big difference!
- Whip the Cream: Pour the cold heavy cream into your chilled bowl. Using a hand mixer or stand mixer, beat the cream on medium-high speed until it forms `medium-stiff peaks`. What does that look like? When you lift the beaters, the cream should hold its shape, with the peak bending over slightly, but not collapsing entirely. Don’t over-whip it into butter!
- Stir the Base: In a separate smaller bowl, combine the sweetened condensed milk, vanilla extract (or vanilla bean paste), and fine salt. Stir until well combined.
- Fold It In: This is the most crucial step for a `creamy ice cream` texture! Pour the condensed milk mixture over the whipped cream. Using a rubber spatula, gently `fold` the two mixtures together. Use an up-and-over motion, scraping from the bottom of the bowl and folding it over the top, rotating the bowl as you go. Be careful not to deflate the whipped cream – we want to keep all that beautiful air you just whipped in! Stop folding as soon as no streaks of condensed milk remain. Over-mixing can make your ice cream less airy and more icy.
- Add Mix-ins (Optional): If you're using any optional add-ins like `cookies and cream ice cream` bits or `ice cream with chocolate chips`, gently fold them in now. For swirls, dollop the jam or caramel over the mixture and gently swirl with a knife or spoon, again, being careful not to overmix.
- Freeze: Transfer the mixture to a 9x5 inch loaf pan or a shallow, freezer-safe container. Press a piece of parchment paper or plastic wrap directly onto the surface of the ice cream to prevent `freezer burn`.
- 2-3 hours: You'll have a delightful `soft-serve ice cream` texture, perfect for immediate gratification!
- 6+ hours / Overnight: For a firmer, `scoopable ice cream` that holds its shape beautifully.
- Serve: When ready to serve, if your ice cream is very firm, let it temper on the counter for 5-10 minutes. For cleaner scoops, dip your ice cream scoop in warm water between scoops. Enjoy your `homemade vanilla ice cream`!
You may also like


Hey there! I’m just someone who seriously loves good food and believes that cooking doesn’t have to be complicated to be amazing. Whether it’s a quick weeknight dinner or a cozy weekend meal, I’m all about sharing easy, tasty recipes that actually work.


