
Kosovo Bajadere - Perfect No-Bake Dessert Bars for Parties
Kosovo Bajadere - Perfect No-Bake Dessert Bars for Parties


- Serves: 24 People
- Prepare Time: 30 minutes
- Cooking Time: 0 minutes
- Calories: -
- Difficulty: Easy
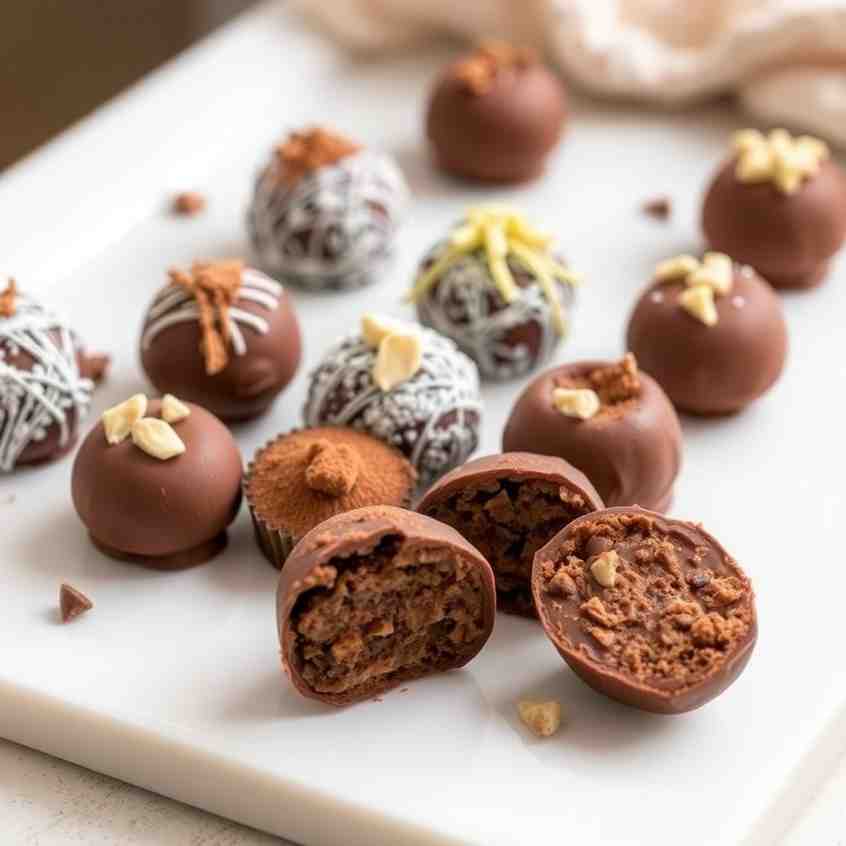
Get ready to discover your new favorite sweet treat! If you've never experienced the magic of Kosovo Bajadere (often simply called Bajadera), you're in for a truly decadent surprise. These no-bake chocolate-nut layer bars are a beloved classic in the Balkans, known for their beautiful clean layers, rich flavor, and glossy chocolate glaze. They're the ultimate easy to make sweet treats that look incredibly impressive, making them perfect dessert bars for parties and special occasions.
Unlike many American "chocolate delight" or "chocolate lush" recipes that often rely on pudding mixes, Bajadere is a unique, sliceable candy-style bar. It’s crafted from simple pantry ingredients like finely crushed biscuits, ground nuts, and rich semi sweet baking chocolate, creating a dense, satisfying texture that melts in your mouth. Whether you grew up with these nostalgic chocolate squares for baking or are discovering them for the first time, this recipe will guide you to a foolproof, show-stopping dessert. Prepare to impress everyone with these elegant and utterly delicious decadent chocolate layered dessert bars!
Ingredients
Directions
- Prep the PanLine a 9x13 inch baking pan with parchment paper, allowing an overhang on the longer sides to create a "sling." Lightly grease the bottom of the pan before adding the parchment paper to help it stay in place.
- Make the Syrup BaseIn a medium saucepan, combine the sugar and water. Warm over medium heat, stirring occasionally, until the sugar is completely dissolved and the mixture is clear. Add the unsalted butter and continue to stir until it's fully melted and incorporated. Remove from heat, then whisk in the unsweetened cocoa powder and a pinch of salt until the mixture is smooth, glossy, and free of any gritty sugar. If using, stir in the vanilla extract.
- Build the Base MixtureIn a large bowl, combine the finely crushed biscuits and ground nuts. Pour the warm syrup base over the biscuit-nut mixture. Stir well with a spoon or spatula until everything is thoroughly combined. The mixture should be moist enough to pack together firmly, but not crumbly or oily.
- Create the Two LayersDivide the mixture into two equal portions.
- Portion A (Light Layer): This portion stays as is. Press Portion A firmly and evenly into the prepared pan. Use the back of a spoon or a flat-bottomed measuring cup to compact it well and create a smooth, level surface.
- Portion B (Chocolate Layer): To the second portion, add the 100g of finely chopped dark or semi-sweet chocolate. Mix thoroughly until the chocolate is completely melted and distributed, giving this layer a darker, richer color. Spread Portion B over the light layer in the pan, pressing firmly and leveling it out just as you did with the first layer.
- Chill to SetPlace the pan in the refrigerator for a minimum of 1-2 hours, or until the layers are firm to the touch and well-chilled. This step is crucial for clean slicing later.
- GlazeOnce the bars are chilled, prepare the glaze. In a heatproof bowl set over a saucepan of simmering water (or in the microwave in 30-second intervals), melt the 150g of dark or semi-sweet chocolate with the 30g of butter (or neutral oil), stirring until smooth and glossy. Let the glaze cool slightly for about 5-10 minutes – it should still be pourable but not piping hot. Pour the slightly cooled glaze evenly over the chilled bars. Quickly spread it with an offset spatula or the back of a spoon to create a thin, even top layer.
- Final Set + SliceReturn the pan to the refrigerator and chill for another 1-2 hours, or until the chocolate glaze is completely firm.To slice, lift the bars out of the pan using the parchment paper sling. For clean cuts, warm a sharp knife under hot water, wipe it dry, and then make your cuts. Repeat this warming and wiping process for each cut. Cut the bars into your desired pattern – traditional diamonds or classic squares work beautifully.
Kosovo Bajadere - Perfect No-Bake Dessert Bars for Parties

- Serves: 24 People
- Prepare Time: 30 minutes
- Cooking Time: 0 minutes
- Calories: -
- Difficulty: Easy
Get ready to discover your new favorite sweet treat! If you've never experienced the magic of Kosovo Bajadere (often simply called Bajadera), you're in for a truly decadent surprise. These no-bake chocolate-nut layer bars are a beloved classic in the Balkans, known for their beautiful clean layers, rich flavor, and glossy chocolate glaze. They're the ultimate easy to make sweet treats that look incredibly impressive, making them perfect dessert bars for parties and special occasions.
Unlike many American "chocolate delight" or "chocolate lush" recipes that often rely on pudding mixes, Bajadere is a unique, sliceable candy-style bar. It’s crafted from simple pantry ingredients like finely crushed biscuits, ground nuts, and rich semi sweet baking chocolate, creating a dense, satisfying texture that melts in your mouth. Whether you grew up with these nostalgic chocolate squares for baking or are discovering them for the first time, this recipe will guide you to a foolproof, show-stopping dessert. Prepare to impress everyone with these elegant and utterly delicious decadent chocolate layered dessert bars!
Ingredients
Directions
- Prep the PanLine a 9x13 inch baking pan with parchment paper, allowing an overhang on the longer sides to create a "sling." Lightly grease the bottom of the pan before adding the parchment paper to help it stay in place.
- Make the Syrup BaseIn a medium saucepan, combine the sugar and water. Warm over medium heat, stirring occasionally, until the sugar is completely dissolved and the mixture is clear. Add the unsalted butter and continue to stir until it's fully melted and incorporated. Remove from heat, then whisk in the unsweetened cocoa powder and a pinch of salt until the mixture is smooth, glossy, and free of any gritty sugar. If using, stir in the vanilla extract.
- Build the Base MixtureIn a large bowl, combine the finely crushed biscuits and ground nuts. Pour the warm syrup base over the biscuit-nut mixture. Stir well with a spoon or spatula until everything is thoroughly combined. The mixture should be moist enough to pack together firmly, but not crumbly or oily.
- Create the Two LayersDivide the mixture into two equal portions.
- Portion A (Light Layer): This portion stays as is. Press Portion A firmly and evenly into the prepared pan. Use the back of a spoon or a flat-bottomed measuring cup to compact it well and create a smooth, level surface.
- Portion B (Chocolate Layer): To the second portion, add the 100g of finely chopped dark or semi-sweet chocolate. Mix thoroughly until the chocolate is completely melted and distributed, giving this layer a darker, richer color. Spread Portion B over the light layer in the pan, pressing firmly and leveling it out just as you did with the first layer.
- Chill to SetPlace the pan in the refrigerator for a minimum of 1-2 hours, or until the layers are firm to the touch and well-chilled. This step is crucial for clean slicing later.
- GlazeOnce the bars are chilled, prepare the glaze. In a heatproof bowl set over a saucepan of simmering water (or in the microwave in 30-second intervals), melt the 150g of dark or semi-sweet chocolate with the 30g of butter (or neutral oil), stirring until smooth and glossy. Let the glaze cool slightly for about 5-10 minutes – it should still be pourable but not piping hot. Pour the slightly cooled glaze evenly over the chilled bars. Quickly spread it with an offset spatula or the back of a spoon to create a thin, even top layer.
- Final Set + SliceReturn the pan to the refrigerator and chill for another 1-2 hours, or until the chocolate glaze is completely firm.To slice, lift the bars out of the pan using the parchment paper sling. For clean cuts, warm a sharp knife under hot water, wipe it dry, and then make your cuts. Repeat this warming and wiping process for each cut. Cut the bars into your desired pattern – traditional diamonds or classic squares work beautifully.
You may also like


Hey there! I’m just someone who seriously loves good food and believes that cooking doesn’t have to be complicated to be amazing. Whether it’s a quick weeknight dinner or a cozy weekend meal, I’m all about sharing easy, tasty recipes that actually work.


