
Easy No-Bake Peanut Butter Balls Recipe
Easy No-Bake Peanut Butter Balls Recipe
- Serves: 24 People
- Prepare Time: 20 minutes
- Cooking Time: 0 minutes
- Calories: -
- Difficulty: Easy
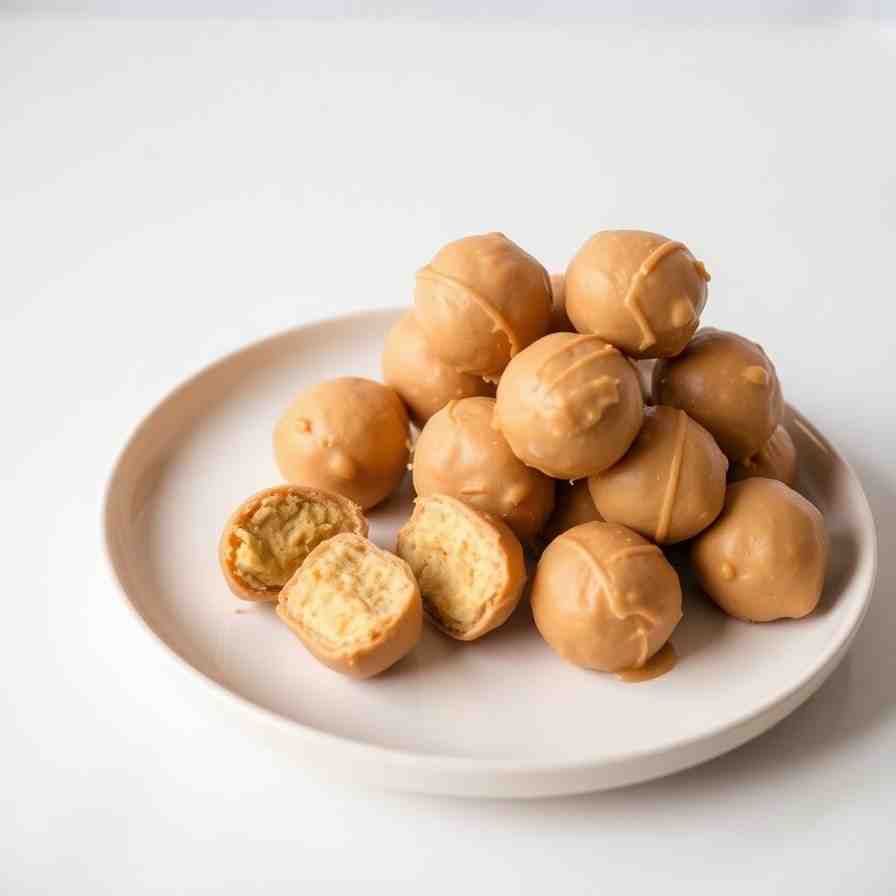
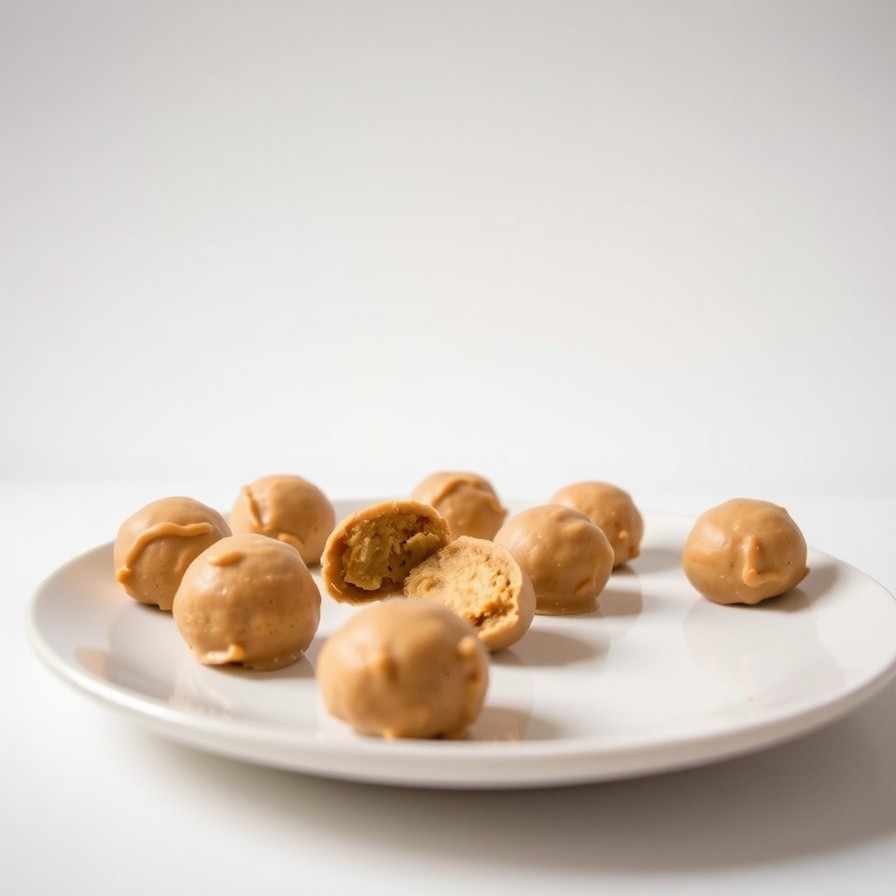
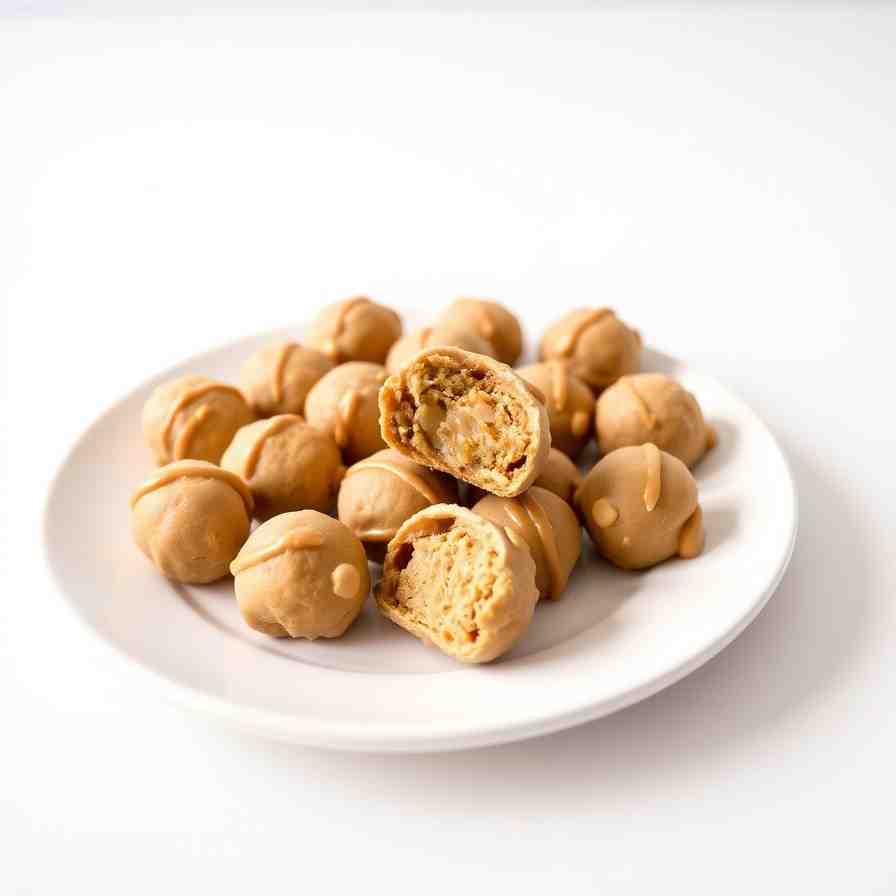
Get ready to whip up some seriously delicious peanut butter balls recipe! These no-bake chocolate peanut butter bites are the ultimate easy treat, perfect for satisfying your sweet tooth or sharing with friends. Forget complicated baking – this recipe is designed to be super fast and incredibly reliable, setting cleanly every time. Whether you're looking for vegan gluten free treats, a simple salty and sweet snack, or a delightful edible gift, these homemade peanut butter chocolate treats tick all the boxes. They're quick, require no oven, and the hardest part is waiting for the chocolate to set!
Ingredients
Directions
- Mix the base until smooth: In your large mixing bowl, combine the softened peanut butter, softened butter (or dairy-free alternative), vanilla extract, and salt. Use a rubber spatula or wooden spoon to mix thoroughly until the mixture is completely smooth and creamy.
- Add powdered sugar gradually to reach “rollable” texture: Gradually add the powdered sugar, about 1/2 cup at a time, mixing well after each addition. Continue mixing until all the sugar is incorporated and the dough is firm enough to handle.
- Dough texture cue: The dough should be soft but hold its shape when pressed and shouldn't stick badly to your hands.
- Scoop/roll into balls: Using a small cookie scoop (about 1 tablespoon or 1-inch diameter) or two spoons, scoop out portions of the dough. Roll them between your palms into uniform balls. Place the finished balls onto the parchment-lined baking sheet.Chill or freeze briefly to firm: Once all the balls are formed, place the baking sheet in the refrigerator for at least 15-20 minutes, or in the freezer for 10 minutes. This firms them up, making them much easier to dip in chocolate without falling apart.
- Melt chocolate properly: In a microwave-safe bowl, combine the chocolate chips (or chopped chocolate) and optional coconut oil. Microwave on high in 30-second intervals, stirring well after each interval, until the chocolate is mostly melted and smooth. Be careful not to overheat. Alternatively, use a double boiler for a gentler melt.
- Chocolate cue: The melted chocolate should be smooth and fluid, not thick like a paste. If it's too thick, add another 1/2 teaspoon of coconut oil and stir.
- Dip and coat: Take the chilled peanut butter balls out of the fridge/freezer. Using a fork or a dipping tool, carefully drop one ball into the melted chocolate. Turn it gently to coat completely, then lift it out, tapping the fork lightly against the side of the bowl to allow excess chocolate to drip off.
- Let set and store: Place the coated peanut butter ball back onto the parchment-lined baking sheet. Repeat with the remaining balls. If desired, sprinkle with flaky sea salt or crushed pretzels immediately after dipping. Once all balls are coated, return the baking sheet to the refrigerator for another 15-20 minutes (or until the chocolate is fully set). Store in an airtight container.
Easy No-Bake Peanut Butter Balls Recipe
- Serves: 24 People
- Prepare Time: 20 minutes
- Cooking Time: 0 minutes
- Calories: -
- Difficulty: Easy
Get ready to whip up some seriously delicious peanut butter balls recipe! These no-bake chocolate peanut butter bites are the ultimate easy treat, perfect for satisfying your sweet tooth or sharing with friends. Forget complicated baking – this recipe is designed to be super fast and incredibly reliable, setting cleanly every time. Whether you're looking for vegan gluten free treats, a simple salty and sweet snack, or a delightful edible gift, these homemade peanut butter chocolate treats tick all the boxes. They're quick, require no oven, and the hardest part is waiting for the chocolate to set!
Ingredients
Directions
- Mix the base until smooth: In your large mixing bowl, combine the softened peanut butter, softened butter (or dairy-free alternative), vanilla extract, and salt. Use a rubber spatula or wooden spoon to mix thoroughly until the mixture is completely smooth and creamy.
- Add powdered sugar gradually to reach “rollable” texture: Gradually add the powdered sugar, about 1/2 cup at a time, mixing well after each addition. Continue mixing until all the sugar is incorporated and the dough is firm enough to handle.
- Dough texture cue: The dough should be soft but hold its shape when pressed and shouldn't stick badly to your hands.
- Scoop/roll into balls: Using a small cookie scoop (about 1 tablespoon or 1-inch diameter) or two spoons, scoop out portions of the dough. Roll them between your palms into uniform balls. Place the finished balls onto the parchment-lined baking sheet.Chill or freeze briefly to firm: Once all the balls are formed, place the baking sheet in the refrigerator for at least 15-20 minutes, or in the freezer for 10 minutes. This firms them up, making them much easier to dip in chocolate without falling apart.
- Melt chocolate properly: In a microwave-safe bowl, combine the chocolate chips (or chopped chocolate) and optional coconut oil. Microwave on high in 30-second intervals, stirring well after each interval, until the chocolate is mostly melted and smooth. Be careful not to overheat. Alternatively, use a double boiler for a gentler melt.
- Chocolate cue: The melted chocolate should be smooth and fluid, not thick like a paste. If it's too thick, add another 1/2 teaspoon of coconut oil and stir.
- Dip and coat: Take the chilled peanut butter balls out of the fridge/freezer. Using a fork or a dipping tool, carefully drop one ball into the melted chocolate. Turn it gently to coat completely, then lift it out, tapping the fork lightly against the side of the bowl to allow excess chocolate to drip off.
- Let set and store: Place the coated peanut butter ball back onto the parchment-lined baking sheet. Repeat with the remaining balls. If desired, sprinkle with flaky sea salt or crushed pretzels immediately after dipping. Once all balls are coated, return the baking sheet to the refrigerator for another 15-20 minutes (or until the chocolate is fully set). Store in an airtight container.
You may also like


Hey there! I’m just someone who seriously loves good food and believes that cooking doesn’t have to be complicated to be amazing. Whether it’s a quick weeknight dinner or a cozy weekend meal, I’m all about sharing easy, tasty recipes that actually work.


