
Chinese Barbecue Char Siu at Home
Chinese Barbecue Char Siu at Home


- Serves: 4 People
- Prepare Time: 15 minutes
- Cooking Time: 60-70 minut
- Calories: -
- Difficulty: Medium
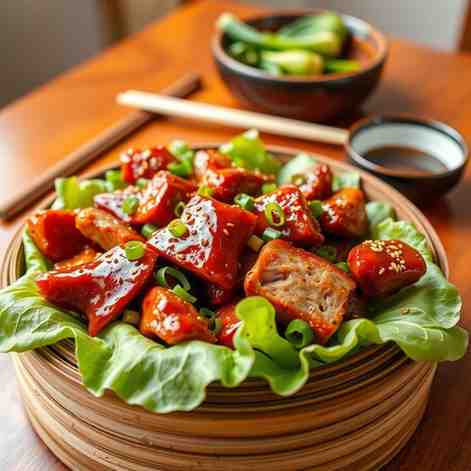
Ever craved that irresistible, glistening red pork hanging in the windows of a Hong Kong roast meat shop? You know, the one with the sticky, lacquered glaze, perfectly charred edges, and a juicy, tender interior? Good news: you absolutely can make real Hong Kong-style char siu (Chinese BBQ pork) right in your own kitchen with a regular oven! Forget those intimidating restaurant techniques; our definitive guide makes this iconic Cantonese Chinese food accessible for every home cook.
What you'll get:
A beautiful, sticky, lacquered glaze that's sweet, savory, and deeply flavorful.
Perfectly charred edges that add an incredible smoky depth to every bite.
A juicy, tender interior that melts in your mouth, infused with authentic Hong Kong BBQ flavors.
Before we dive in, a quick clarification: we're focusing on char siu here, which is sweet, savory, marinated roast pork. It's different from siu yuk, which is crispy roast pork belly. So, if you're here for that classic red BBQ pork, you're definitely in the right place! Get ready to impress your taste buds and your family with the best char siu pork you've ever made.
Ingredients
Directions
- Slice the Pork: Trim any excess silver skin or very thick fat from the pork. Slice the pork shoulder or butt into long strips, roughly 1.5-2 inches thick and 6-8 inches long. Aim for uniform thickness so it cooks evenly and maximizes surface area for that delicious glaze.
- Make the Marinade/Glaze: In a large bowl, whisk together the hoisin sauce, soy sauce, Shaoxing wine (if using), maltose or honey, brown sugar, five-spice powder, white pepper, minced garlic, grated ginger, red fermented bean curd (if using), and red food coloring (if using). If using maltose, add 1 tablespoon of hot water to help it dissolve and mix smoothly.
- Reserve Glaze: Crucially, set aside about ¼ cup of this marinade in a separate, clean bowl before adding the raw pork. This reserved portion will be used later as a food-safe glaze during roasting.
- Marinate: Add the sliced pork to the main bowl with the remaining marinade. Toss to coat thoroughly. Cover the bowl with plastic wrap and refrigerate for at least 4 hours, or ideally overnight (up to 24 hours) for the best flavor penetration. Flip the pork strips occasionally to ensure even marination.
- Preheat & Set Up Pan: When ready to cook, preheat your oven to 400°F (200°C). Line a large, rimmed baking sheet with aluminum foil for easy cleanup. Place an oven-safe wire rack on top of the foil-lined pan. You can also add a thin layer of water (about ¼ inch) to the foil-lined pan under the rack to catch drippings and prevent them from burning and smoking excessively.
- Roast Phase 1: Arrange the marinated pork strips in a single layer on the wire rack, ensuring they don't touch. Place the pan in the preheated oven and roast for 20 minutes. This initial cook helps set the surface.
- Glaze Phase: After 20 minutes, remove the pan from the oven. Brush the pork generously with some of the reserved glaze. Return to the oven and roast for another 10-15 minutes. Repeat this glazing process 2-3 more times, brushing with glaze every 10-15 minutes, until the pork is deeply colored and sticky.
- Char Phase (Broiler): For those iconic charred edges, move the oven rack to the second-highest position (about 6-8 inches from the broiler element). Switch the oven to broiler setting (high). Broil the pork for 2-4 minutes per side, watching very closely to prevent burning. You want a nice char, not a burnt crisp. Flip and broil the other side.
- Check Doneness: The internal temperature of the pork should reach 145°F (63°C) when checked with an instant-read thermometer. Even if it looks done, always check the temperature to ensure it's cooked through but still juicy.
- Rest & Slice: Remove the char siu from the oven and let it rest on a cutting board for 10-15 minutes. This allows the juices to redistribute, ensuring maximum tenderness. Slice the char siu across the grain into thin, bite-sized pieces for serving with rice bowls, or slightly thicker slices if you prefer for noodles.
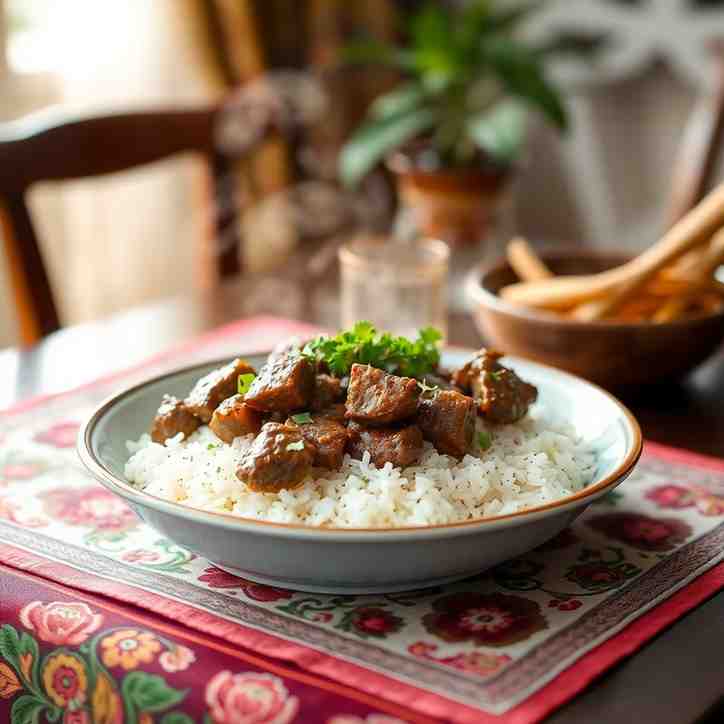
- Serving (Char Siu Rice Vibes):
- To serve like a true Hong Kong lunch, arrange your freshly sliced char siu over a bed of fluffy white rice. Add a side of quickly blanched or stir-fried green vegetables (like gai lan or bok choy). Drizzle any pan drippings (skimmed of excess fat) or a little extra reserved glaze over the pork and rice for an extra burst of flavor. It’s simple, satisfying, and utterly delicious!
Chinese Barbecue Char Siu at Home
- Serves: 4 People
- Prepare Time: 15 minutes
- Cooking Time: 60-70 minut
- Calories: -
- Difficulty: Medium
Ever craved that irresistible, glistening red pork hanging in the windows of a Hong Kong roast meat shop? You know, the one with the sticky, lacquered glaze, perfectly charred edges, and a juicy, tender interior? Good news: you absolutely can make real Hong Kong-style char siu (Chinese BBQ pork) right in your own kitchen with a regular oven! Forget those intimidating restaurant techniques; our definitive guide makes this iconic Cantonese Chinese food accessible for every home cook.
What you'll get:
A beautiful, sticky, lacquered glaze that's sweet, savory, and deeply flavorful.
Perfectly charred edges that add an incredible smoky depth to every bite.
A juicy, tender interior that melts in your mouth, infused with authentic Hong Kong BBQ flavors.
Before we dive in, a quick clarification: we're focusing on char siu here, which is sweet, savory, marinated roast pork. It's different from siu yuk, which is crispy roast pork belly. So, if you're here for that classic red BBQ pork, you're definitely in the right place! Get ready to impress your taste buds and your family with the best char siu pork you've ever made.
Ingredients
Directions
- Slice the Pork: Trim any excess silver skin or very thick fat from the pork. Slice the pork shoulder or butt into long strips, roughly 1.5-2 inches thick and 6-8 inches long. Aim for uniform thickness so it cooks evenly and maximizes surface area for that delicious glaze.
- Make the Marinade/Glaze: In a large bowl, whisk together the hoisin sauce, soy sauce, Shaoxing wine (if using), maltose or honey, brown sugar, five-spice powder, white pepper, minced garlic, grated ginger, red fermented bean curd (if using), and red food coloring (if using). If using maltose, add 1 tablespoon of hot water to help it dissolve and mix smoothly.
- Reserve Glaze: Crucially, set aside about ¼ cup of this marinade in a separate, clean bowl before adding the raw pork. This reserved portion will be used later as a food-safe glaze during roasting.
- Marinate: Add the sliced pork to the main bowl with the remaining marinade. Toss to coat thoroughly. Cover the bowl with plastic wrap and refrigerate for at least 4 hours, or ideally overnight (up to 24 hours) for the best flavor penetration. Flip the pork strips occasionally to ensure even marination.
- Preheat & Set Up Pan: When ready to cook, preheat your oven to 400°F (200°C). Line a large, rimmed baking sheet with aluminum foil for easy cleanup. Place an oven-safe wire rack on top of the foil-lined pan. You can also add a thin layer of water (about ¼ inch) to the foil-lined pan under the rack to catch drippings and prevent them from burning and smoking excessively.
- Roast Phase 1: Arrange the marinated pork strips in a single layer on the wire rack, ensuring they don't touch. Place the pan in the preheated oven and roast for 20 minutes. This initial cook helps set the surface.
- Glaze Phase: After 20 minutes, remove the pan from the oven. Brush the pork generously with some of the reserved glaze. Return to the oven and roast for another 10-15 minutes. Repeat this glazing process 2-3 more times, brushing with glaze every 10-15 minutes, until the pork is deeply colored and sticky.
- Char Phase (Broiler): For those iconic charred edges, move the oven rack to the second-highest position (about 6-8 inches from the broiler element). Switch the oven to broiler setting (high). Broil the pork for 2-4 minutes per side, watching very closely to prevent burning. You want a nice char, not a burnt crisp. Flip and broil the other side.
- Check Doneness: The internal temperature of the pork should reach 145°F (63°C) when checked with an instant-read thermometer. Even if it looks done, always check the temperature to ensure it's cooked through but still juicy.
- Rest & Slice: Remove the char siu from the oven and let it rest on a cutting board for 10-15 minutes. This allows the juices to redistribute, ensuring maximum tenderness. Slice the char siu across the grain into thin, bite-sized pieces for serving with rice bowls, or slightly thicker slices if you prefer for noodles.
- Serving (Char Siu Rice Vibes):
- To serve like a true Hong Kong lunch, arrange your freshly sliced char siu over a bed of fluffy white rice. Add a side of quickly blanched or stir-fried green vegetables (like gai lan or bok choy). Drizzle any pan drippings (skimmed of excess fat) or a little extra reserved glaze over the pork and rice for an extra burst of flavor. It’s simple, satisfying, and utterly delicious!
You may also like


Hey there! I’m just someone who seriously loves good food and believes that cooking doesn’t have to be complicated to be amazing. Whether it’s a quick weeknight dinner or a cozy weekend meal, I’m all about sharing easy, tasty recipes that actually work.


