Make It | CulinaryCreationss alt=")
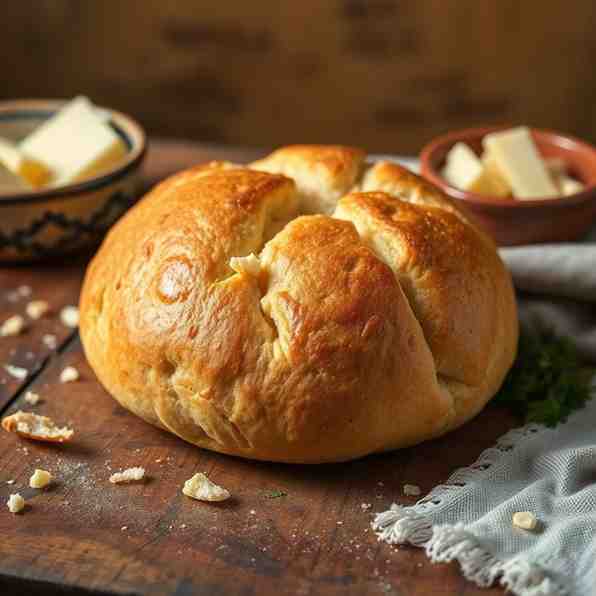
Homemade Queijo da Serra - Portugal's Gem (Pão de Queijo!) Make It
Homemade Queijo da Serra - Portugal's Gem (Pão de Queijo!) Make It
- Serves: 1 People
- Prepare Time: 30 minutes
- Cooking Time: 2 hours
- Calories: -
- Difficulty: Medium
Ever dreamed of bringing a piece of Portugal's culinary heart into your home kitchen? We're talking about Queijo da Serra, a truly exquisite, creamy delight that melts in your mouth and captures the essence of the Serra da Estrela mountains. While you might be more familiar with delicious `pão de queijo` or searching for a `receita de pão de queijo` for your next snack, there's another incredible dairy adventure waiting! This cherished Portuguese cheese is unlike any other, known for its rich flavor and incredibly soft, spoonable texture. Forget searching for just any `receita de pao`; today, we're diving deep into crafting this legendary cheese from scratch. Whether you're a seasoned cheesemaker or just starting your culinary journey, our easy-to-follow steps will guide you to create your own authentic Queijo da Serra. Imagine serving this luxurious cheese alongside your favorite `pão de queijo recheado` or freshly baked bread – it's a match made in heaven! Get ready to impress your taste buds and your friends with this homemade masterpiece.
Ingredients
Directions
- Prepare your milk and culture mixture.
- Gently heat the sheep's milk in your large pot to 86°F (30°C). Use a dairy thermometer to be precise – temperature is super important for cheesemaking!
- Once the milk hits the right temp, sprinkle the mesophilic starter culture evenly over the surface. Let it hang out and rehydrate for 1-2 minutes, then give it a gentle, up-and-down stir for about a minute to mix it in thoroughly.
- Cover the pot and let the milk "ripen" for 60 minutes. Try to keep that 86°F (30°C) temperature steady, maybe by placing the pot in a warm water bath or wrapping it in a cozy towel.
- Add rennet and allow curdling.
- After the ripening hour, give the milk another gentle stir.
- If you're using liquid thistle rennet, add it directly to the milk and stir gently but thoroughly for 30 seconds. If you have a tablet, dissolve it first in 1/4 cup of cool, non-chlorinated water, then add that mixture and stir.
- Cover the pot again and let it sit undisturbed at 86°F (30°C) for 1 to 1.5 hours. You're waiting for something called a "clean break." To check, carefully insert a knife into the curd at an angle and lift slightly; the curd should break cleanly, and clear whey should fill the cut.
- Drain the curds and whey.
- Once you've got that perfect clean break, grab a long knife or curd cutter and cut the curds into 1/2-inch cubes. Take your time and make those cuts as even as possible.
- Let the curds rest for 10 minutes to firm up a bit.
- Now, gently stir the curds for 20-30 minutes, keeping that temperature consistent. This stirring helps release more whey and makes your curds firmer.
- Line a colander or a special cheese mold with cheesecloth. Carefully ladle your curds into the lined colander or mold, letting the whey drain away.
- Allow the curds to drain for 2-4 hours, turning the cheese every 30 minutes for the first hour. This ensures even drainage and helps the cheese take on a nice, uniform shape.
- Form the cheese into the traditional shape.
- Once your curds have drained enough and feel firm, take them out of the cheesecloth.
- Place the curds into your traditional Queijo da Serra cheese mold (it's usually cylindrical with a slightly concave top). Gently press the curds into the mold, making sure there are no big air pockets. The classic shape is a squat little wheel with that characteristic dimple on top.
- Put the molded cheese on a draining mat or rack and let it press under its own weight for another 6-12 hours, or even overnight, at room temperature (around 68-72°F / 20-22°C). This helps the cheese consolidate further and really hold its shape. Remember to turn it once or twice during this period.
- Salt the cheese and allow it to age.
- The next day, gently remove the cheese from its mold. It should be nice and firm!
- Generously rub the entire surface of your cheese with non-iodized cheese salt. Make sure you get every side! You can even do this in two rounds: salt one side, wait 12 hours, then salt the other.
- Now for the fun part: aging! Place your salted Queijo da Serra in a dedicated cheese aging spot (often called a "cave" or a mini-fridge set to 50-55°F / 10-13°C with 85-90% humidity).
- Age your Queijo da Serra for at least 30 days, but for the best flavor and that incredible spoonable texture, aim for 45-90 days. Turn it daily for the first week, then every few days after that. You'll notice a natural rind developing. If you see any excessive mold, just wipe it gently with a cloth dipped in a light brine (1 teaspoon salt per cup of water).
- The longer it ages, the stronger and more complex its flavor will become, and its interior will get wonderfully soft and creamy, eventually becoming perfect for scooping!
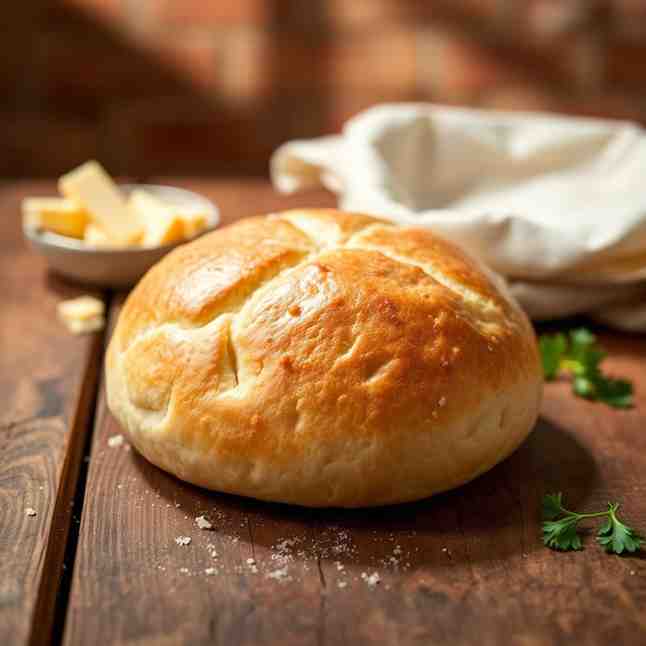
Homemade Queijo da Serra - Portugal's Gem (Pão de Queijo!) Make It
-Make-It.jpg)
- Serves: 1 People
- Prepare Time: 30 minutes
- Cooking Time: 2 hours
- Calories: -
- Difficulty: Medium
Ever dreamed of bringing a piece of Portugal's culinary heart into your home kitchen? We're talking about Queijo da Serra, a truly exquisite, creamy delight that melts in your mouth and captures the essence of the Serra da Estrela mountains. While you might be more familiar with delicious `pão de queijo` or searching for a `receita de pão de queijo` for your next snack, there's another incredible dairy adventure waiting! This cherished Portuguese cheese is unlike any other, known for its rich flavor and incredibly soft, spoonable texture. Forget searching for just any `receita de pao`; today, we're diving deep into crafting this legendary cheese from scratch. Whether you're a seasoned cheesemaker or just starting your culinary journey, our easy-to-follow steps will guide you to create your own authentic Queijo da Serra. Imagine serving this luxurious cheese alongside your favorite `pão de queijo recheado` or freshly baked bread – it's a match made in heaven! Get ready to impress your taste buds and your friends with this homemade masterpiece.
Ingredients
Directions
- Prepare your milk and culture mixture.
- Gently heat the sheep's milk in your large pot to 86°F (30°C). Use a dairy thermometer to be precise – temperature is super important for cheesemaking!
- Once the milk hits the right temp, sprinkle the mesophilic starter culture evenly over the surface. Let it hang out and rehydrate for 1-2 minutes, then give it a gentle, up-and-down stir for about a minute to mix it in thoroughly.
- Cover the pot and let the milk "ripen" for 60 minutes. Try to keep that 86°F (30°C) temperature steady, maybe by placing the pot in a warm water bath or wrapping it in a cozy towel.
- Add rennet and allow curdling.
- After the ripening hour, give the milk another gentle stir.
- If you're using liquid thistle rennet, add it directly to the milk and stir gently but thoroughly for 30 seconds. If you have a tablet, dissolve it first in 1/4 cup of cool, non-chlorinated water, then add that mixture and stir.
- Cover the pot again and let it sit undisturbed at 86°F (30°C) for 1 to 1.5 hours. You're waiting for something called a "clean break." To check, carefully insert a knife into the curd at an angle and lift slightly; the curd should break cleanly, and clear whey should fill the cut.
- Drain the curds and whey.
- Once you've got that perfect clean break, grab a long knife or curd cutter and cut the curds into 1/2-inch cubes. Take your time and make those cuts as even as possible.
- Let the curds rest for 10 minutes to firm up a bit.
- Now, gently stir the curds for 20-30 minutes, keeping that temperature consistent. This stirring helps release more whey and makes your curds firmer.
- Line a colander or a special cheese mold with cheesecloth. Carefully ladle your curds into the lined colander or mold, letting the whey drain away.
- Allow the curds to drain for 2-4 hours, turning the cheese every 30 minutes for the first hour. This ensures even drainage and helps the cheese take on a nice, uniform shape.
- Form the cheese into the traditional shape.
- Once your curds have drained enough and feel firm, take them out of the cheesecloth.
- Place the curds into your traditional Queijo da Serra cheese mold (it's usually cylindrical with a slightly concave top). Gently press the curds into the mold, making sure there are no big air pockets. The classic shape is a squat little wheel with that characteristic dimple on top.
- Put the molded cheese on a draining mat or rack and let it press under its own weight for another 6-12 hours, or even overnight, at room temperature (around 68-72°F / 20-22°C). This helps the cheese consolidate further and really hold its shape. Remember to turn it once or twice during this period.
- Salt the cheese and allow it to age.
- The next day, gently remove the cheese from its mold. It should be nice and firm!
- Generously rub the entire surface of your cheese with non-iodized cheese salt. Make sure you get every side! You can even do this in two rounds: salt one side, wait 12 hours, then salt the other.
- Now for the fun part: aging! Place your salted Queijo da Serra in a dedicated cheese aging spot (often called a "cave" or a mini-fridge set to 50-55°F / 10-13°C with 85-90% humidity).
- Age your Queijo da Serra for at least 30 days, but for the best flavor and that incredible spoonable texture, aim for 45-90 days. Turn it daily for the first week, then every few days after that. You'll notice a natural rind developing. If you see any excessive mold, just wipe it gently with a cloth dipped in a light brine (1 teaspoon salt per cup of water).
- The longer it ages, the stronger and more complex its flavor will become, and its interior will get wonderfully soft and creamy, eventually becoming perfect for scooping!
You may also like


Hey there! I’m just someone who seriously loves good food and believes that cooking doesn’t have to be complicated to be amazing. Whether it’s a quick weeknight dinner or a cozy weekend meal, I’m all about sharing easy, tasty recipes that actually work.