| CulinaryCreationss alt=")
Aruban Funchi Recipe (Easy & Savory)
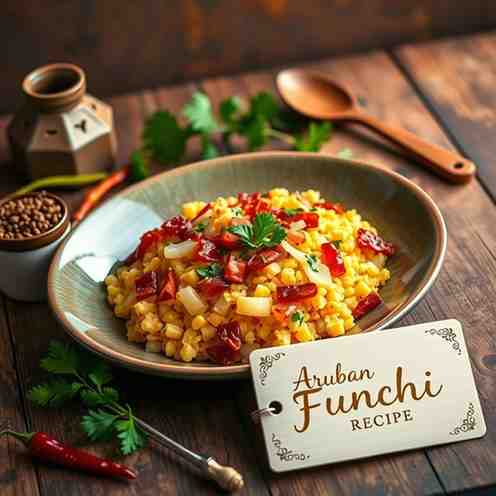
Aruban Funchi Recipe (Easy & Savory)


- Serves: 4 People
- Prepare Time: 15 minutes
- Cooking Time: 20 minutes
- Calories: -
- Difficulty: Easy
Ever wondered what truly captures the taste of the Caribbean in a simple, satisfying dish? Look no further than Funchi! This humble yet delicious cornmeal mush is a beloved staple across the Dutch Caribbean, especially in Aruba and the rest of the former Netherlands Antilles. Often compared to polenta or Southern grits, funchi offers a unique, savory experience that's both comforting and incredibly versatile. It’s the perfect companion to saucy stews, grilled fish, or hearty soups, soaking up all those wonderful flavors.
This recipe for Aruban Funchi is designed to bring an authentic slice of island life right into your kitchen. We’re talking traditional ratios, easy-to-find ingredients, and a method so straightforward, even beginner cooks will feel like seasoned island chefs. Naturally gluten-free and budget-friendly, funchi is a fantastic addition to any meal, whether you serve it soft and scoopable tonight or crisp up slices for "funchi fries" tomorrow. Get ready to explore a delicious piece of healthy home cooked recipes that truly tastes good!
Ingredients
Directions
- Season and Boil the Water: In a deep, heavy-bottomed pot or Dutch oven, combine the water, salt, and butter/oil. Bring it to a steady simmer over medium-high heat. You want to see small, steady bubbles, not a violent, splashing boil – this helps reduce splatter when you add the cornmeal.
- Whisk in the Cornmeal Slowly: Once simmering, reduce the heat to medium-low. Slowly rain in the cornmeal, a little at a time, while whisking constantly. This is key to preventing lumps and ensuring a smooth, consistent texture. As the mixture thickens, switch from a whisk to a sturdy wooden spoon or silicone spatula.
- Cook Until Thick, Smooth & Steaming: Continue stirring constantly for 10–20 minutes. The exact time can vary depending on your cornmeal brand (Harina PAN-style pre-steamed maize flour often cooks faster than regular cornmeal). The mixture should become very thick and heavy, pulling away from the sides of the pot. When you drag your spoon through it, it should hold a clean line. If it feels too stiff, add a spoonful of hot water and stir vigorously. If it's too thin after the recommended time, keep cooking and stirring for a few more minutes.
- Taste, Adjust & Enrich: Carefully taste the funchi for salt and adjust if needed. If using, now is the time to stir in any optional grated cheese or dried herbs/garlic powder. Keep them optional to maintain the simple, flexible nature of classic funchi.
- Shape and Set:
- For soft, scoopable funchi: Serve immediately in bowls with a wet spoon or scoop. This is a common, comforting serving style.
- For traditional sliceable funchi: Lightly grease or wet a heat-safe bowl, loaf pan, or square pan. Transfer the hot funchi mixture into the prepared pan, smoothing the top with the back of your spoon or spatula. Let it stand at room temperature for 10–15 minutes to firm up. Once set, carefully flip it out onto a cutting board and slice it into wedges or thick slices.
- Serve as a Savory Side: Serve your funchi warm. It's traditionally enjoyed by ladling saucy stews or soups around or over it, allowing the funchi to beautifully soak up all those rich flavors.
- Optional Step – Crisp the Slices (Funchi Fries Vibe, Same Recipe)Once your funchi slices are firm and cool, you can take them to the next level for a "funchi fries" experience!
- Skillet Option: Brush the funchi slices with a thin layer of oil (olive oil or vegetable oil works great). Heat a non-stick skillet over medium heat and pan-sear the slices for 3-5 minutes per side, until golden brown and crisp.
- Oven Option: Lay the slices on a parchment-lined baking sheet. Brush or mist them lightly with oil. Bake in a preheated oven at 400°F (200°C) for 15-20 minutes, flipping once halfway through, until the edges are crunchy and golden.
- Serving Tip: Crispy funchi slices are fantastic with a simple dipping sauce, like a light tomato-chili sauce or a garlicky yogurt dip.
Aruban Funchi Recipe (Easy & Savory)
- Serves: 4 People
- Prepare Time: 15 minutes
- Cooking Time: 20 minutes
- Calories: -
- Difficulty: Easy
Ever wondered what truly captures the taste of the Caribbean in a simple, satisfying dish? Look no further than Funchi! This humble yet delicious cornmeal mush is a beloved staple across the Dutch Caribbean, especially in Aruba and the rest of the former Netherlands Antilles. Often compared to polenta or Southern grits, funchi offers a unique, savory experience that's both comforting and incredibly versatile. It’s the perfect companion to saucy stews, grilled fish, or hearty soups, soaking up all those wonderful flavors.
This recipe for Aruban Funchi is designed to bring an authentic slice of island life right into your kitchen. We’re talking traditional ratios, easy-to-find ingredients, and a method so straightforward, even beginner cooks will feel like seasoned island chefs. Naturally gluten-free and budget-friendly, funchi is a fantastic addition to any meal, whether you serve it soft and scoopable tonight or crisp up slices for "funchi fries" tomorrow. Get ready to explore a delicious piece of healthy home cooked recipes that truly tastes good!
Ingredients
Directions
- Season and Boil the Water: In a deep, heavy-bottomed pot or Dutch oven, combine the water, salt, and butter/oil. Bring it to a steady simmer over medium-high heat. You want to see small, steady bubbles, not a violent, splashing boil – this helps reduce splatter when you add the cornmeal.
- Whisk in the Cornmeal Slowly: Once simmering, reduce the heat to medium-low. Slowly rain in the cornmeal, a little at a time, while whisking constantly. This is key to preventing lumps and ensuring a smooth, consistent texture. As the mixture thickens, switch from a whisk to a sturdy wooden spoon or silicone spatula.
- Cook Until Thick, Smooth & Steaming: Continue stirring constantly for 10–20 minutes. The exact time can vary depending on your cornmeal brand (Harina PAN-style pre-steamed maize flour often cooks faster than regular cornmeal). The mixture should become very thick and heavy, pulling away from the sides of the pot. When you drag your spoon through it, it should hold a clean line. If it feels too stiff, add a spoonful of hot water and stir vigorously. If it's too thin after the recommended time, keep cooking and stirring for a few more minutes.
- Taste, Adjust & Enrich: Carefully taste the funchi for salt and adjust if needed. If using, now is the time to stir in any optional grated cheese or dried herbs/garlic powder. Keep them optional to maintain the simple, flexible nature of classic funchi.
- Shape and Set:
- For soft, scoopable funchi: Serve immediately in bowls with a wet spoon or scoop. This is a common, comforting serving style.
- For traditional sliceable funchi: Lightly grease or wet a heat-safe bowl, loaf pan, or square pan. Transfer the hot funchi mixture into the prepared pan, smoothing the top with the back of your spoon or spatula. Let it stand at room temperature for 10–15 minutes to firm up. Once set, carefully flip it out onto a cutting board and slice it into wedges or thick slices.
- Serve as a Savory Side: Serve your funchi warm. It's traditionally enjoyed by ladling saucy stews or soups around or over it, allowing the funchi to beautifully soak up all those rich flavors.
- Optional Step – Crisp the Slices (Funchi Fries Vibe, Same Recipe)Once your funchi slices are firm and cool, you can take them to the next level for a "funchi fries" experience!
- Skillet Option: Brush the funchi slices with a thin layer of oil (olive oil or vegetable oil works great). Heat a non-stick skillet over medium heat and pan-sear the slices for 3-5 minutes per side, until golden brown and crisp.
- Oven Option: Lay the slices on a parchment-lined baking sheet. Brush or mist them lightly with oil. Bake in a preheated oven at 400°F (200°C) for 15-20 minutes, flipping once halfway through, until the edges are crunchy and golden.
- Serving Tip: Crispy funchi slices are fantastic with a simple dipping sauce, like a light tomato-chili sauce or a garlicky yogurt dip.
You may also like


Hey there! I’m just someone who seriously loves good food and believes that cooking doesn’t have to be complicated to be amazing. Whether it’s a quick weeknight dinner or a cozy weekend meal, I’m all about sharing easy, tasty recipes that actually work.