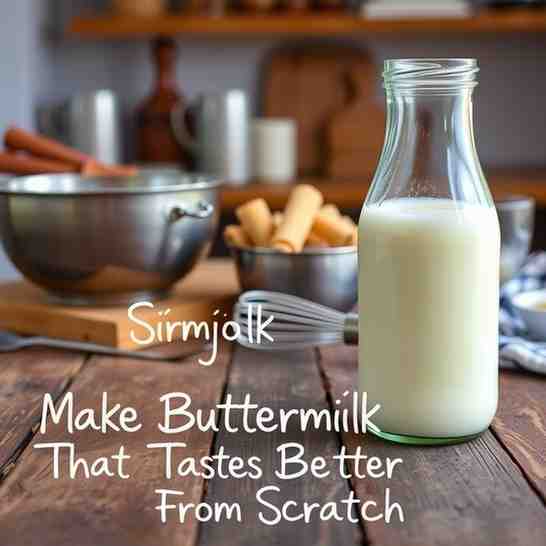
Súrmjólk - Make Buttermilk That Tastes Better From Scratch
Súrmjólk - Make Buttermilk That Tastes Better From Scratch

- Serves: 4 People
- Prepare Time: 15 minutes
- Cooking Time: 0 minutes
- Calories: -
- Difficulty: Easy
Ever wondered how to make truly good food that tastes better from scratch right in your own kitchen? Let us introduce you to Súrmjólk, Iceland’s beloved tangy, cultured milk. Forget the store-bought stuff; making authentic Súrmjólk at home is incredibly simple, rewarding, and opens up a world of macro friendly recipes and easy healthy meals at home. If you’re into meal plan recipes or creating a weekly meal plan with recipes, this is about to become your new secret weapon.
Súrmjólk, often translated simply as "sour milk" or even "buttermilk" (though we’ll clear up that confusion in a bit!), is a thin, pourable fermented milk product. Think of it as a lighter, tangier cousin to yogurt, with a wonderfully refreshing zing. It’s a staple in Icelandic homes, traditionally enjoyed for breakfast with cereal or bread, but it’s incredibly versatile. By making it yourself, you get to control the ingredients and the tang level, ensuring a fresh, delicious product that’s perfect for everything from breakfast bowls to savory marinades. Get ready to elevate your meal planning recipe book with this simple yet profound addition!
Ingredients
Directions
- Sanitize Your Tools: Start with a super clean, preferably sterilized, 1-quart glass jar with a lid and a clean spoon or whisk. This prevents unwanted bacteria from interfering with your fermentation.
- Warm the Milk (Optional but Recommended): Gently warm the pasteurized milk in a saucepan over low heat until it reaches about 70-75°F (21-24°C). You can use an instant-read thermometer for accuracy. This ideal temperature helps the starter culture get going quickly and consistently. If your kitchen is naturally warm, you can skip warming and just use room-temperature milk.
- Stir in Starter: Pour the slightly warmed milk into your clean jar. Add the 2 tablespoons of your chosen cultured starter. Stir gently but thoroughly with your clean spoon or whisk until the starter is completely dissolved and evenly distributed.
- Ferment at Room Temperature: Cover the jar loosely with its lid or a clean cloth (to allow for minimal airflow while keeping dust out). Place the jar in a spot with a steady room temperature, ideally between 68-75°F (20-24°C). Avoid direct sunlight or drafty areas. Let it ferment for 12-24 hours.
- Check for "Done" Cues: Begin checking around the 12-hour mark. Your Súrmjólk is ready when it has thickened slightly, smells pleasantly tangy (like fresh yogurt or buttermilk), and has a pourable, slightly viscous consistency.
- What "Done" Looks Like (Confidence Cues):
- Pour Test: When you tilt the jar, the milk should move slowly and smoothly, coating the sides slightly, rather than sloshing like plain milk.
- Smell & Taste: It should have a clean, sour, and fresh aroma. Taste a tiny bit – it should be tangy and refreshing, not overly sour, bitter, or cheesy.
- Chill to Stop Fermentation: Once your Súrmjólk reaches the desired tang and consistency, secure the lid tightly and transfer the jar to the refrigerator. Chilling will slow down and eventually stop the fermentation process.
- Whisk Smooth Before Serving: Before serving, give your Súrmjólk a good whisk or shake. This will break up any small curds and ensure a smooth, uniform texture. Enjoy!
You may also like


Hey there! I’m just someone who seriously loves good food and believes that cooking doesn’t have to be complicated to be amazing. Whether it’s a quick weeknight dinner or a cozy weekend meal, I’m all about sharing easy, tasty recipes that actually work.