
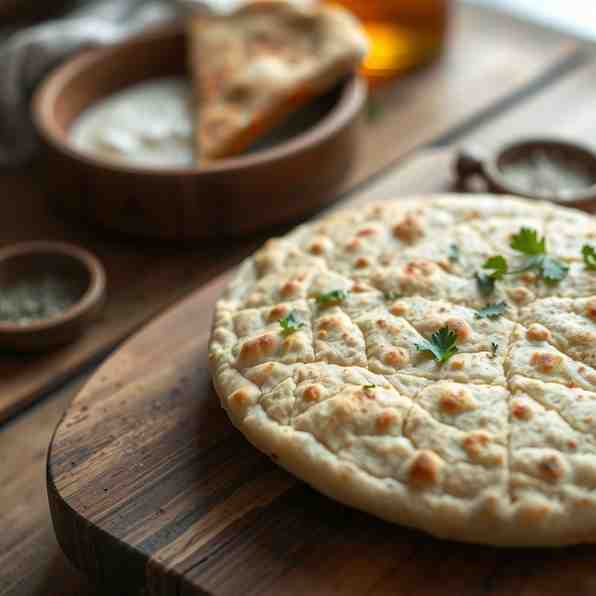
Eritrean Taita - Gluten-Free African Flatbread
Eritrean Taita - Gluten-Free African Flatbread
- Serves: 6 People
- Prepare Time: 15 minutes
- Cooking Time: 30-45 minut
- Calories: -
- Difficulty: Medium
Craving a taste of authentic african cuisine recipes that are both healthy and incredibly satisfying? Look no further than Eritrean Taita (Tayta)! This isn't just any flatbread; it's a culinary journey, a staple of Eritrean and Ethiopian dining, and a truly unique addition to your kitchen. Often referred to as "injera-style," Taita is a naturally gluten-free and vegan recipe made from humble teff flour, transformed through fermentation into a soft, spongy, and slightly tangy flatbread. It serves as your edible utensil, perfect for scooping up hearty stews and vibrant sauces in a communal, family-style meal.
What makes Taita so special?
Authentic Experience: We'll guide you through traditional Eritrean techniques, adapted for your home kitchen, ensuring a genuine taste of East Africa.
Naturally Gluten-Free: Teff, an ancient grain, is the star here, making this an ideal choice for anyone seeking healthy gluten-free recipes or managing gluten intolerance.
Plant-Powered Perfection: By default, Taita is a vegetarian and vegan-friendly recipe, free from dairy and eggs. It's the ideal foundation for healthy vegetarian recipes, pairing beautifully with lentil dishes, vegetable stews, and rich tomato-based sauces.
A Foundation for Flavor: Beyond its deliciousness, Taita is a fantastic way to build healthy African meals, offering a wholesome, whole-grain base that complements a wide array of flavors. Get ready to discover why this African food recipe is about to become your new favorite!
Ingredients
Directions
- Equipment You’ll Need:While a traditional mitad or mogogo (Eritrean electric griddle) is authentic, you can achieve excellent results with common kitchen tools. The best home options include a good quality nonstick skillet (10-12 inch), a crepe pan, or an electric griddle. A tight-fitting lid is essential for steaming the top of the Taita without flipping.
- Fermentation Timeline (The Heart of Taita):
- Day 1: The Initial Mix
- In a large, non-reactive bowl (glass or ceramic is best), combine the teff flour and 3 cups of water.
- Whisk vigorously until completely smooth and lump-free. A good whisking now prevents issues later. The consistency should be like a thin pancake batter.
- Cover the bowl loosely with plastic wrap or a clean kitchen towel (allowing some air exchange).
- Place the bowl in a warm spot in your kitchen (ideally 70-75°F / 21-24°C). If your kitchen is very cold, you might consider adding the optional pinch of yeast now to kickstart fermentation.
- Day 2–3: Souring & Bubbles
- Over the next 1-2 days, you'll start to observe changes. The batter will begin to bubble, and a thin layer of liquid might separate on top.
- You'll notice a distinct, pleasant sour smell – a sign that the natural wild yeasts and bacteria are doing their work. This is the characteristic flavor of Taita.
- Stir the batter once or twice a day.
- "Cooked Starter" (Absit-Style) Step: This step is crucial for achieving Taita’s signature spongy texture and "eyes" (small holes). Do this on Day 2 or 3, once the batter is actively bubbling and smells sour.
- Carefully pour about ½ cup of the fermented teff batter into a small saucepan.
- Add ½ cup of fresh water to the saucepan.
- Whisk constantly over medium heat. The mixture will quickly thicken into a smooth, porridge-like consistency (similar to a roux). This is your "absit" or "cooked starter."
- Remove from heat and let it cool completely to room temperature. This is important – hot absit will kill the active yeasts in your main batter.
- Once cooled, stir the absit back into your main fermented teff batter. This "cooked starter" feeds the yeast, adds structure, and helps create those coveted bubbles.
- Stir in the ½ teaspoon of salt.
- Cover again and let it ferment for another 12-24 hours.
- Day 3–4: Cooking Day (Flexible Timing Windows)
- By now, your batter should be well-fermented, bubbly, and have a noticeably sour aroma. It should look like a very thin pancake or heavy cream consistency. If it's too thick, add a tablespoon or two of water at a time until it's just pourable but not watery.
- Cooking the Taita:
- Pan Setup + Heat Control
- Place your nonstick skillet, crepe pan, or electric griddle over medium heat. The pan needs to be hot enough to sizzle a drop of water but not so hot that the Taita burns immediately. If using an electric griddle, aim for 350-375°F (175-190°C).
- Lightly grease the pan with a tiny amount of oil or cooking spray for the first Taita, if needed, but a good nonstick surface often requires none.
- Pour + Swirl (or No-Swirl)
- Give the batter a gentle stir.
- Pour about ½ cup to ¾ cup of batter (depending on your pan size) into the center of the hot pan.
- Immediately tilt and swirl the pan to evenly coat the bottom with a thin layer of batter. You want it to be thin but not transparent. Some traditional cooks prefer not to swirl, letting the batter spread naturally for a thicker center.
- Steam to Finish (Lid Timing)
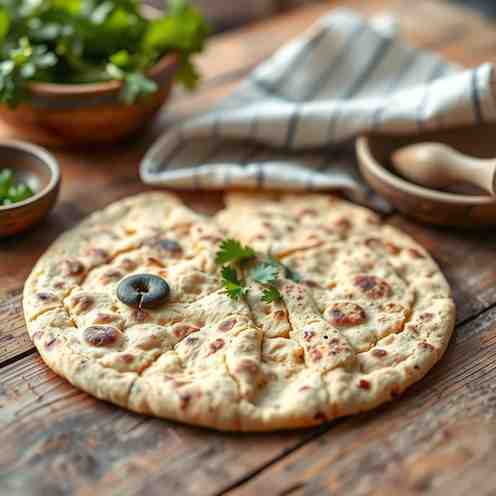
- As the Taita cooks, you'll see bubbles forming on the surface – these are the "eyes" or enjera (Eritrean term for the holes).
- Once the entire surface is covered in bubbles and the edges start to curl slightly, cover the pan with a tight-fitting lid. This traps the steam, cooking the top without needing to flip the Taita.
- Cook for another 1-2 minutes, or until the top is set and no longer wet. The "eyes" should be prominent.
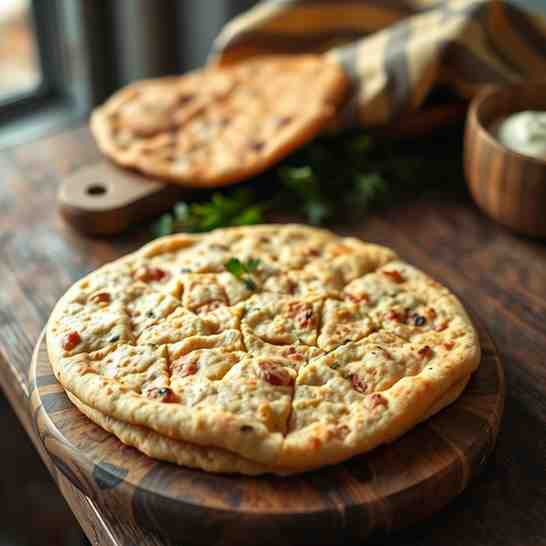
- Cool + Stack Properly
- Carefully remove the Taita from the pan using a spatula. It should peel off easily.
- Place the cooked Taita on a clean kitchen towel or wire rack to cool slightly.
- As you make more, stack them on top of each other, covering them with a clean towel to keep them soft and pliable. Avoid stacking them while they're too hot, as they might stick or become gummy.
Eritrean Taita - Gluten-Free African Flatbread
- Serves: 6 People
- Prepare Time: 15 minutes
- Cooking Time: 30-45 minut
- Calories: -
- Difficulty: Medium
Craving a taste of authentic african cuisine recipes that are both healthy and incredibly satisfying? Look no further than Eritrean Taita (Tayta)! This isn't just any flatbread; it's a culinary journey, a staple of Eritrean and Ethiopian dining, and a truly unique addition to your kitchen. Often referred to as "injera-style," Taita is a naturally gluten-free and vegan recipe made from humble teff flour, transformed through fermentation into a soft, spongy, and slightly tangy flatbread. It serves as your edible utensil, perfect for scooping up hearty stews and vibrant sauces in a communal, family-style meal.
What makes Taita so special?
Authentic Experience: We'll guide you through traditional Eritrean techniques, adapted for your home kitchen, ensuring a genuine taste of East Africa.
Naturally Gluten-Free: Teff, an ancient grain, is the star here, making this an ideal choice for anyone seeking healthy gluten-free recipes or managing gluten intolerance.
Plant-Powered Perfection: By default, Taita is a vegetarian and vegan-friendly recipe, free from dairy and eggs. It's the ideal foundation for healthy vegetarian recipes, pairing beautifully with lentil dishes, vegetable stews, and rich tomato-based sauces.
A Foundation for Flavor: Beyond its deliciousness, Taita is a fantastic way to build healthy African meals, offering a wholesome, whole-grain base that complements a wide array of flavors. Get ready to discover why this African food recipe is about to become your new favorite!
Ingredients
Directions
- Equipment You’ll Need:While a traditional mitad or mogogo (Eritrean electric griddle) is authentic, you can achieve excellent results with common kitchen tools. The best home options include a good quality nonstick skillet (10-12 inch), a crepe pan, or an electric griddle. A tight-fitting lid is essential for steaming the top of the Taita without flipping.
- Fermentation Timeline (The Heart of Taita):
- Day 1: The Initial Mix
- In a large, non-reactive bowl (glass or ceramic is best), combine the teff flour and 3 cups of water.
- Whisk vigorously until completely smooth and lump-free. A good whisking now prevents issues later. The consistency should be like a thin pancake batter.
- Cover the bowl loosely with plastic wrap or a clean kitchen towel (allowing some air exchange).
- Place the bowl in a warm spot in your kitchen (ideally 70-75°F / 21-24°C). If your kitchen is very cold, you might consider adding the optional pinch of yeast now to kickstart fermentation.
- Day 2–3: Souring & Bubbles
- Over the next 1-2 days, you'll start to observe changes. The batter will begin to bubble, and a thin layer of liquid might separate on top.
- You'll notice a distinct, pleasant sour smell – a sign that the natural wild yeasts and bacteria are doing their work. This is the characteristic flavor of Taita.
- Stir the batter once or twice a day.
- "Cooked Starter" (Absit-Style) Step: This step is crucial for achieving Taita’s signature spongy texture and "eyes" (small holes). Do this on Day 2 or 3, once the batter is actively bubbling and smells sour.
- Carefully pour about ½ cup of the fermented teff batter into a small saucepan.
- Add ½ cup of fresh water to the saucepan.
- Whisk constantly over medium heat. The mixture will quickly thicken into a smooth, porridge-like consistency (similar to a roux). This is your "absit" or "cooked starter."
- Remove from heat and let it cool completely to room temperature. This is important – hot absit will kill the active yeasts in your main batter.
- Once cooled, stir the absit back into your main fermented teff batter. This "cooked starter" feeds the yeast, adds structure, and helps create those coveted bubbles.
- Stir in the ½ teaspoon of salt.
- Cover again and let it ferment for another 12-24 hours.
- Day 3–4: Cooking Day (Flexible Timing Windows)
- By now, your batter should be well-fermented, bubbly, and have a noticeably sour aroma. It should look like a very thin pancake or heavy cream consistency. If it's too thick, add a tablespoon or two of water at a time until it's just pourable but not watery.
- Cooking the Taita:
- Pan Setup + Heat Control
- Place your nonstick skillet, crepe pan, or electric griddle over medium heat. The pan needs to be hot enough to sizzle a drop of water but not so hot that the Taita burns immediately. If using an electric griddle, aim for 350-375°F (175-190°C).
- Lightly grease the pan with a tiny amount of oil or cooking spray for the first Taita, if needed, but a good nonstick surface often requires none.
- Pour + Swirl (or No-Swirl)
- Give the batter a gentle stir.
- Pour about ½ cup to ¾ cup of batter (depending on your pan size) into the center of the hot pan.
- Immediately tilt and swirl the pan to evenly coat the bottom with a thin layer of batter. You want it to be thin but not transparent. Some traditional cooks prefer not to swirl, letting the batter spread naturally for a thicker center.
- Steam to Finish (Lid Timing)
- As the Taita cooks, you'll see bubbles forming on the surface – these are the "eyes" or enjera (Eritrean term for the holes).
- Once the entire surface is covered in bubbles and the edges start to curl slightly, cover the pan with a tight-fitting lid. This traps the steam, cooking the top without needing to flip the Taita.
- Cook for another 1-2 minutes, or until the top is set and no longer wet. The "eyes" should be prominent.
- Cool + Stack Properly
- Carefully remove the Taita from the pan using a spatula. It should peel off easily.
- Place the cooked Taita on a clean kitchen towel or wire rack to cool slightly.
- As you make more, stack them on top of each other, covering them with a clean towel to keep them soft and pliable. Avoid stacking them while they're too hot, as they might stick or become gummy.
You may also like


Hey there! I’m just someone who seriously loves good food and believes that cooking doesn’t have to be complicated to be amazing. Whether it’s a quick weeknight dinner or a cozy weekend meal, I’m all about sharing easy, tasty recipes that actually work.


