
Israeli Hummus Recipe - Ultra-Smooth & Easy
Israeli Hummus Recipe - Ultra-Smooth & Easy
- Serves: 6 People
- Prepare Time: 20 minutes
- Cooking Time: 1 hour 30 m
- Calories: -
- Difficulty: Medium
Get ready to ditch store-bought and dive into the world of truly homemade hummus! This isn't just any hummus recipe; it's your guide to crafting authentic, ultra-smooth Israeli-style hummus right in your kitchen. Imagine a creamy, dreamy dip that's rich in nutty tahini flavor, perfectly balanced with fresh lemon and a whisper of garlic. What makes it "Israeli-style"? It’s all about a tahini-forward taste, a velvety texture achieved by cooking dried chickpeas until super soft, and a specific whipping technique that makes it wonderfully light and fluffy. This method guarantees a restaurant-quality experience that will elevate your vegan recipes and become a staple in your cooking repertoire.
Israeli-style hummus stands out from the crowd for a few key reasons. It’s not just a dip; it’s a cultural cornerstone, and getting it right means paying attention to these defining characteristics:
Tahini-Forward Flavor: The star of the show isn't just chickpeas; it's a generous amount of high-quality, raw tahini that gives it a rich, nutty depth.
Very Soft Chickpeas (from Dried): Starting with dried chickpeas and cooking them until they're practically falling apart is crucial for that signature melt-in-your-mouth texture.
Mellowed Garlic + Fresh Lemon: A careful balance of fresh lemon juice and garlic that's allowed to mellow, ensuring bright flavor without harshness.
Whipped Tahini Base + Ice Water: Whipping the tahini with ice-cold water first creates an emulsion that results in an incredibly light and fluffy base.
Served Warm/Room Temp: Authentic hummus is often enjoyed warm or at room temperature, allowing its flavors and creamy texture to shine.
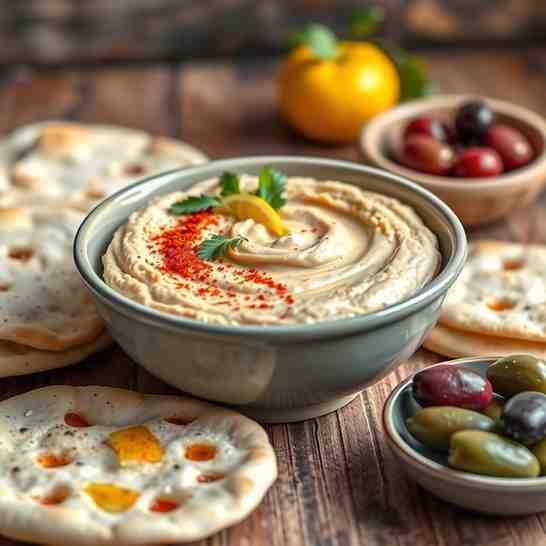
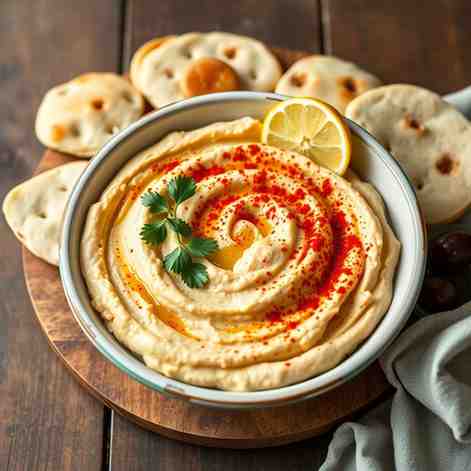
Classic Hummus-Joint Plating: Served in a shallow bowl with a swirl, a generous well for olive oil, and often topped with whole chickpeas, paprika, or fresh parsley.
You don't need a professional kitchen to make amazing hummus, but these tools will make your life a lot easier:
Large Pot + Strainer: For soaking and cooking those chickpeas until they're perfectly tender.
Food Processor (Preferred) or High-Powered Blender: This is your secret weapon for achieving that ultra-smooth, creamy consistency. A food processor typically works best for hummus.
Measuring Cups/Spoons: Essential for getting your ratios just right, especially when it comes to tahini, lemon, and salt.
Want to know the secrets to making hummus that rivals your favorite Israeli restaurant? It all comes down to these simple, yet powerful, techniques:
1. Cook Chickpeas Until They’re Truly Soft: Don't just cook them until they're edible; cook them until they're mushy, almost falling apart between your fingers. This is the single most important step for a smooth texture.
2. Use Baking Soda: Adding a pinch of baking soda to the soaking and/or cooking water helps break down the chickpea skins and softens them significantly, making them easier to blend.
3. Skim Foam/Loose Skins (Fast Approach): While you don't need to peel every single chickpea, a quick skim of the foam and any very loose skins during cooking can contribute to a smoother final product. Don't stress over perfection here!
4. Blend Garlic with Lemon and Let It Sit: Mince your garlic with the lemon juice and salt in the food processor first. Letting it sit for 5-10 minutes mellows the raw garlic's harshness, infusing the lemon with its flavor.
5. Whip Tahini First, Then Add Ice Water: This is a game-changer! Process the tahini alone until it thickens, then gradually stream in ice-cold water. It will lighten in color and fluff up beautifully, creating an airy base.
6. Add Chickpeas While They’re Still Warm: Warm chickpeas blend much more easily and create a smoother, creamier hummus than cold ones. Just let them cool slightly after draining, but don't let them get completely cold.
7. Adjust Thickness Slowly: Use the reserved chickpea cooking liquid or additional ice water, adding it in small splashes (tablespoon by tablespoon) until you reach your desired creamy consistency. It’s easier to add more liquid than to fix overly thin hummus.
Ingredients
Directions
- Prep and Soak (Night Before)
- Sort & Rinse Chickpeas: Pour the dried chickpeas onto a clean surface and pick through them, removing any small stones, debris, or shriveled chickpeas. Rinse them thoroughly under cold running water in a colander.
- Overnight Soak: Transfer the rinsed chickpeas to a large bowl. Add ½ teaspoon of baking soda and cover them with plenty of cold water – at least 4-5 inches above the chickpeas, as they will expand significantly. Let them soak at room temperature for 8-12 hours, or overnight. They should almost double in size.
- Cook the Chickpeas
- Rinse & Transfer: Drain the soaked chickpeas and rinse them well. Transfer them to a large pot.
- Add Water & Baking Soda: Cover the chickpeas with fresh cold water, again ensuring at least 4-5 inches of water above them. Add the remaining ½ teaspoon of baking soda.
- Boil & Skim: Bring the water to a rolling boil over high heat. As it boils, foam will rise to the surface. Skim off this foam with a spoon. You may also see some loose chickpea skins; you can skim some of these too, but don't worry about getting every single one.
- Simmer Until Soft: Reduce the heat to low, cover the pot partially, and simmer gently for 60-90 minutes, or even up to 2 hours. The goal is for the chickpeas to be extremely soft – you should be able to easily smash one between your thumb and forefinger with very little pressure, and the skins should be falling off.
- Drain & Save Liquid: Once cooked, drain the chickpeas in a colander set over a large bowl.
- Crucially, reserve at least 1-2 cups of the hot cooking liquid. This liquid is packed with flavor and starch, and you'll use it to adjust the hummus's consistency. Let the chickpeas cool for just 5-10 minutes; they should still be quite warm when you blend them.
- Build the Flavor Base (While Chickpeas Cook/Cool Slightly)
- Combine Aromatics: While your chickpeas are cooking or cooling slightly, add the fresh lemon juice, peeled garlic cloves, and 1 teaspoon of fine sea salt to the bowl of your food processor.
- Mince & Mellow: Process these ingredients until the garlic is finely minced. Scrape down the sides of the bowl. Let this mixture sit for 5-10 minutes. This short rest allows the garlic to mellow slightly and its flavor to infuse into the lemon juice, preventing any harsh raw garlic notes in your final hummus.
- Whip the Tahini
- Add Tahini: Without draining the lemon-garlic mixture, add the ½ cup of tahini to the food processor.
- Process Until Thick: Process for 1-2 minutes. The mixture will initially look thick and pasty.
- Add Ice Water & Whip: With the food processor running, gradually stream in the ½ cup of ice-cold water (or drop in 1-2 ice cubes). The mixture will magically transform – it will lighten in color, become incredibly creamy, and fluff up into a beautiful, airy paste. This is the whipped tahini base, essential for light and smooth hummus.
- Finish the Hummus
- Add Warm Chickpeas & Cumin: Add the warm, cooked chickpeas and the optional ¼ teaspoon of ground cumin to the food processor with the whipped tahini.
- Blend Until Completely Smooth: Process continuously for 3-5 minutes, scraping down the sides of the bowl every minute or so. Keep blending until the hummus is incredibly smooth, light, and creamy, with no gritty bits remaining. It should look like a thick, luxurious paste.
- Adjust Flavor & Thickness:
- Salt: Taste the hummus and add more salt if needed, a pinch at a time.
- Lemon: If you want a brighter flavor, add a tiny splash more lemon juice.
- Thickness: If the hummus is too thick, add the reserved warm chickpea cooking liquid, one tablespoon at a time, blending after each addition, until it reaches your desired silky-smooth, pourable (but not runny) consistency.
- Plate Like a Hummus Joint
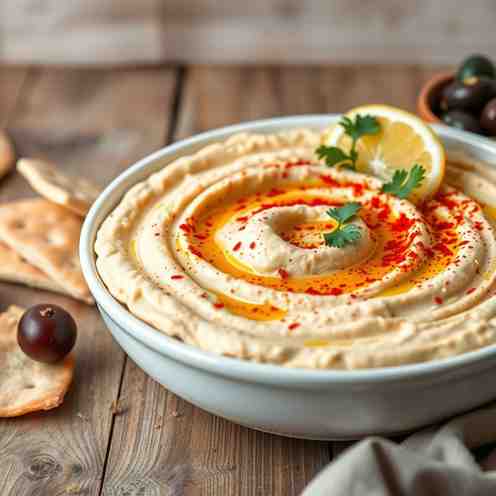
- Spread & Swirl: Spoon the finished hummus into a shallow serving bowl. Use the back of a spoon to spread it out, creating an appealing swirl pattern around the edges.
- Make a Well: Create a slight well or depression in the center of the hummus.
- Garnish: Drizzle generously with good quality extra virgin olive oil in the well. Sprinkle with paprika (smoked or sweet) and fresh chopped parsley. For extra authenticity, add a few whole cooked chickpeas to the center.
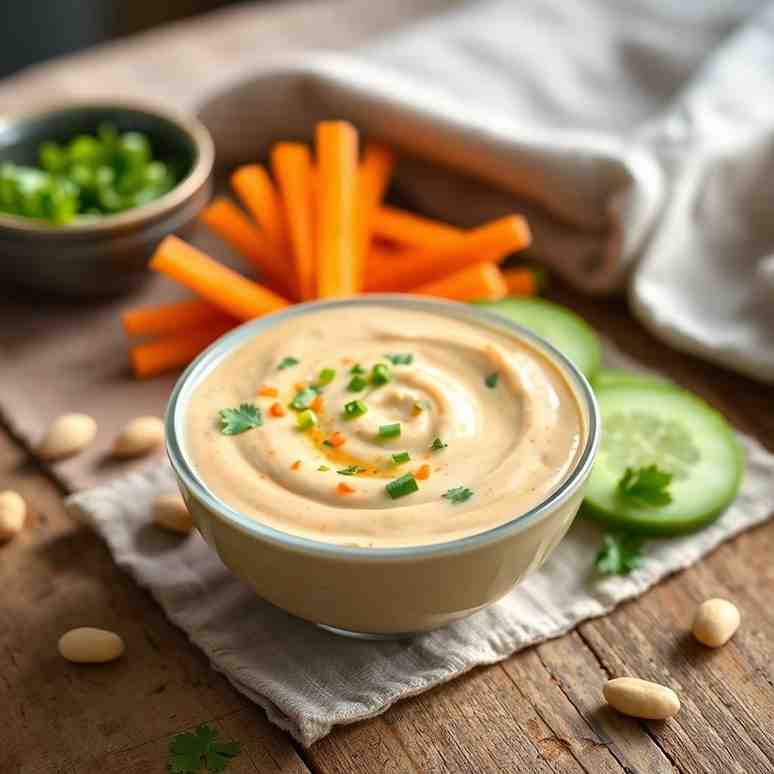
- Serve: Serve immediately with warm pita bread, fresh cucumber and tomato slices, pickles, or raw onion wedges. Enjoy your incredibly delicious best homemade hummus recipe!
Israeli Hummus Recipe - Ultra-Smooth & Easy
- Serves: 6 People
- Prepare Time: 20 minutes
- Cooking Time: 1 hour 30 m
- Calories: -
- Difficulty: Medium
Get ready to ditch store-bought and dive into the world of truly homemade hummus! This isn't just any hummus recipe; it's your guide to crafting authentic, ultra-smooth Israeli-style hummus right in your kitchen. Imagine a creamy, dreamy dip that's rich in nutty tahini flavor, perfectly balanced with fresh lemon and a whisper of garlic. What makes it "Israeli-style"? It’s all about a tahini-forward taste, a velvety texture achieved by cooking dried chickpeas until super soft, and a specific whipping technique that makes it wonderfully light and fluffy. This method guarantees a restaurant-quality experience that will elevate your vegan recipes and become a staple in your cooking repertoire.
Israeli-style hummus stands out from the crowd for a few key reasons. It’s not just a dip; it’s a cultural cornerstone, and getting it right means paying attention to these defining characteristics:
Tahini-Forward Flavor: The star of the show isn't just chickpeas; it's a generous amount of high-quality, raw tahini that gives it a rich, nutty depth.
Very Soft Chickpeas (from Dried): Starting with dried chickpeas and cooking them until they're practically falling apart is crucial for that signature melt-in-your-mouth texture.
Mellowed Garlic + Fresh Lemon: A careful balance of fresh lemon juice and garlic that's allowed to mellow, ensuring bright flavor without harshness.
Whipped Tahini Base + Ice Water: Whipping the tahini with ice-cold water first creates an emulsion that results in an incredibly light and fluffy base.
Served Warm/Room Temp: Authentic hummus is often enjoyed warm or at room temperature, allowing its flavors and creamy texture to shine.
Classic Hummus-Joint Plating: Served in a shallow bowl with a swirl, a generous well for olive oil, and often topped with whole chickpeas, paprika, or fresh parsley.
You don't need a professional kitchen to make amazing hummus, but these tools will make your life a lot easier:
Large Pot + Strainer: For soaking and cooking those chickpeas until they're perfectly tender.
Food Processor (Preferred) or High-Powered Blender: This is your secret weapon for achieving that ultra-smooth, creamy consistency. A food processor typically works best for hummus.
Measuring Cups/Spoons: Essential for getting your ratios just right, especially when it comes to tahini, lemon, and salt.
Want to know the secrets to making hummus that rivals your favorite Israeli restaurant? It all comes down to these simple, yet powerful, techniques:
1. Cook Chickpeas Until They’re Truly Soft: Don't just cook them until they're edible; cook them until they're mushy, almost falling apart between your fingers. This is the single most important step for a smooth texture.
2. Use Baking Soda: Adding a pinch of baking soda to the soaking and/or cooking water helps break down the chickpea skins and softens them significantly, making them easier to blend.
3. Skim Foam/Loose Skins (Fast Approach): While you don't need to peel every single chickpea, a quick skim of the foam and any very loose skins during cooking can contribute to a smoother final product. Don't stress over perfection here!
4. Blend Garlic with Lemon and Let It Sit: Mince your garlic with the lemon juice and salt in the food processor first. Letting it sit for 5-10 minutes mellows the raw garlic's harshness, infusing the lemon with its flavor.
5. Whip Tahini First, Then Add Ice Water: This is a game-changer! Process the tahini alone until it thickens, then gradually stream in ice-cold water. It will lighten in color and fluff up beautifully, creating an airy base.
6. Add Chickpeas While They’re Still Warm: Warm chickpeas blend much more easily and create a smoother, creamier hummus than cold ones. Just let them cool slightly after draining, but don't let them get completely cold.
7. Adjust Thickness Slowly: Use the reserved chickpea cooking liquid or additional ice water, adding it in small splashes (tablespoon by tablespoon) until you reach your desired creamy consistency. It’s easier to add more liquid than to fix overly thin hummus.
Ingredients
Directions
- Prep and Soak (Night Before)
- Sort & Rinse Chickpeas: Pour the dried chickpeas onto a clean surface and pick through them, removing any small stones, debris, or shriveled chickpeas. Rinse them thoroughly under cold running water in a colander.
- Overnight Soak: Transfer the rinsed chickpeas to a large bowl. Add ½ teaspoon of baking soda and cover them with plenty of cold water – at least 4-5 inches above the chickpeas, as they will expand significantly. Let them soak at room temperature for 8-12 hours, or overnight. They should almost double in size.
- Cook the Chickpeas
- Rinse & Transfer: Drain the soaked chickpeas and rinse them well. Transfer them to a large pot.
- Add Water & Baking Soda: Cover the chickpeas with fresh cold water, again ensuring at least 4-5 inches of water above them. Add the remaining ½ teaspoon of baking soda.
- Boil & Skim: Bring the water to a rolling boil over high heat. As it boils, foam will rise to the surface. Skim off this foam with a spoon. You may also see some loose chickpea skins; you can skim some of these too, but don't worry about getting every single one.
- Simmer Until Soft: Reduce the heat to low, cover the pot partially, and simmer gently for 60-90 minutes, or even up to 2 hours. The goal is for the chickpeas to be extremely soft – you should be able to easily smash one between your thumb and forefinger with very little pressure, and the skins should be falling off.
- Drain & Save Liquid: Once cooked, drain the chickpeas in a colander set over a large bowl.
- Crucially, reserve at least 1-2 cups of the hot cooking liquid. This liquid is packed with flavor and starch, and you'll use it to adjust the hummus's consistency. Let the chickpeas cool for just 5-10 minutes; they should still be quite warm when you blend them.
- Build the Flavor Base (While Chickpeas Cook/Cool Slightly)
- Combine Aromatics: While your chickpeas are cooking or cooling slightly, add the fresh lemon juice, peeled garlic cloves, and 1 teaspoon of fine sea salt to the bowl of your food processor.
- Mince & Mellow: Process these ingredients until the garlic is finely minced. Scrape down the sides of the bowl. Let this mixture sit for 5-10 minutes. This short rest allows the garlic to mellow slightly and its flavor to infuse into the lemon juice, preventing any harsh raw garlic notes in your final hummus.
- Whip the Tahini
- Add Tahini: Without draining the lemon-garlic mixture, add the ½ cup of tahini to the food processor.
- Process Until Thick: Process for 1-2 minutes. The mixture will initially look thick and pasty.
- Add Ice Water & Whip: With the food processor running, gradually stream in the ½ cup of ice-cold water (or drop in 1-2 ice cubes). The mixture will magically transform – it will lighten in color, become incredibly creamy, and fluff up into a beautiful, airy paste. This is the whipped tahini base, essential for light and smooth hummus.
- Finish the Hummus
- Add Warm Chickpeas & Cumin: Add the warm, cooked chickpeas and the optional ¼ teaspoon of ground cumin to the food processor with the whipped tahini.
- Blend Until Completely Smooth: Process continuously for 3-5 minutes, scraping down the sides of the bowl every minute or so. Keep blending until the hummus is incredibly smooth, light, and creamy, with no gritty bits remaining. It should look like a thick, luxurious paste.
- Adjust Flavor & Thickness:
- Salt: Taste the hummus and add more salt if needed, a pinch at a time.
- Lemon: If you want a brighter flavor, add a tiny splash more lemon juice.
- Thickness: If the hummus is too thick, add the reserved warm chickpea cooking liquid, one tablespoon at a time, blending after each addition, until it reaches your desired silky-smooth, pourable (but not runny) consistency.
- Plate Like a Hummus Joint
- Spread & Swirl: Spoon the finished hummus into a shallow serving bowl. Use the back of a spoon to spread it out, creating an appealing swirl pattern around the edges.
- Make a Well: Create a slight well or depression in the center of the hummus.
- Garnish: Drizzle generously with good quality extra virgin olive oil in the well. Sprinkle with paprika (smoked or sweet) and fresh chopped parsley. For extra authenticity, add a few whole cooked chickpeas to the center.
- Serve: Serve immediately with warm pita bread, fresh cucumber and tomato slices, pickles, or raw onion wedges. Enjoy your incredibly delicious best homemade hummus recipe!
You may also like


Hey there! I’m just someone who seriously loves good food and believes that cooking doesn’t have to be complicated to be amazing. Whether it’s a quick weeknight dinner or a cozy weekend meal, I’m all about sharing easy, tasty recipes that actually work.


