
Crispy Porchetta - Italian Roasted Pork Recipe
Crispy Porchetta - Italian Roasted Pork Recipe
- Serves: 10 People
- Prepare Time: 60 minutes
- Cooking Time: 4-5 hours
- Calories: -
- Difficulty: Hard
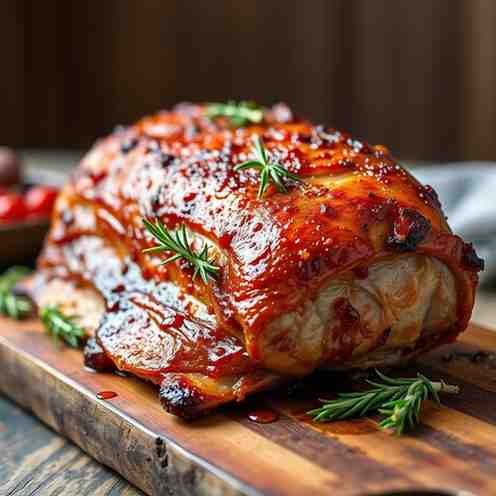
Welcome to the ultimate guide for making truly authentic Italian porchetta! If you've ever dreamt of serving a show-stopping roast pork slices with impossibly crispy skin on pork and tender, aromatic meat, you're in the right place. Porchetta isn't just a meal; it's a celebration of Italian culinary tradition, a symphony of herbs, and a testament to patience. Many recipes promise sliced pork roast perfection, but ours is meticulously crafted to ensure you achieve that coveted crackling and succulent whole pork loin (or rather, the perfect combination of belly and loin!) every single time.
This isn't just another recipe; it's a deep dive into the techniques, ingredients, and secrets behind a legendary dish. Whether you're a seasoned chef or a curious beginner looking to master meat for roast, we'll walk you through every step, from selecting the ideal center cut pork loin to achieving that glorious high-heat crisp finish. Get ready to transform your kitchen into a Roman trattoria and impress everyone with the most flavorful, crispy porchetta they've ever tasted.
This recipe delivers on all the promises: incredibly crispy skin, melt-in-your-mouth juicy meat, and an aromatic blend of traditional Italian herbs. Perfect for gatherings or a truly special family meal.
Ingredients
Directions
- Prep the Pork
- Score Skin: Lay the pork belly skin-side up on a clean surface. Using a very sharp knife or a clean utility blade, carefully score the skin in a crosshatch pattern, about 1/4 to 1/2 inch deep, without cutting into the meat itself. This helps the fat render and the skin crisp up. Visual cues for proper scoring: You should see the fat layer beneath the skin, but not the red meat.
- Remove Membrane: Flip the belly over. On the meat side, remove any silverskin or tough membranes if present.
- Dry Brine: Pat the entire pork belly and loin very dry with paper towels. Rub the skin generously with kosher salt (about 1-2 tablespoons). This initial dry brining helps draw out moisture, crucial for crispy crackling later. Place the pork on a wire rack set over a baking sheet, uncovered, in the refrigerator for at least 12 hours, and preferably 24-48 hours. This step is critical for drying the skin.
- Season & Roll
- Herb Paste: In a small bowl, combine the chopped rosemary, sage, crushed fennel seeds, minced garlic, olive oil, salt, pepper, and citrus zest (if using). Mix well to form a thick paste.
- Season Meat: Remove the pork from the fridge. Pat the skin very dry again. Lay the pork belly skin-side down. Spread the herb paste evenly over the entire meat surface of the belly, leaving a small border around the edges.
- Position Loin: Place the pork loin lengthwise along one edge of the belly.
- Rolling Technique: Tightly roll the pork belly around the loin, starting from the side with the loin. Roll it as tightly as possible to ensure a compact roast.
- Tying Evenly: Secure the rolled porchetta with butcher's twine at 1-inch intervals. Start by tying a knot at one end, then loop the twine around the roast, pulling it taut, and securing it. Repeat this along the entire length. Ensure the roast is uniformly tight to promote even cooking and crisping.
- Dry Overnight (if possible)
- Why it matters: This step is paramount for achieving incredible crackling. Air circulation around the skin allows it to dry out thoroughly, which is the secret to a shatteringly crisp finish.
- Timing options: If you didn't dry brine the skin overnight, or even if you did, tying the porchetta and letting it air dry in the refrigerator, uncovered, for another 12-24 hours will significantly improve the crispiness.
- Roast — Low & Slow
- Preheat: Preheat your oven to 300°F (150°C).
- Initial Roast: Place the porchetta on a roasting rack set inside a roasting pan, skin-side up. Roast for 3 to 4 hours, or until the internal temperature of the pork loin reaches 145°F (63°C) and the belly reaches 160°F (71°C). Internal temp target: Use a reliable meat thermometer inserted into the thickest part of the loin, avoiding the belly fat. This slow roasting phase renders the fat and ensures the meat is incredibly tender.
- High-Heat Crisp Finish
- Blast Oven: Once the internal temperature is reached, increase the oven temperature to 400-450°F (200-230°C).
- Monitoring Crackling: Continue roasting for another 30-60 minutes, or until the skin is deeply golden brown, blistered, and uniformly crispy. Keep a close eye on it to prevent burning. If one side is crisping faster, rotate the pan.
- Rest: Remove the porchetta from the oven and let it rest on a cutting board for at least 20-30 minutes before slicing. This allows the juices to redistribute, ensuring a tender and moist roast pork slices.
Crispy Porchetta - Italian Roasted Pork Recipe

- Serves: 10 People
- Prepare Time: 60 minutes
- Cooking Time: 4-5 hours
- Calories: -
- Difficulty: Hard
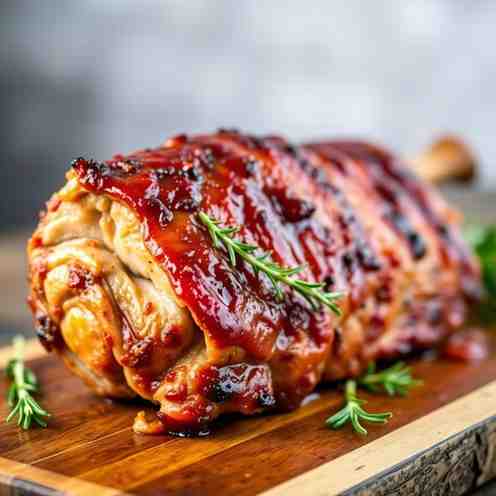
Welcome to the ultimate guide for making truly authentic Italian porchetta! If you've ever dreamt of serving a show-stopping roast pork slices with impossibly crispy skin on pork and tender, aromatic meat, you're in the right place. Porchetta isn't just a meal; it's a celebration of Italian culinary tradition, a symphony of herbs, and a testament to patience. Many recipes promise sliced pork roast perfection, but ours is meticulously crafted to ensure you achieve that coveted crackling and succulent whole pork loin (or rather, the perfect combination of belly and loin!) every single time.
This isn't just another recipe; it's a deep dive into the techniques, ingredients, and secrets behind a legendary dish. Whether you're a seasoned chef or a curious beginner looking to master meat for roast, we'll walk you through every step, from selecting the ideal center cut pork loin to achieving that glorious high-heat crisp finish. Get ready to transform your kitchen into a Roman trattoria and impress everyone with the most flavorful, crispy porchetta they've ever tasted.
This recipe delivers on all the promises: incredibly crispy skin, melt-in-your-mouth juicy meat, and an aromatic blend of traditional Italian herbs. Perfect for gatherings or a truly special family meal.
Ingredients
Directions
- Prep the Pork
- Score Skin: Lay the pork belly skin-side up on a clean surface. Using a very sharp knife or a clean utility blade, carefully score the skin in a crosshatch pattern, about 1/4 to 1/2 inch deep, without cutting into the meat itself. This helps the fat render and the skin crisp up. Visual cues for proper scoring: You should see the fat layer beneath the skin, but not the red meat.
- Remove Membrane: Flip the belly over. On the meat side, remove any silverskin or tough membranes if present.
- Dry Brine: Pat the entire pork belly and loin very dry with paper towels. Rub the skin generously with kosher salt (about 1-2 tablespoons). This initial dry brining helps draw out moisture, crucial for crispy crackling later. Place the pork on a wire rack set over a baking sheet, uncovered, in the refrigerator for at least 12 hours, and preferably 24-48 hours. This step is critical for drying the skin.
- Season & Roll
- Herb Paste: In a small bowl, combine the chopped rosemary, sage, crushed fennel seeds, minced garlic, olive oil, salt, pepper, and citrus zest (if using). Mix well to form a thick paste.
- Season Meat: Remove the pork from the fridge. Pat the skin very dry again. Lay the pork belly skin-side down. Spread the herb paste evenly over the entire meat surface of the belly, leaving a small border around the edges.
- Position Loin: Place the pork loin lengthwise along one edge of the belly.
- Rolling Technique: Tightly roll the pork belly around the loin, starting from the side with the loin. Roll it as tightly as possible to ensure a compact roast.
- Tying Evenly: Secure the rolled porchetta with butcher's twine at 1-inch intervals. Start by tying a knot at one end, then loop the twine around the roast, pulling it taut, and securing it. Repeat this along the entire length. Ensure the roast is uniformly tight to promote even cooking and crisping.
- Dry Overnight (if possible)
- Why it matters: This step is paramount for achieving incredible crackling. Air circulation around the skin allows it to dry out thoroughly, which is the secret to a shatteringly crisp finish.
- Timing options: If you didn't dry brine the skin overnight, or even if you did, tying the porchetta and letting it air dry in the refrigerator, uncovered, for another 12-24 hours will significantly improve the crispiness.
- Roast — Low & Slow
- Preheat: Preheat your oven to 300°F (150°C).
- Initial Roast: Place the porchetta on a roasting rack set inside a roasting pan, skin-side up. Roast for 3 to 4 hours, or until the internal temperature of the pork loin reaches 145°F (63°C) and the belly reaches 160°F (71°C). Internal temp target: Use a reliable meat thermometer inserted into the thickest part of the loin, avoiding the belly fat. This slow roasting phase renders the fat and ensures the meat is incredibly tender.
- High-Heat Crisp Finish
- Blast Oven: Once the internal temperature is reached, increase the oven temperature to 400-450°F (200-230°C).
- Monitoring Crackling: Continue roasting for another 30-60 minutes, or until the skin is deeply golden brown, blistered, and uniformly crispy. Keep a close eye on it to prevent burning. If one side is crisping faster, rotate the pan.
- Rest: Remove the porchetta from the oven and let it rest on a cutting board for at least 20-30 minutes before slicing. This allows the juices to redistribute, ensuring a tender and moist roast pork slices.
You may also like


Hey there! I’m just someone who seriously loves good food and believes that cooking doesn’t have to be complicated to be amazing. Whether it’s a quick weeknight dinner or a cozy weekend meal, I’m all about sharing easy, tasty recipes that actually work.


