
Salt Cured Ham - Njeguški Pršut Recipe
Salt Cured Ham - Njeguški Pršut Recipe

- Serves: 1 People
- Prepare Time: 2 hours (ac
- Cooking Time: 0 minutes
- Calories: -
- Difficulty: Hard
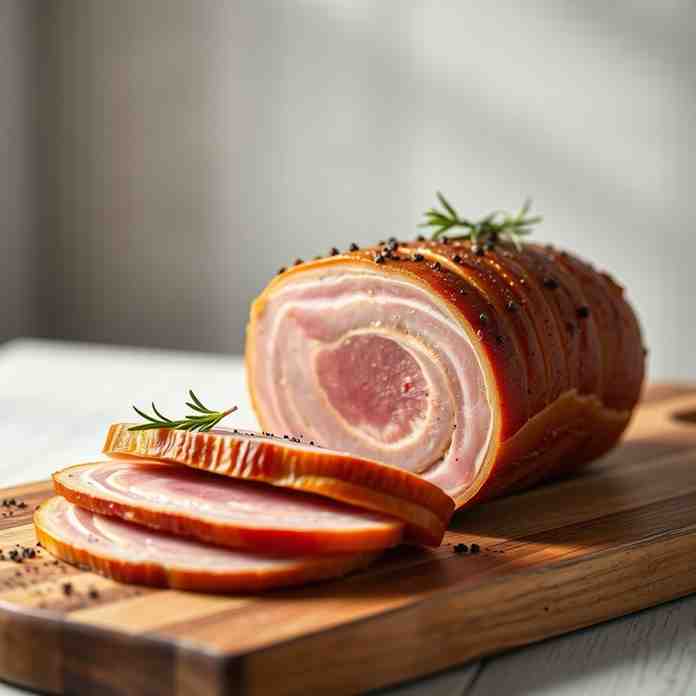
Dreaming of crafting your own artisanal salt cured ham? You're in the right place! Get ready to dive deep into the ancient, revered tradition of Montenegrin Njeguški Pršut. This isn't just any dry cured meat recipe; it's a journey into the heart of Montenegrin culinary heritage, a process perfected over centuries in the village of Njeguši. Njeguški Pršut is a specific type of prosciutto cured ham, known for its distinctive flavor, which comes from a unique combination of mountain air, precise salting, and often, a touch of gentle smoking.
Many recipes for country ham preparation might seem daunting, but we're here to guide you every step of the way. This authentic method will teach you how to prepare a ham that's not only safe and delicious but also a true testament to traditional dried and cured meats. By the end of this comprehensive guide, you'll have the knowledge to create your very own, perfectly sliced, flavorful country cured ham that will impress everyone who tastes it. Let's get started on making the best cured meats for charcuterie right in your home!
Ingredients
Directions
- 1: Prep the Meat
- Trim & Weigh: Carefully inspect your pork leg. Trim any ragged edges, loose bits of meat, or excessive skin, but leave a good layer of fat (about 1/2 to 1 inch thick) as it protects the meat during curing. If your leg comes with the foot attached, you can remove it or leave it on, depending on your preference (traditionally, it’s often left on). Weigh the prepared pork leg precisely. This weight is critical for calculating your salt ratios.
- Calculate Salt Ratios: Based on your exact pork leg weight, calculate the amount of coarse sea salt and curing salt #2 you'll need. Remember, curing salt #2 should be 0.25% of the total meat weight. For example, if your leg weighs 20 pounds (9 kg):
- Coarse Sea Salt: ~4-6 pounds (1.8-2.7 kg)
- Curing Salt #2: 0.25% of 20 lbs = 0.05 lbs or 0.8 ounces (approx. 22 grams). Use a precise digital scale for this!
- 2: Dry Salt Cure
- Rub Meat: In a bowl, thoroughly mix your calculated coarse sea salt and curing salt #2 (and optional spices, if using). Generously rub this salt mixture all over the pork leg, ensuring every surface, including the bone cavity and skin side, is completely coated. Don't be shy; the meat will only absorb what it needs.
- Place in Container: Place the heavily salted pork leg in a clean, non-reactive container (a large food-grade plastic tub or brining container works well). The container should be large enough to hold the leg with some space around it to collect moisture.
- Turn Daily: For the first week, turn the leg daily, redistributing any accumulated liquid and ensuring the salt remains in contact with all surfaces. After the first week, turning every 2-3 days is sufficient.
- Exact Duration Table: The salting period is crucial and depends on the weight of your pork leg. A general rule of thumb is 1 day per 2 pounds (approx. 1 kg) of meat.
- For a 18-20 lb (8-9 kg) leg: Salt for 9-10 days.
- For a 20-22 lb (9-10 kg) leg: Salt for 10-11 days.
- For a 22-25 lb (10-11 kg) leg: Salt for 11-12 days.
- During this period, keep the container in a cool place, ideally between 36-40°F (2-4°C).
- 3: Pressing & Draining
- Rinse & Pat Dry: After the salting period, thoroughly rinse the pork leg under cold running water to remove all excess salt and spices from the surface. Pat it completely dry with clean paper towels or a clean cloth. This step is important to prevent over-salting and to prepare for the next phase.
- Set Up Weights: Place the rinsed and dried ham on a clean, sturdy surface or a rack over a tray. Place a heavy, flat object (like a clean wooden board or another food-grade weight) on top of the ham. Apply pressure evenly. The goal here is to press out any remaining moisture and help compact the meat. This pressing phase typically lasts for 7-10 days. During this time, continue to keep the ham in a cool environment (36-40°F / 2-4°C).
- 4: Optional Smoking
- When & How Long: After the pressing phase, if you desire the traditional smoky flavor of Njeguški Pršut, this is when you'll smoke it. The smoking process is typically cold smoking, meaning the temperature should remain low, ideally below 68°F (20°C). Smoke the ham intermittently for 2-4 weeks, depending on your desired smokiness. This usually means smoking for a few hours each day, then letting it air out.
- Wood Choices: Use mild hardwoods like beechwood, oak, or cherry. Avoid strong, resinous woods. The goal is a subtle smoky aroma, not an overpowering flavor. Ensure good airflow during and after smoking.
- 5: Air Drying & Aging
- Hang the Ham: After pressing (and optional smoking), tie a strong butcher's twine securely around the hock of the ham. Hang it in a dedicated curing chamber or a cool, well-ventilated area. Traditionally, this is done in a "sušara" (drying house) in Montenegro.
- Temperature & Humidity Chart: This is the longest and most critical phase.
- Initial Drying (1-2 months): Aim for temperatures around 50-60°F (10-15°C) and relative humidity of 70-75%. Good airflow is essential.
- Aging (Remaining 5-10 months): Gradually increase the temperature slightly to 55-65°F (13-18°C) and lower the humidity to 60-70%.
- Important: Consistency is key. Fluctuations can lead to issues. A thermometer and hygrometer are invaluable here.
- Expected Timeline: The entire air drying and aging process can take anywhere from 6 to 12 months, or even longer, depending on the size of the ham and desired flavor development. The ham is ready when it has lost approximately 30-35% of its initial weight, feels firm to the touch, and has a rich, developed aroma.
Salt Cured Ham - Njeguški Pršut Recipe
- Serves: 1 People
- Prepare Time: 2 hours (ac
- Cooking Time: 0 minutes
- Calories: -
- Difficulty: Hard
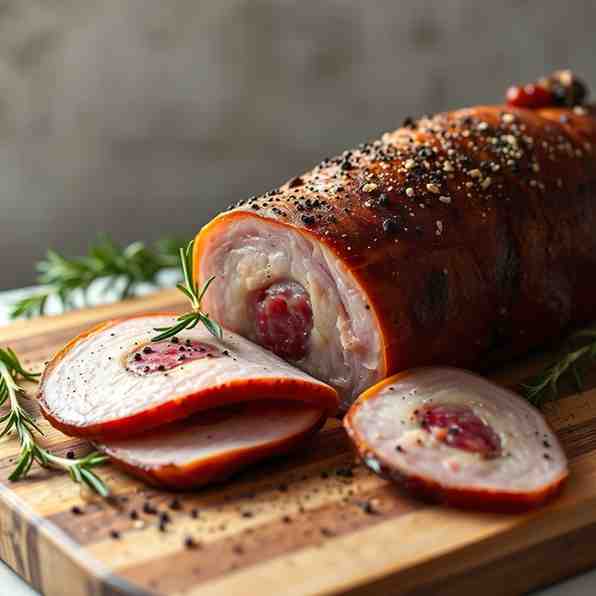
Dreaming of crafting your own artisanal salt cured ham? You're in the right place! Get ready to dive deep into the ancient, revered tradition of Montenegrin Njeguški Pršut. This isn't just any dry cured meat recipe; it's a journey into the heart of Montenegrin culinary heritage, a process perfected over centuries in the village of Njeguši. Njeguški Pršut is a specific type of prosciutto cured ham, known for its distinctive flavor, which comes from a unique combination of mountain air, precise salting, and often, a touch of gentle smoking.
Many recipes for country ham preparation might seem daunting, but we're here to guide you every step of the way. This authentic method will teach you how to prepare a ham that's not only safe and delicious but also a true testament to traditional dried and cured meats. By the end of this comprehensive guide, you'll have the knowledge to create your very own, perfectly sliced, flavorful country cured ham that will impress everyone who tastes it. Let's get started on making the best cured meats for charcuterie right in your home!
Ingredients
Directions
- 1: Prep the Meat
- Trim & Weigh: Carefully inspect your pork leg. Trim any ragged edges, loose bits of meat, or excessive skin, but leave a good layer of fat (about 1/2 to 1 inch thick) as it protects the meat during curing. If your leg comes with the foot attached, you can remove it or leave it on, depending on your preference (traditionally, it’s often left on). Weigh the prepared pork leg precisely. This weight is critical for calculating your salt ratios.
- Calculate Salt Ratios: Based on your exact pork leg weight, calculate the amount of coarse sea salt and curing salt #2 you'll need. Remember, curing salt #2 should be 0.25% of the total meat weight. For example, if your leg weighs 20 pounds (9 kg):
- Coarse Sea Salt: ~4-6 pounds (1.8-2.7 kg)
- Curing Salt #2: 0.25% of 20 lbs = 0.05 lbs or 0.8 ounces (approx. 22 grams). Use a precise digital scale for this!
- 2: Dry Salt Cure
- Rub Meat: In a bowl, thoroughly mix your calculated coarse sea salt and curing salt #2 (and optional spices, if using). Generously rub this salt mixture all over the pork leg, ensuring every surface, including the bone cavity and skin side, is completely coated. Don't be shy; the meat will only absorb what it needs.
- Place in Container: Place the heavily salted pork leg in a clean, non-reactive container (a large food-grade plastic tub or brining container works well). The container should be large enough to hold the leg with some space around it to collect moisture.
- Turn Daily: For the first week, turn the leg daily, redistributing any accumulated liquid and ensuring the salt remains in contact with all surfaces. After the first week, turning every 2-3 days is sufficient.
- Exact Duration Table: The salting period is crucial and depends on the weight of your pork leg. A general rule of thumb is 1 day per 2 pounds (approx. 1 kg) of meat.
- For a 18-20 lb (8-9 kg) leg: Salt for 9-10 days.
- For a 20-22 lb (9-10 kg) leg: Salt for 10-11 days.
- For a 22-25 lb (10-11 kg) leg: Salt for 11-12 days.
- During this period, keep the container in a cool place, ideally between 36-40°F (2-4°C).
- 3: Pressing & Draining
- Rinse & Pat Dry: After the salting period, thoroughly rinse the pork leg under cold running water to remove all excess salt and spices from the surface. Pat it completely dry with clean paper towels or a clean cloth. This step is important to prevent over-salting and to prepare for the next phase.
- Set Up Weights: Place the rinsed and dried ham on a clean, sturdy surface or a rack over a tray. Place a heavy, flat object (like a clean wooden board or another food-grade weight) on top of the ham. Apply pressure evenly. The goal here is to press out any remaining moisture and help compact the meat. This pressing phase typically lasts for 7-10 days. During this time, continue to keep the ham in a cool environment (36-40°F / 2-4°C).
- 4: Optional Smoking
- When & How Long: After the pressing phase, if you desire the traditional smoky flavor of Njeguški Pršut, this is when you'll smoke it. The smoking process is typically cold smoking, meaning the temperature should remain low, ideally below 68°F (20°C). Smoke the ham intermittently for 2-4 weeks, depending on your desired smokiness. This usually means smoking for a few hours each day, then letting it air out.
- Wood Choices: Use mild hardwoods like beechwood, oak, or cherry. Avoid strong, resinous woods. The goal is a subtle smoky aroma, not an overpowering flavor. Ensure good airflow during and after smoking.
- 5: Air Drying & Aging
- Hang the Ham: After pressing (and optional smoking), tie a strong butcher's twine securely around the hock of the ham. Hang it in a dedicated curing chamber or a cool, well-ventilated area. Traditionally, this is done in a "sušara" (drying house) in Montenegro.
- Temperature & Humidity Chart: This is the longest and most critical phase.
- Initial Drying (1-2 months): Aim for temperatures around 50-60°F (10-15°C) and relative humidity of 70-75%. Good airflow is essential.
- Aging (Remaining 5-10 months): Gradually increase the temperature slightly to 55-65°F (13-18°C) and lower the humidity to 60-70%.
- Important: Consistency is key. Fluctuations can lead to issues. A thermometer and hygrometer are invaluable here.
- Expected Timeline: The entire air drying and aging process can take anywhere from 6 to 12 months, or even longer, depending on the size of the ham and desired flavor development. The ham is ready when it has lost approximately 30-35% of its initial weight, feels firm to the touch, and has a rich, developed aroma.
You may also like


Hey there! I’m just someone who seriously loves good food and believes that cooking doesn’t have to be complicated to be amazing. Whether it’s a quick weeknight dinner or a cozy weekend meal, I’m all about sharing easy, tasty recipes that actually work.


