
Poi - Hawaiian Dish
Poi - Hawaiian Dish
- Serves: 4 People
- Prepare Time: 15 minutes
- Cooking Time: 75 minutes
- Calories: -
- Difficulty: Medium
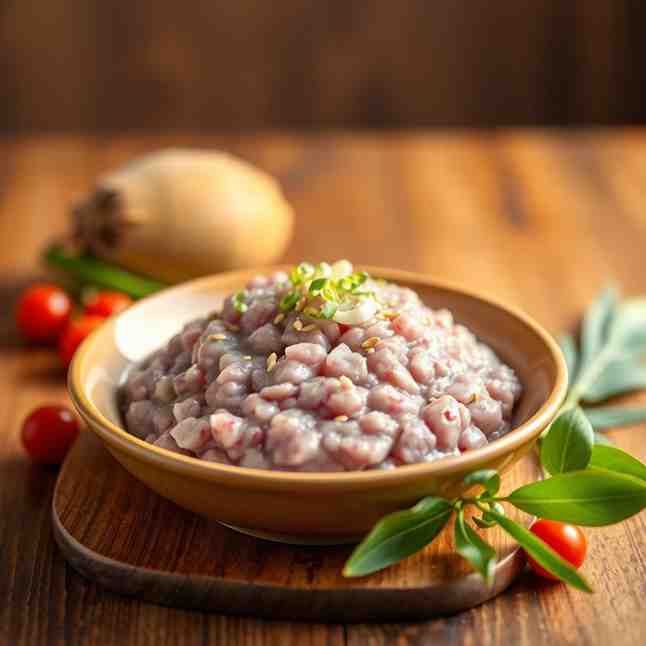
Aloha, future poi masters! If you've ever dreamt of bringing the authentic taste of the islands to your kitchen, you're in the right place. Poi, a revered staple of Hawaiian cuisine, is more than just food—it's a connection to tradition, community, and the land. Made from the humble taro (or kalo) root, this unique hawaiian dish offers a subtly sweet, earthy flavor that’s truly unforgettable. Whether you've tasted it before or are completely new to its charm, this guide is designed to empower you. We're diving deep into a real, from-scratch poi hawaiian dish recipe, showing you exactly how to transform taro into this beloved delicacy, and even how to perfectly serve it for your next luau. Get ready to pound some kalo!
Ingredients
Directions
- Prep the Taro
- Scrub it Clean: Give your taro roots a good scrub under cold running water to remove any dirt. Don't worry about peeling them yet – it's much easier after cooking!
- Safety First: Remember, raw taro can cause irritation due to calcium oxalate crystals. It's absolutely crucial that your taro is cooked completely through to neutralize these compounds. We'll make sure it's super tender!
- Cook Until Truly Tender
- Boil or Steam: For the best results, we recommend boiling. Place the scrubbed taro roots in a large pot and cover them with at least an inch or two of water. Bring to a boil, then reduce heat to a simmer, covering the pot.
- Cook Time: Simmer for 45-90 minutes, depending on the size and age of your taro.
- Check for Doneness: The taro is ready when a fork slides into the thickest part with absolutely no resistance. The center should feel soft and creamy, not chalky or firm. If it's still firm, keep simmering!
- Peel and Break Down
- Cool Slightly: Once cooked, carefully remove the taro from the hot water and let it cool just enough to handle comfortably. Peeling while warm is easiest and minimizes waste.
- Peel Away: Use a paring knife or your hands to peel the skin from the cooked taro. It should come off quite easily.Chop It Up: Cut the peeled taro into rough chunks, small enough for your mashing tool or food processor.
- Mash/Process into a Smooth Paste
- For Best Texture: If you have a sturdy food processor, this is your best friend for super smooth poi. Add the taro chunks in batches and process until a smooth, thick paste forms. You might need to scrape down the sides a few times.
- Mashing Option: If using a strong potato masher or a traditional poi pounder (pōhaku kuʻi ʻai), place the chunks in a large, sturdy bowl. Mash thoroughly until as smooth as possible. This takes some elbow grease!
- What "Smooth" Looks Like: Aim for a consistency similar to thick dough or very stiff mashed potatoes at this stage. There shouldn't be any large lumps.
- Add Water Gradually to Hit Your Texture
- Start Small: Begin by adding about 1/2 cup of water to your taro paste. Mix well, either by hand, with a sturdy spoon, or by pulsing in the food processor.
- The "Finger" Test: This is where the magic happens! Poi texture is often described by how many fingers it takes to scoop it.
- Three-finger poi: Thicker, almost like hummus. Great for beginners.
- Two-finger poi: The classic, slightly looser, smooth consistency.
- One-finger poi: Very thin, almost soupy (usually achieved through fermentation).
- Adjust Slowly: Continue adding water, a tablespoon or two at a time, mixing thoroughly after each addition. Dip your fingers in and see how it feels. Stop when you reach your desired "finger" consistency. For first-timers, aim for two or three-finger poi.
- Optional: Ferment for Sour Poi (Still the Same Recipe)
- Cover & Hold: If you prefer the tangy, slightly sour flavor of fermented poi, place your freshly made poi in an airtight container.
- Room Temp: Leave it at a cool room temperature (ideally 68-75°F / 20-24°C).
- How Long?
- Mildly Tangy: 1-2 days
- Distinctly Sour: 3-5 days
- Stir it once a day. The poi will naturally thin out and develop its characteristic sourness. Don't worry if you see a thin layer of liquid on top; just stir it back in.
- Store It Right
- Water Layer: To prevent a crust from forming and keep your poi fresh, pour a thin layer of water (about 1/4 inch) directly over the surface of the poi in its storage container. This creates a protective seal.
- Refrigerate: Store the covered poi in the refrigerator.
- Stir Before Serving: Always stir the poi thoroughly before serving to reincorporate any separated water and ensure a smooth consistency.
Poi - Hawaiian Dish
- Serves: 4 People
- Prepare Time: 15 minutes
- Cooking Time: 75 minutes
- Calories: -
- Difficulty: Medium
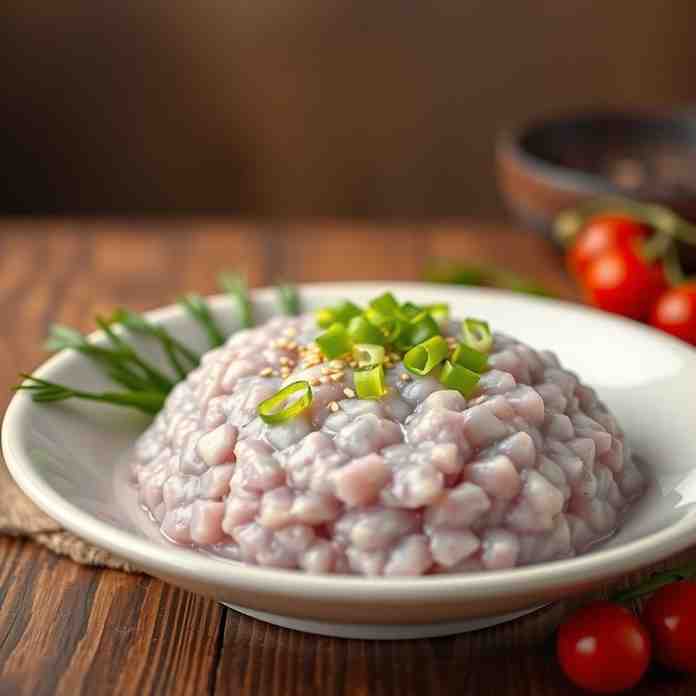
Aloha, future poi masters! If you've ever dreamt of bringing the authentic taste of the islands to your kitchen, you're in the right place. Poi, a revered staple of Hawaiian cuisine, is more than just food—it's a connection to tradition, community, and the land. Made from the humble taro (or kalo) root, this unique hawaiian dish offers a subtly sweet, earthy flavor that’s truly unforgettable. Whether you've tasted it before or are completely new to its charm, this guide is designed to empower you. We're diving deep into a real, from-scratch poi hawaiian dish recipe, showing you exactly how to transform taro into this beloved delicacy, and even how to perfectly serve it for your next luau. Get ready to pound some kalo!
Ingredients
Directions
- Prep the Taro
- Scrub it Clean: Give your taro roots a good scrub under cold running water to remove any dirt. Don't worry about peeling them yet – it's much easier after cooking!
- Safety First: Remember, raw taro can cause irritation due to calcium oxalate crystals. It's absolutely crucial that your taro is cooked completely through to neutralize these compounds. We'll make sure it's super tender!
- Cook Until Truly Tender
- Boil or Steam: For the best results, we recommend boiling. Place the scrubbed taro roots in a large pot and cover them with at least an inch or two of water. Bring to a boil, then reduce heat to a simmer, covering the pot.
- Cook Time: Simmer for 45-90 minutes, depending on the size and age of your taro.
- Check for Doneness: The taro is ready when a fork slides into the thickest part with absolutely no resistance. The center should feel soft and creamy, not chalky or firm. If it's still firm, keep simmering!
- Peel and Break Down
- Cool Slightly: Once cooked, carefully remove the taro from the hot water and let it cool just enough to handle comfortably. Peeling while warm is easiest and minimizes waste.
- Peel Away: Use a paring knife or your hands to peel the skin from the cooked taro. It should come off quite easily.Chop It Up: Cut the peeled taro into rough chunks, small enough for your mashing tool or food processor.
- Mash/Process into a Smooth Paste
- For Best Texture: If you have a sturdy food processor, this is your best friend for super smooth poi. Add the taro chunks in batches and process until a smooth, thick paste forms. You might need to scrape down the sides a few times.
- Mashing Option: If using a strong potato masher or a traditional poi pounder (pōhaku kuʻi ʻai), place the chunks in a large, sturdy bowl. Mash thoroughly until as smooth as possible. This takes some elbow grease!
- What "Smooth" Looks Like: Aim for a consistency similar to thick dough or very stiff mashed potatoes at this stage. There shouldn't be any large lumps.
- Add Water Gradually to Hit Your Texture
- Start Small: Begin by adding about 1/2 cup of water to your taro paste. Mix well, either by hand, with a sturdy spoon, or by pulsing in the food processor.
- The "Finger" Test: This is where the magic happens! Poi texture is often described by how many fingers it takes to scoop it.
- Three-finger poi: Thicker, almost like hummus. Great for beginners.
- Two-finger poi: The classic, slightly looser, smooth consistency.
- One-finger poi: Very thin, almost soupy (usually achieved through fermentation).
- Adjust Slowly: Continue adding water, a tablespoon or two at a time, mixing thoroughly after each addition. Dip your fingers in and see how it feels. Stop when you reach your desired "finger" consistency. For first-timers, aim for two or three-finger poi.
- Optional: Ferment for Sour Poi (Still the Same Recipe)
- Cover & Hold: If you prefer the tangy, slightly sour flavor of fermented poi, place your freshly made poi in an airtight container.
- Room Temp: Leave it at a cool room temperature (ideally 68-75°F / 20-24°C).
- How Long?
- Mildly Tangy: 1-2 days
- Distinctly Sour: 3-5 days
- Stir it once a day. The poi will naturally thin out and develop its characteristic sourness. Don't worry if you see a thin layer of liquid on top; just stir it back in.
- Store It Right
- Water Layer: To prevent a crust from forming and keep your poi fresh, pour a thin layer of water (about 1/4 inch) directly over the surface of the poi in its storage container. This creates a protective seal.
- Refrigerate: Store the covered poi in the refrigerator.
- Stir Before Serving: Always stir the poi thoroughly before serving to reincorporate any separated water and ensure a smooth consistency.
You may also like


Hey there! I’m just someone who seriously loves good food and believes that cooking doesn’t have to be complicated to be amazing. Whether it’s a quick weeknight dinner or a cozy weekend meal, I’m all about sharing easy, tasty recipes that actually work.


