
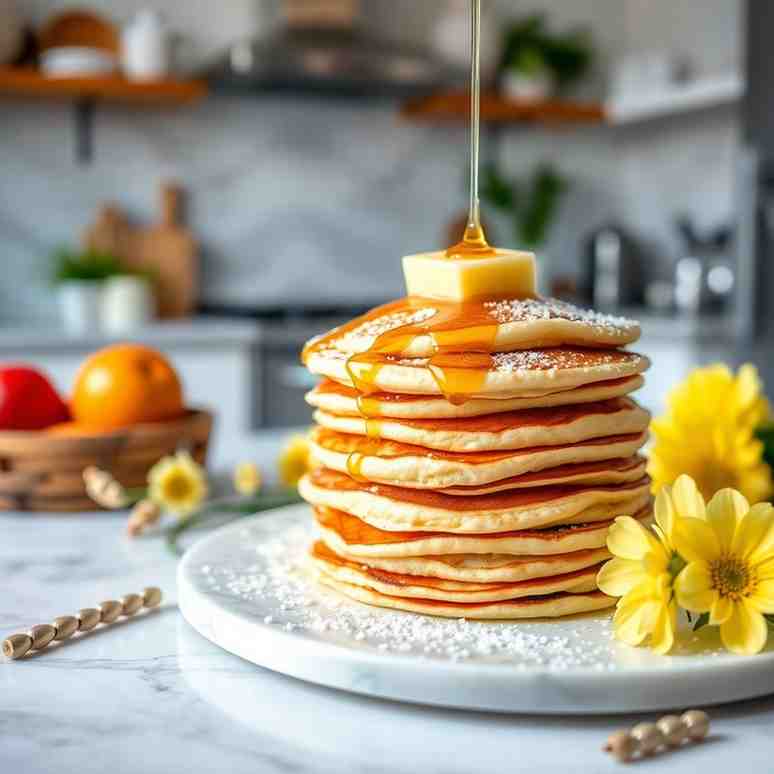
Belgian Pancakes Recipe Thin & Tender Perfection
Belgian Pancakes Recipe Thin & Tender Perfection

- Serves: 4 People
- Prepare Time: 15 minutes
- Cooking Time: 25 minutes
- Calories: -
- Difficulty: Easy
Welcome to the wonderful world of Belgian Pancakes (or as they're known in Belgium, pannenkoeken)! If you're tired of thick, fluffy American-style pancakes and are looking for something elegantly thin, tender, and incredibly versatile, you've hit the jackpot. These delightful, crepe-like pancakes are slightly enriched and boast a delicate texture that makes them perfect for rolling around your favorite fillings – whether you’re craving a sweet treat with pancakes with chocolate and bananas, or a savory wrap with ham and cheese.
Forget the myth that thin pancakes are tricky! This definitive recipe has been tested and perfected for US kitchens, ensuring a smooth, easy process from batter to plate. We'll guide you through making a simple batter that yields consistently perfect, rollable pannenkoeken every time. So, if you're ready to explore a pancake experience that’s a little different, a little lighter, and a whole lot of delicious, let's get cooking!
Ingredients
Directions
- Mix the Batter
- Whisk Wet Ingredients: In a medium mixing bowl, whisk the eggs and milk together until smooth and slightly frothy.
- Add Flour Gradually: Gradually add the all-purpose flour to the egg mixture, whisking continuously to avoid lumps. Continue whisking until the batter is smooth and resembles a thick cream.
- Incorporate Flavorings: Whisk in the melted butter, sugar, salt, and the optional vanilla extract until well combined.
- Gentle Stir with Sparkling Water: Gently stir in the sparkling water or club soda. Be careful not to overmix at this stage; just mix until the batter is thin and pourable, similar in consistency to heavy cream. The carbonation is key for lightness!
- Optional Rest: For the best results, let the batter rest in the fridge for 20-30 minutes. This allows the flour to fully hydrate, resulting in more tender and less prone-to-tear pancakes.
- Heat the Pan
- Preheat Correctly: Place a 10-12-inch non-stick skillet or well-seasoned crepe pan over medium to medium-high heat. Proper preheating is crucial for non-stick success.
- Test the Heat: To test if your pan is ready, drop a tiny bit of batter into it. It should sizzle immediately but not burn instantly. If it smokes or burns, lower the heat slightly.
- Lightly Grease: Lightly grease the pan with a small amount of butter or oil. Use a paper towel to wipe off any excess, leaving just a thin film. This prevents sticking without making the pancakes greasy.
- Cook the Belgian Pancakes
- Ladle and Swirl: Ladle about ¼ cup of batter into the center of the hot, lightly greased pan. Immediately tilt and swirl the pan in a circular motion to coat the entire bottom in a thin, even layer of batter.
- Cook First Side: Cook for 1-2 minutes, or until the surface of the pancake looks dry, the edges appear set and faintly golden, and you might see a few small bubbles appear.
- Flip and Finish: Gently loosen the edges of the pancake with a thin spatula. Slide the spatula underneath and flip the pancake confidently. Cook for another 15-30 seconds on the second side, just until light golden spots appear. These pancakes should remain soft and flexible, not overly browned.
- Transfer and Repeat: Transfer the cooked pancake to a warm plate. Repeat the cooking process with the remaining batter, stacking the pancakes as you go. Place a clean kitchen towel over the stacked pancakes to keep them warm and tender.
- Keep Warm & Serve
- Keep Warm: If you're making a large batch, you can keep the finished pancakes warm by placing the stack on an oven-safe plate in a low oven (around 200°F / 95°C) while you finish cooking the rest.
- Serve Promptly: Serve your delicate Belgian Pancakes immediately with your favorite toppings! Remember, they should stay soft and flexible, perfect for rolling.
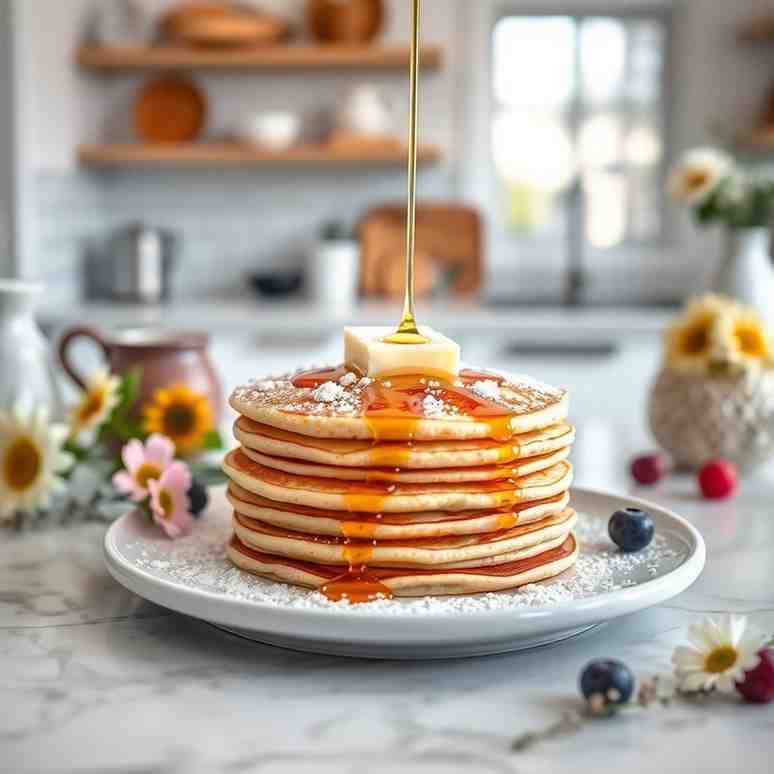
Belgian Pancakes Recipe Thin & Tender Perfection
- Serves: 4 People
- Prepare Time: 15 minutes
- Cooking Time: 25 minutes
- Calories: -
- Difficulty: Easy
Welcome to the wonderful world of Belgian Pancakes (or as they're known in Belgium, pannenkoeken)! If you're tired of thick, fluffy American-style pancakes and are looking for something elegantly thin, tender, and incredibly versatile, you've hit the jackpot. These delightful, crepe-like pancakes are slightly enriched and boast a delicate texture that makes them perfect for rolling around your favorite fillings – whether you’re craving a sweet treat with pancakes with chocolate and bananas, or a savory wrap with ham and cheese.
Forget the myth that thin pancakes are tricky! This definitive recipe has been tested and perfected for US kitchens, ensuring a smooth, easy process from batter to plate. We'll guide you through making a simple batter that yields consistently perfect, rollable pannenkoeken every time. So, if you're ready to explore a pancake experience that’s a little different, a little lighter, and a whole lot of delicious, let's get cooking!
Ingredients
Directions
- Mix the Batter
- Whisk Wet Ingredients: In a medium mixing bowl, whisk the eggs and milk together until smooth and slightly frothy.
- Add Flour Gradually: Gradually add the all-purpose flour to the egg mixture, whisking continuously to avoid lumps. Continue whisking until the batter is smooth and resembles a thick cream.
- Incorporate Flavorings: Whisk in the melted butter, sugar, salt, and the optional vanilla extract until well combined.
- Gentle Stir with Sparkling Water: Gently stir in the sparkling water or club soda. Be careful not to overmix at this stage; just mix until the batter is thin and pourable, similar in consistency to heavy cream. The carbonation is key for lightness!
- Optional Rest: For the best results, let the batter rest in the fridge for 20-30 minutes. This allows the flour to fully hydrate, resulting in more tender and less prone-to-tear pancakes.
- Heat the Pan
- Preheat Correctly: Place a 10-12-inch non-stick skillet or well-seasoned crepe pan over medium to medium-high heat. Proper preheating is crucial for non-stick success.
- Test the Heat: To test if your pan is ready, drop a tiny bit of batter into it. It should sizzle immediately but not burn instantly. If it smokes or burns, lower the heat slightly.
- Lightly Grease: Lightly grease the pan with a small amount of butter or oil. Use a paper towel to wipe off any excess, leaving just a thin film. This prevents sticking without making the pancakes greasy.
- Cook the Belgian Pancakes
- Ladle and Swirl: Ladle about ¼ cup of batter into the center of the hot, lightly greased pan. Immediately tilt and swirl the pan in a circular motion to coat the entire bottom in a thin, even layer of batter.
- Cook First Side: Cook for 1-2 minutes, or until the surface of the pancake looks dry, the edges appear set and faintly golden, and you might see a few small bubbles appear.
- Flip and Finish: Gently loosen the edges of the pancake with a thin spatula. Slide the spatula underneath and flip the pancake confidently. Cook for another 15-30 seconds on the second side, just until light golden spots appear. These pancakes should remain soft and flexible, not overly browned.
- Transfer and Repeat: Transfer the cooked pancake to a warm plate. Repeat the cooking process with the remaining batter, stacking the pancakes as you go. Place a clean kitchen towel over the stacked pancakes to keep them warm and tender.
- Keep Warm & Serve
- Keep Warm: If you're making a large batch, you can keep the finished pancakes warm by placing the stack on an oven-safe plate in a low oven (around 200°F / 95°C) while you finish cooking the rest.
- Serve Promptly: Serve your delicate Belgian Pancakes immediately with your favorite toppings! Remember, they should stay soft and flexible, perfect for rolling.
The following nutritional values are per serving (one piece of cake) Estimated Calories per serving (1-2 pancakes) 180-250 kcal Estimated Carbohydrates per serving 25-35g Estimated Protein per serving 6-9g Estimated Fat per serving 7-12g Tools and ingredients that can help you cook more easily and consistently. Problem: Mixing pancake batter by hand can be lumpy and messy, taking extra time and effort. Problem: Your pancakes stick, burn, or cook unevenly, making the process frustrating and slow. Problem: Getting consistent pancake sizes is tricky, leading to some being too big and others too small. Problem: Flipping delicate Belgian pancakes can be a disaster, causing them to tear or fold incorrectly. Click any ingredient for detailed nutritional information:Recipe Nutritional Values
Additional Information
Recipe Success Tips
Ingredient Substitutions & Variations
Cultural Variations
Make-Ahead & Storage Instructions
Frequently Asked Questions
Recommended Kitchen Tools
medium mixing bowl
Agitate: No one wants gritty pancakes or to spend ages scrubbing stuck-on batter from countertops.
Solution: A medium mixing bowl and a good whisk make combining ingredients a breeze, ensuring a smooth, lump-free batter in minutes.10-12-inch non-stick or well-seasoned skillet/crepe pan
Agitate: Wasting batter on failed pancakes is a drag, and constantly adjusting heat or battling a sticky pan can really kill your breakfast vibe.
Solution: A quality 10-12-inch non-stick or well-seasoned skillet/crepe pan ensures even heating and easy flipping, saving you time and stress.ladle or ¼ cup measure
Agitate: Uneven pancakes don't just look messy; they cook inconsistently, too!
Solution: A ladle or ¼ cup measure provides the perfect portion every time, making your pancakes uniformly thin and easy to manage.thin spatula
Agitate: Watching your perfectly cooked pancake rip in half is truly heartbreaking.
Solution: A thin spatula slides easily under the pancake, allowing for a clean, confident flip without any tearing.Calories per Ingredient
Resources & References
You may also like


Hey there! I’m just someone who seriously loves good food and believes that cooking doesn’t have to be complicated to be amazing. Whether it’s a quick weeknight dinner or a cozy weekend meal, I’m all about sharing easy, tasty recipes that actually work.


