
Best Kiwi Fruit Tart Recipe - Sweet & Easy Dessert
Best Kiwi Fruit Tart Recipe - Sweet & Easy Dessert

- Serves: 8 People
- Prepare Time: 35 minutes
- Cooking Time: 25 minutes
- Calories: -
- Difficulty: Medium
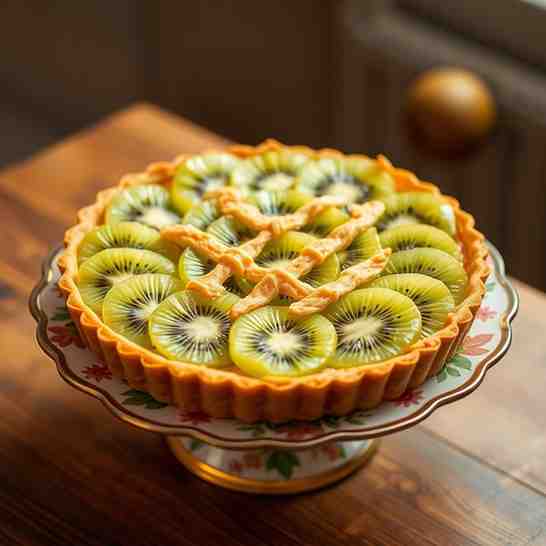
Ever dreamt of a show-stopping dessert that tastes as incredible as it looks, but still feels totally achievable for a home baker? Well, get ready to make that dream a reality with The Best Kiwi Fruit Tart (Fresh Kiwi & Creamy Custard Recipe)! This isn't just another sweet treat recipe; it's your new go-to for a homemade sweet recipe that perfectly balances sweet and tart flavors. If you're searching for kiwi dessert recipes that truly impress, you've hit the jackpot.
Why is this particular kiwi dessert idea so fantastic? Imagine a perfectly flaky, buttery crust hugging a rich, velvety vanilla custard, all crowned with vibrant, thinly sliced fresh kiwi. It’s a symphony of textures and tastes that’s surprisingly easy to master. Forget complicated baking recipes homemade that leave you stressed; this recipe is designed to be straightforward, making it an easy recipe to bake for both beginners and seasoned pros. We promise no multiple versions or endless tweaks – just one definitive, delicious kiwi fruit tart that works every single time. It’s the ultimate way to explore recipes using kiwi and create a memorable sweet treat that everyone will adore.
Ingredients
Directions
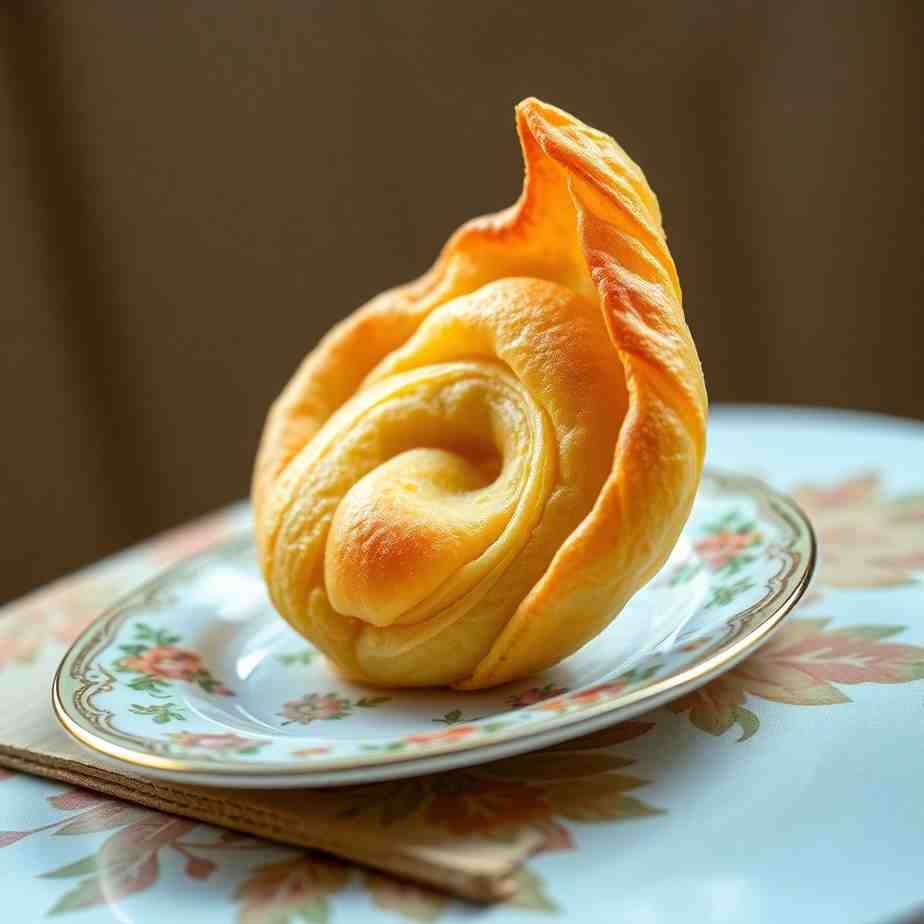
- Make the Crust (Photo Opportunity!)In a large bowl, whisk together the flour, sugar, and salt. Add the cold, cubed butter and use a pastry blender or your fingertips to cut the butter into the flour until it resembles coarse crumbs with some pea-sized pieces of butter remaining. Gradually add the ice water, one tablespoon at a time, mixing until the dough just comes together. Be careful not to overmix! Form the dough into a flat disk, wrap in plastic wrap, and chill in the refrigerator for at least 30 minutes.
- Time: 15 minutes prep, 30 minutes chill
- Blind Bake the CrustPreheat your oven to 375°F (190°C). On a lightly floured surface, roll out the chilled dough into a 12-inch circle. Carefully transfer the dough to a 9-inch tart pan with a removable bottom. Press the dough gently into the bottom and up the sides. Trim any excess dough. Prick the bottom of the crust all over with a fork. Line the crust with parchment paper and fill with pie weights or dried beans. Blind bake for 15 minutes. Remove the parchment and weights, then bake for another 5-10 minutes, or until the crust is lightly golden. This step matters because it prevents a soggy crust once the wet custard is added. Let cool completely on a wire rack.
- Time: 20-25 minutes bake
- Make the Custard FillingIn a medium saucepan, gently heat the milk over medium heat until it just begins to simmer around the edges. In a separate bowl, whisk together the sugar, cornstarch, and egg yolks until smooth and pale. Gradually pour about half of the hot milk into the egg yolk mixture, whisking constantly to temper the eggs (this prevents them from scrambling!). Pour the tempered egg mixture back into the saucepan with the remaining milk. Cook over medium-low heat, whisking continuously, until the custard thickens and comes to a boil. Boil for 1 minute, still whisking. Remove from heat and stir in the softened butter and vanilla extract until smooth. Pour the custard into a clean bowl, cover the surface directly with plastic wrap to prevent a skin from forming, and chill in the refrigerator for at least 2 hours, or until completely cold and firm.
- Time: 15 minutes prep, 2 hours chill
- Assemble & Arrange KiwiOnce the crust is cool and the custard is chilled, spread the cold custard evenly into the blind-baked tart crust. Arrange the thinly sliced kiwi rounds decoratively over the custard. You can create concentric circles, overlapping patterns, or any design you like! If desired, gently warm the apricot jam or glaze and brush it over the kiwi slices for a beautiful, glossy finish and to help prevent oxidation.
- Time: 10-15 minutes assembly
- Chill & ServePlace the assembled tart back in the refrigerator for at least 30 minutes to allow everything to set and chill thoroughly. This cooling cue is crucial for the custard to achieve its perfect texture and for easy slicing. Serve chilled, slicing with a sharp knife for clean pieces.
- Time: 30 minutes chill
Best Kiwi Fruit Tart Recipe - Sweet & Easy Dessert

- Serves: 8 People
- Prepare Time: 35 minutes
- Cooking Time: 25 minutes
- Calories: -
- Difficulty: Medium
Ever dreamt of a show-stopping dessert that tastes as incredible as it looks, but still feels totally achievable for a home baker? Well, get ready to make that dream a reality with The Best Kiwi Fruit Tart (Fresh Kiwi & Creamy Custard Recipe)! This isn't just another sweet treat recipe; it's your new go-to for a homemade sweet recipe that perfectly balances sweet and tart flavors. If you're searching for kiwi dessert recipes that truly impress, you've hit the jackpot.
Why is this particular kiwi dessert idea so fantastic? Imagine a perfectly flaky, buttery crust hugging a rich, velvety vanilla custard, all crowned with vibrant, thinly sliced fresh kiwi. It’s a symphony of textures and tastes that’s surprisingly easy to master. Forget complicated baking recipes homemade that leave you stressed; this recipe is designed to be straightforward, making it an easy recipe to bake for both beginners and seasoned pros. We promise no multiple versions or endless tweaks – just one definitive, delicious kiwi fruit tart that works every single time. It’s the ultimate way to explore recipes using kiwi and create a memorable sweet treat that everyone will adore.
Ingredients
Directions
- Make the Crust (Photo Opportunity!)In a large bowl, whisk together the flour, sugar, and salt. Add the cold, cubed butter and use a pastry blender or your fingertips to cut the butter into the flour until it resembles coarse crumbs with some pea-sized pieces of butter remaining. Gradually add the ice water, one tablespoon at a time, mixing until the dough just comes together. Be careful not to overmix! Form the dough into a flat disk, wrap in plastic wrap, and chill in the refrigerator for at least 30 minutes.
- Time: 15 minutes prep, 30 minutes chill
- Blind Bake the CrustPreheat your oven to 375°F (190°C). On a lightly floured surface, roll out the chilled dough into a 12-inch circle. Carefully transfer the dough to a 9-inch tart pan with a removable bottom. Press the dough gently into the bottom and up the sides. Trim any excess dough. Prick the bottom of the crust all over with a fork. Line the crust with parchment paper and fill with pie weights or dried beans. Blind bake for 15 minutes. Remove the parchment and weights, then bake for another 5-10 minutes, or until the crust is lightly golden. This step matters because it prevents a soggy crust once the wet custard is added. Let cool completely on a wire rack.
- Time: 20-25 minutes bake
- Make the Custard FillingIn a medium saucepan, gently heat the milk over medium heat until it just begins to simmer around the edges. In a separate bowl, whisk together the sugar, cornstarch, and egg yolks until smooth and pale. Gradually pour about half of the hot milk into the egg yolk mixture, whisking constantly to temper the eggs (this prevents them from scrambling!). Pour the tempered egg mixture back into the saucepan with the remaining milk. Cook over medium-low heat, whisking continuously, until the custard thickens and comes to a boil. Boil for 1 minute, still whisking. Remove from heat and stir in the softened butter and vanilla extract until smooth. Pour the custard into a clean bowl, cover the surface directly with plastic wrap to prevent a skin from forming, and chill in the refrigerator for at least 2 hours, or until completely cold and firm.
- Time: 15 minutes prep, 2 hours chill
- Assemble & Arrange KiwiOnce the crust is cool and the custard is chilled, spread the cold custard evenly into the blind-baked tart crust. Arrange the thinly sliced kiwi rounds decoratively over the custard. You can create concentric circles, overlapping patterns, or any design you like! If desired, gently warm the apricot jam or glaze and brush it over the kiwi slices for a beautiful, glossy finish and to help prevent oxidation.
- Time: 10-15 minutes assembly
- Chill & ServePlace the assembled tart back in the refrigerator for at least 30 minutes to allow everything to set and chill thoroughly. This cooling cue is crucial for the custard to achieve its perfect texture and for easy slicing. Serve chilled, slicing with a sharp knife for clean pieces.
- Time: 30 minutes chill
You may also like


Hey there! I’m just someone who seriously loves good food and believes that cooking doesn’t have to be complicated to be amazing. Whether it’s a quick weeknight dinner or a cozy weekend meal, I’m all about sharing easy, tasty recipes that actually work.


