
Classic British Steak & Ale Pie Recipe - Get Recipe Now
Classic British Steak & Ale Pie Recipe - Get Recipe Now

- Serves: 6 People
- Prepare Time: 45 minutes
- Cooking Time: 2 hours 45
- Calories: -
- Difficulty: Medium
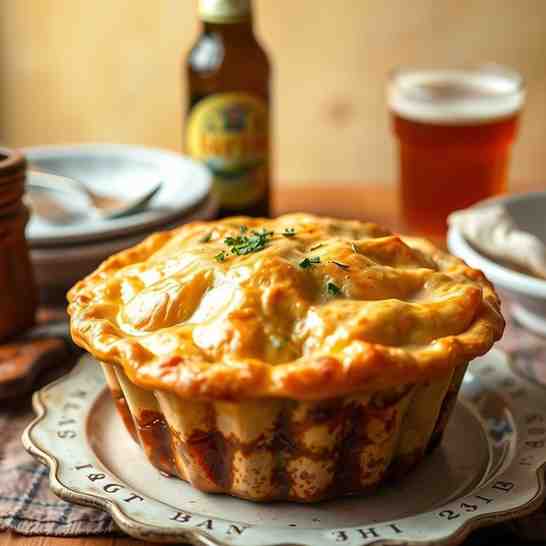
Welcome to the ultimate guide for crafting a truly classic British Steak and Ale Pie! This isn't just any british meat pies recipe; it's a hearty, pub-style masterpiece that brings the cozy comfort of England right to your kitchen. Imagine rich, savory beef, slow-braised until it's melt-in-your-mouth tender, swimming in a thick, malty ale gravy, all encased in a gloriously buttery, crisp shortcrust pastry.
What makes it "steak & ale"? It's that magical combination of succulent `chuck roast steak` or `beef stewing meat` slow-cooked with a dark, malty beer. This process infuses the beef with an incredible depth of flavor, creating a gravy that's pure liquid gold. Forget bland, watery fillings or a dreaded soggy bottom; we're here to promise you a pie with a thick, robust gravy and a perfectly crisp crust that holds up to every delicious bite. Get ready to bake a true `english meat pies` classic!
Ingredients
Directions
- Make the Dough + Chill: In a large bowl, whisk together the flour and salt. Cut in the very cold butter (and/or shortening) using a pastry blender, your fingertips, or a food processor until the mixture resembles coarse crumbs with some pea-sized butter chunks. Gradually add ice water, 1 tablespoon at a time, mixing until the dough just comes together. Be careful not to overmix. Form into two discs, wrap tightly in plastic wrap, and chill in the refrigerator for at least 30 minutes (or up to 2 days). Chilling is crucial as it allows the gluten to relax, prevents shrinking, and keeps the butter cold for a flaky crust.
- Brown the Beef: Pat the beef cubes very dry with paper towels. Season generously with salt and pepper. Heat 1 tablespoon of oil in your Dutch oven over medium-high heat until shimmering. Working in batches to avoid overcrowding, brown the beef on all sides until deeply caramelized. Don't steam it by adding too much meat at once; browning creates rich flavor. Remove browned beef to a plate and set aside.
- Build the Flavor Base: Reduce heat to medium. Add the remaining 1 tablespoon of oil to the pot. Add the chopped onion and carrots and cook, stirring occasionally, until softened, about 5-7 minutes. Add the minced garlic (if using) and tomato paste, and cook for another minute until fragrant.
- Deglaze with Ale: Sprinkle the flour over the vegetables and stir for 1 minute to cook off the raw flour taste. Pour in the ale, scraping the bottom of the pot with a wooden spoon to release all those delicious browned bits (this is called deglazing, and it adds immense flavor!). Bring to a simmer.
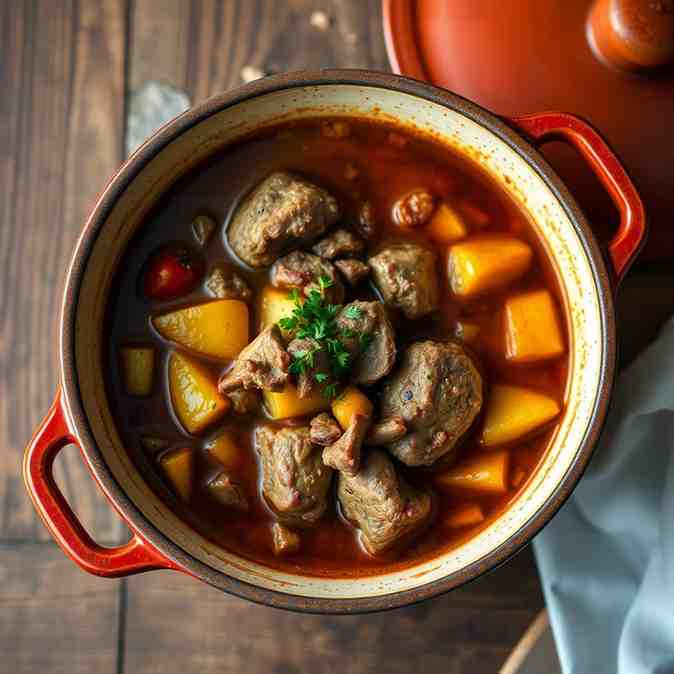
- Braise Until Tender: Return the browned beef to the pot. Stir in the `beef stock low sodium`, Worcestershire sauce, thyme/rosemary, and bay leaf. Bring the mixture to a gentle simmer, then reduce heat to low, cover, and braise for 2 to 2 ½ hours, or until the beef is incredibly fork-tender. The beef should easily shred when poked with a fork. If it's still tough, keep braising!
- Thicken the Gravy: Remove the bay leaf. If the gravy seems too thin, uncover the pot and simmer for an additional 15-20 minutes, or until it coats the back of a spoon. You can also make a slurry (1 tbsp flour mixed with 2 tbsp cold water) and whisk it in, simmering for a few minutes to thicken. Adjust seasoning with salt and pepper.
- Cool the Filling Completely: This step is absolutely non-negotiable for preventing a soggy bottom! Transfer the filling to a shallow dish and let it cool completely to room temperature, then chill in the refrigerator for at least 2 hours, or preferably overnight. Cold filling is essential for a crisp crust.
- Roll + Blind-Bake the Bottom Crust: Preheat your oven to 400°F (200°C). On a lightly floured surface, roll out one disc of chilled dough into a 12-inch circle. Carefully transfer it to your 9-inch pie plate. Trim the edges, leaving about a ½-inch overhang. Crimp the edges decoratively. Line the crust with parchment paper and fill with pie weights or dried beans. Blind-bake for 15 minutes, then carefully remove the parchment and weights and bake for another 5-7 minutes, or until lightly golden. This anti-soggy system creates a barrier against the wet filling.
- Fill + Top Crust + Seal + Vent: Reduce oven temperature to 375°F (190°C). Pour the completely cooled beef filling into the blind-baked crust. Roll out the second disc of dough for the top crust. Place it over the filling. Trim and crimp the edges to seal the top and bottom crusts together. Cut a few slits or a decorative pattern in the center of the top crust to allow steam to escape during baking (this prevents the crust from puffing up or cracking). Brush the top with the whisked egg wash for a golden sheen.
- Bake + Rest: Place the pie on a baking sheet (to catch any potential drips). Bake for 40-50 minutes, or until the crust is deeply golden brown and the filling is bubbling. If the top starts browning too quickly, loosely tent it with aluminum foil. Let the pie rest for at least 15-20 minutes before slicing and serving. This allows the gravy to set, preventing it from spilling out.
Classic British Steak & Ale Pie Recipe - Get Recipe Now

- Serves: 6 People
- Prepare Time: 45 minutes
- Cooking Time: 2 hours 45
- Calories: -
- Difficulty: Medium
Welcome to the ultimate guide for crafting a truly classic British Steak and Ale Pie! This isn't just any british meat pies recipe; it's a hearty, pub-style masterpiece that brings the cozy comfort of England right to your kitchen. Imagine rich, savory beef, slow-braised until it's melt-in-your-mouth tender, swimming in a thick, malty ale gravy, all encased in a gloriously buttery, crisp shortcrust pastry.
What makes it "steak & ale"? It's that magical combination of succulent `chuck roast steak` or `beef stewing meat` slow-cooked with a dark, malty beer. This process infuses the beef with an incredible depth of flavor, creating a gravy that's pure liquid gold. Forget bland, watery fillings or a dreaded soggy bottom; we're here to promise you a pie with a thick, robust gravy and a perfectly crisp crust that holds up to every delicious bite. Get ready to bake a true `english meat pies` classic!
Ingredients
Directions
- Make the Dough + Chill: In a large bowl, whisk together the flour and salt. Cut in the very cold butter (and/or shortening) using a pastry blender, your fingertips, or a food processor until the mixture resembles coarse crumbs with some pea-sized butter chunks. Gradually add ice water, 1 tablespoon at a time, mixing until the dough just comes together. Be careful not to overmix. Form into two discs, wrap tightly in plastic wrap, and chill in the refrigerator for at least 30 minutes (or up to 2 days). Chilling is crucial as it allows the gluten to relax, prevents shrinking, and keeps the butter cold for a flaky crust.
- Brown the Beef: Pat the beef cubes very dry with paper towels. Season generously with salt and pepper. Heat 1 tablespoon of oil in your Dutch oven over medium-high heat until shimmering. Working in batches to avoid overcrowding, brown the beef on all sides until deeply caramelized. Don't steam it by adding too much meat at once; browning creates rich flavor. Remove browned beef to a plate and set aside.
- Build the Flavor Base: Reduce heat to medium. Add the remaining 1 tablespoon of oil to the pot. Add the chopped onion and carrots and cook, stirring occasionally, until softened, about 5-7 minutes. Add the minced garlic (if using) and tomato paste, and cook for another minute until fragrant.
- Deglaze with Ale: Sprinkle the flour over the vegetables and stir for 1 minute to cook off the raw flour taste. Pour in the ale, scraping the bottom of the pot with a wooden spoon to release all those delicious browned bits (this is called deglazing, and it adds immense flavor!). Bring to a simmer.
- Braise Until Tender: Return the browned beef to the pot. Stir in the `beef stock low sodium`, Worcestershire sauce, thyme/rosemary, and bay leaf. Bring the mixture to a gentle simmer, then reduce heat to low, cover, and braise for 2 to 2 ½ hours, or until the beef is incredibly fork-tender. The beef should easily shred when poked with a fork. If it's still tough, keep braising!
- Thicken the Gravy: Remove the bay leaf. If the gravy seems too thin, uncover the pot and simmer for an additional 15-20 minutes, or until it coats the back of a spoon. You can also make a slurry (1 tbsp flour mixed with 2 tbsp cold water) and whisk it in, simmering for a few minutes to thicken. Adjust seasoning with salt and pepper.
- Cool the Filling Completely: This step is absolutely non-negotiable for preventing a soggy bottom! Transfer the filling to a shallow dish and let it cool completely to room temperature, then chill in the refrigerator for at least 2 hours, or preferably overnight. Cold filling is essential for a crisp crust.
- Roll + Blind-Bake the Bottom Crust: Preheat your oven to 400°F (200°C). On a lightly floured surface, roll out one disc of chilled dough into a 12-inch circle. Carefully transfer it to your 9-inch pie plate. Trim the edges, leaving about a ½-inch overhang. Crimp the edges decoratively. Line the crust with parchment paper and fill with pie weights or dried beans. Blind-bake for 15 minutes, then carefully remove the parchment and weights and bake for another 5-7 minutes, or until lightly golden. This anti-soggy system creates a barrier against the wet filling.
- Fill + Top Crust + Seal + Vent: Reduce oven temperature to 375°F (190°C). Pour the completely cooled beef filling into the blind-baked crust. Roll out the second disc of dough for the top crust. Place it over the filling. Trim and crimp the edges to seal the top and bottom crusts together. Cut a few slits or a decorative pattern in the center of the top crust to allow steam to escape during baking (this prevents the crust from puffing up or cracking). Brush the top with the whisked egg wash for a golden sheen.
- Bake + Rest: Place the pie on a baking sheet (to catch any potential drips). Bake for 40-50 minutes, or until the crust is deeply golden brown and the filling is bubbling. If the top starts browning too quickly, loosely tent it with aluminum foil. Let the pie rest for at least 15-20 minutes before slicing and serving. This allows the gravy to set, preventing it from spilling out.
You may also like


Hey there! I’m just someone who seriously loves good food and believes that cooking doesn’t have to be complicated to be amazing. Whether it’s a quick weeknight dinner or a cozy weekend meal, I’m all about sharing easy, tasty recipes that actually work.


