
Caribbean Arepas - P.A.N. Flour for Gluten-Free
Caribbean Arepas - P.A.N. Flour for Gluten-Free


- Serves: 6 People
- Prepare Time: 15 minutes
- Cooking Time: 20 minutes
- Calories: -
- Difficulty: Easy
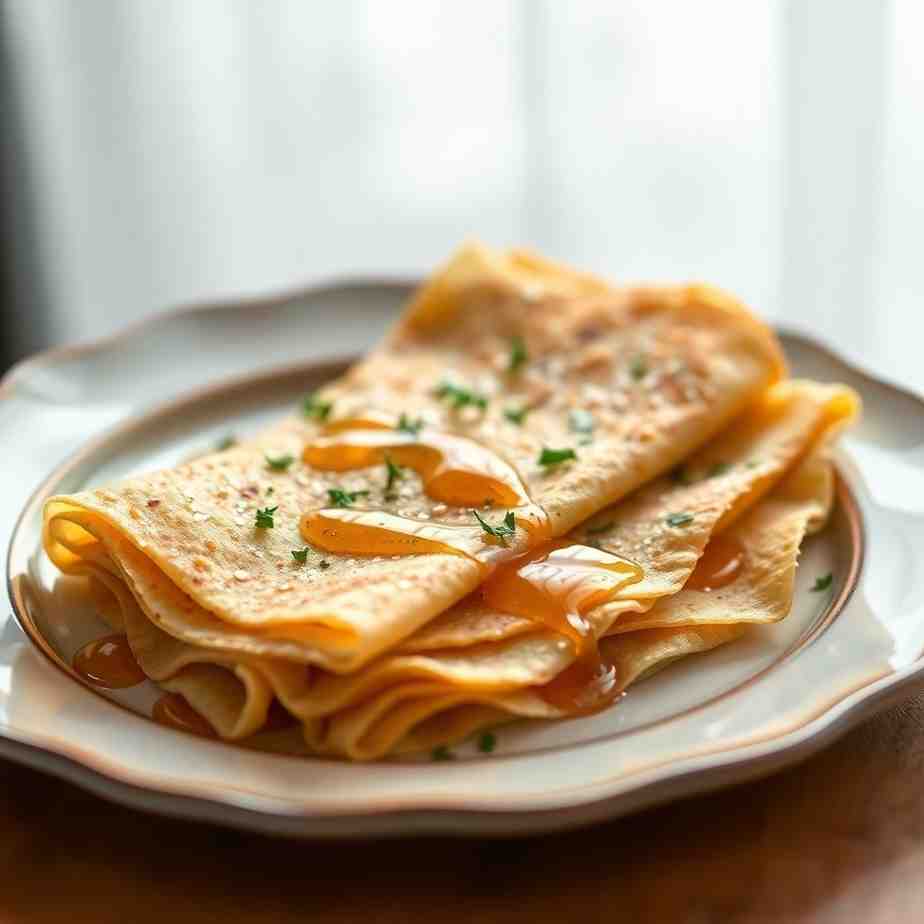
Ever craved that perfect bite? Imagine a crispy, golden shell giving way to a tender, fluffy interior, ready to be stuffed with anything from savory meats to sweet plantains. That's the magic of arepas! While often associated with Venezuela and Colombia, these delightful corn cakes have a vibrant presence throughout the Caribbean, especially in the Netherlands Antilles like Curaçao, Aruba, and Bonaire. This recipe brings you an authentic taste of the islands, focusing on easy-to-find `pan arepa flour` (also known as `harina pan flour` or `pan precooked cornmeal`). Perfect for both beginners and seasoned cooks, our Caribbean arepas are naturally `gluten free cooking` friendly and come together in about 30-40 minutes with no special equipment. Get ready to discover your new favorite meal base!
Ingredients
Directions
- Mix & Hydrate the Dough In a large bowl, dissolve the salt in the warm water. Gradually sprinkle the `P.A.N. cornmeal` into the salted water, stirring continuously with a spoon or your hands. Mix until all the flour is incorporated and you have a soft, cohesive dough. It should feel smooth and pliable, much like warm Play-Doh – not soupy, and not crumbly. Cover the bowl and let the dough rest for 5-10 minutes. This crucial step allows the corn flour to fully hydrate, ensuring a tender interior.
- Shape the Arepas After resting, gently knead the dough for a minute. Divide the dough into 6-8 equal pieces. Roll each piece into a smooth ball, then flatten it between your palms to form a disc about ½ inch thick. Aim for smooth edges; if they crack, the dough might be a little dry (see troubleshooting below). If the discs are too sticky or slump, the dough is too wet; gently knead in a small pinch of `P.A.N. cornmeal` until it holds its shape. These arepas are slightly thicker than some Venezuelan styles, making them perfect for stuffing.
- Pan-Fry to Crisp the Crust Preheat a large skillet or griddle over medium heat. Lightly coat the cooking surface with about a tablespoon of neutral oil. Once hot, carefully place the shaped arepas into the skillet, ensuring they don't overcrowd the pan. Cook for 5-7 minutes per side, or until they develop a beautiful golden-brown crust. Adjust the heat as needed; if they're browning too quickly, lower the heat to ensure the inside has time to warm through.
- Finish in the Oven (Optional but Recommended) For a reliably cooked interior and perfect texture, transfer the pan-fried arepas to a baking sheet. Bake in a preheated oven at 350°F (175°C) for 8-10 minutes. They are ready when they sound hollow when tapped and the center is set but still moist and tender. This oven finish is a common practice in many home kitchens, ensuring your arepas are cooked through without drying out.
- Split & Serve Let the cooked arepas rest on a wire rack for a couple of minutes. This allows the steam to redistribute, resulting in a more tender texture. Using a sharp knife, carefully slice each arepa halfway through its side, creating a pocket like a pita. Stuff with your favorite fillings (see ideas below) and serve warm immediately.
Caribbean Arepas - P.A.N. Flour for Gluten-Free

- Serves: 6 People
- Prepare Time: 15 minutes
- Cooking Time: 20 minutes
- Calories: -
- Difficulty: Easy
Ever craved that perfect bite? Imagine a crispy, golden shell giving way to a tender, fluffy interior, ready to be stuffed with anything from savory meats to sweet plantains. That's the magic of arepas! While often associated with Venezuela and Colombia, these delightful corn cakes have a vibrant presence throughout the Caribbean, especially in the Netherlands Antilles like Curaçao, Aruba, and Bonaire. This recipe brings you an authentic taste of the islands, focusing on easy-to-find `pan arepa flour` (also known as `harina pan flour` or `pan precooked cornmeal`). Perfect for both beginners and seasoned cooks, our Caribbean arepas are naturally `gluten free cooking` friendly and come together in about 30-40 minutes with no special equipment. Get ready to discover your new favorite meal base!
Ingredients
Directions
- Mix & Hydrate the Dough In a large bowl, dissolve the salt in the warm water. Gradually sprinkle the `P.A.N. cornmeal` into the salted water, stirring continuously with a spoon or your hands. Mix until all the flour is incorporated and you have a soft, cohesive dough. It should feel smooth and pliable, much like warm Play-Doh – not soupy, and not crumbly. Cover the bowl and let the dough rest for 5-10 minutes. This crucial step allows the corn flour to fully hydrate, ensuring a tender interior.
- Shape the Arepas After resting, gently knead the dough for a minute. Divide the dough into 6-8 equal pieces. Roll each piece into a smooth ball, then flatten it between your palms to form a disc about ½ inch thick. Aim for smooth edges; if they crack, the dough might be a little dry (see troubleshooting below). If the discs are too sticky or slump, the dough is too wet; gently knead in a small pinch of `P.A.N. cornmeal` until it holds its shape. These arepas are slightly thicker than some Venezuelan styles, making them perfect for stuffing.
- Pan-Fry to Crisp the Crust Preheat a large skillet or griddle over medium heat. Lightly coat the cooking surface with about a tablespoon of neutral oil. Once hot, carefully place the shaped arepas into the skillet, ensuring they don't overcrowd the pan. Cook for 5-7 minutes per side, or until they develop a beautiful golden-brown crust. Adjust the heat as needed; if they're browning too quickly, lower the heat to ensure the inside has time to warm through.
- Finish in the Oven (Optional but Recommended) For a reliably cooked interior and perfect texture, transfer the pan-fried arepas to a baking sheet. Bake in a preheated oven at 350°F (175°C) for 8-10 minutes. They are ready when they sound hollow when tapped and the center is set but still moist and tender. This oven finish is a common practice in many home kitchens, ensuring your arepas are cooked through without drying out.
- Split & Serve Let the cooked arepas rest on a wire rack for a couple of minutes. This allows the steam to redistribute, resulting in a more tender texture. Using a sharp knife, carefully slice each arepa halfway through its side, creating a pocket like a pita. Stuff with your favorite fillings (see ideas below) and serve warm immediately.
You may also like


Hey there! I’m just someone who seriously loves good food and believes that cooking doesn’t have to be complicated to be amazing. Whether it’s a quick weeknight dinner or a cozy weekend meal, I’m all about sharing easy, tasty recipes that actually work.


