
Cassava Cake - Easy Filipino Dessert Recipe
Cassava Cake - Easy Filipino Dessert Recipe
- Serves: 10 People
- Prepare Time: 15 minutes
- Cooking Time: 55 minutes
- Calories: -
- Difficulty: Easy
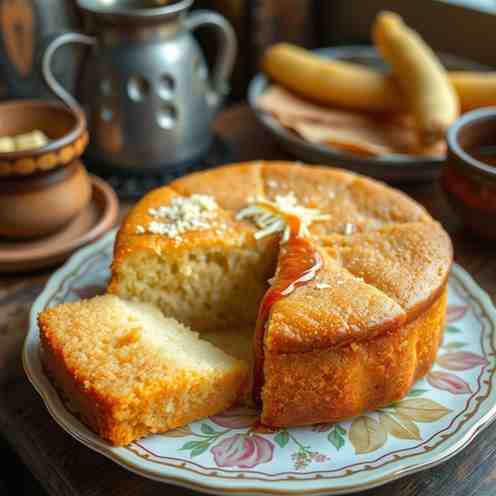
Hey there, sweet tooth! Are you on the hunt for an authentic Filipino food experience that's both comforting and incredibly delicious? Look no further than Cassava Cake! This dessert Filipino food staple is a true classic, beloved across the Philippines for its uniquely chewy texture, rich coconut flavor, and irresistible sweetness. Whether you're a seasoned baker or just starting your culinary journey, this easy sweet treats recipe is designed to bring a taste of the tropics right into your kitchen.
Cassava cake isn't just a simple dessert; it's a celebration on a plate. It’s perfect for holidays, parties, or simply as a comforting treat after a long day. With a base of freshly grated cassava (or the convenient frozen shredded coconut variety!), combined with creamy coconut milk and condensed milk, it bakes into a golden-brown, custardy delight. Get ready to discover why this sweet treat dessert is a must-try for anyone craving fast easy sweet treats that truly hit the spot. Let's get baking and create the definitive cassava cake recipe together!
Ingredients
Directions
- Preheat your oven to 350°F (175°C). Lightly grease a 9x13 inch baking pan with butter or cooking spray. This prevents sticking and ensures easy removal.
- In a large mixing bowl, combine the grated cassava, coconut milk, sweetened condensed milk, eggs, melted butter, granulated sugar, and vanilla extract.
- Mix all the ingredients thoroughly until the mixture is smooth and well combined. Make sure there are no lumps of cassava. Pour this delicious mixture evenly into your prepared baking pan.
- Bake for 50 minutes to 1 hour, or until the top is beautifully golden brown and a toothpick inserted into the center comes out clean. Once baked, remove from the oven and allow the cake to cool completely before slicing and serving. This helps the cake set properly and makes for cleaner slices.
Cassava Cake - Easy Filipino Dessert Recipe
- Serves: 10 People
- Prepare Time: 15 minutes
- Cooking Time: 55 minutes
- Calories: -
- Difficulty: Easy
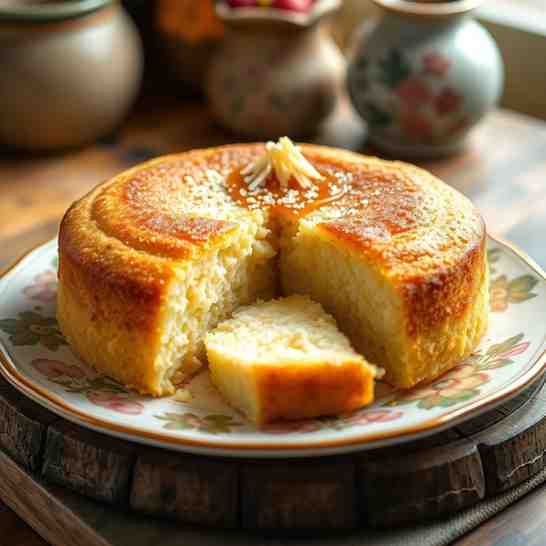
Hey there, sweet tooth! Are you on the hunt for an authentic Filipino food experience that's both comforting and incredibly delicious? Look no further than Cassava Cake! This dessert Filipino food staple is a true classic, beloved across the Philippines for its uniquely chewy texture, rich coconut flavor, and irresistible sweetness. Whether you're a seasoned baker or just starting your culinary journey, this easy sweet treats recipe is designed to bring a taste of the tropics right into your kitchen.
Cassava cake isn't just a simple dessert; it's a celebration on a plate. It’s perfect for holidays, parties, or simply as a comforting treat after a long day. With a base of freshly grated cassava (or the convenient frozen shredded coconut variety!), combined with creamy coconut milk and condensed milk, it bakes into a golden-brown, custardy delight. Get ready to discover why this sweet treat dessert is a must-try for anyone craving fast easy sweet treats that truly hit the spot. Let's get baking and create the definitive cassava cake recipe together!
Ingredients
Directions
- Preheat your oven to 350°F (175°C). Lightly grease a 9x13 inch baking pan with butter or cooking spray. This prevents sticking and ensures easy removal.
- In a large mixing bowl, combine the grated cassava, coconut milk, sweetened condensed milk, eggs, melted butter, granulated sugar, and vanilla extract.
- Mix all the ingredients thoroughly until the mixture is smooth and well combined. Make sure there are no lumps of cassava. Pour this delicious mixture evenly into your prepared baking pan.
- Bake for 50 minutes to 1 hour, or until the top is beautifully golden brown and a toothpick inserted into the center comes out clean. Once baked, remove from the oven and allow the cake to cool completely before slicing and serving. This helps the cake set properly and makes for cleaner slices.
You may also like


Hey there! I’m just someone who seriously loves good food and believes that cooking doesn’t have to be complicated to be amazing. Whether it’s a quick weeknight dinner or a cozy weekend meal, I’m all about sharing easy, tasty recipes that actually work.


