
Make Fluffy Char Siu Bao at Home - Dim Sum
Make Fluffy Char Siu Bao at Home - Dim Sum
- Serves: 12 People
- Prepare Time: 1 hour 15 m
- Cooking Time: 15 minutes
- Calories: -
- Difficulty: Medium
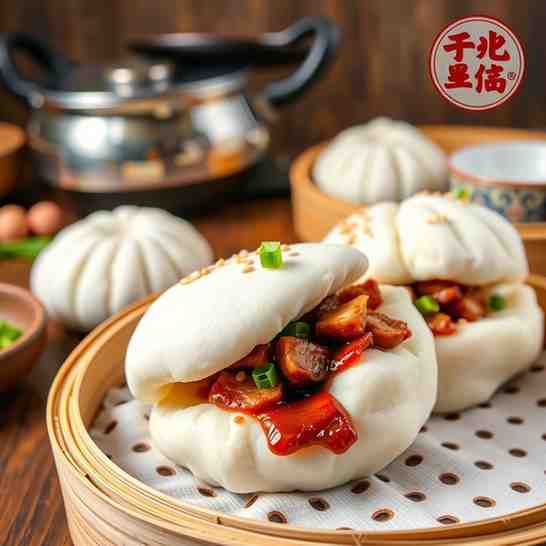
Welcome to the wonderful world of dim sum brunch! If you've ever dreamt of recreating that bustling Hong Kong teahouse experience right in your own kitchen, you're in the right place. While the array of home cooked Chinese recipes can seem daunting, there's one dish that stands out as the ultimate "first project" for any aspiring home dim sum chef: Char Siu Bao, or Chinese steamed buns filled with savory-sweet BBQ pork.
These fluffy, cloud-like buns, bursting with rich char siu BBQ pork, are a true delight. They're a staple of Hong Kong Chinese cuisine and a guaranteed crowd-pleaser. What makes this recipe different? We're cutting through the guesswork to give you crystal-clear cues, precise timing, and comprehensive troubleshooting tips, ensuring your buns don't collapse, your filling stays put, and your steamed bao buns are perfectly tender every single time. Get ready to master a classic and elevate your dim sum brunch game!
Ingredients
Directions
- Make the Filling Sauce: In a small saucepan, combine the light soy sauce, dark soy sauce (if using), hoisin sauce, oyster sauce, sugar, and Shaoxing wine (if using). Bring to a gentle simmer over medium heat, stirring until the sugar dissolves. In a separate small bowl, whisk together the cornstarch and cold water to create a slurry. Pour the slurry into the simmering sauce, whisking constantly until the sauce thickens to a glossy consistency. Remove from heat and stir in the sesame oil and sliced scallions. Add the chopped char siu to the sauce, mixing well to coat. Let the filling cool completely before using – chilling it in the fridge for at least 30 minutes (or overnight) helps it firm up and prevents leakage.
- Mix the Dough: In a large mixing bowl (or the bowl of a stand mixer fitted with a dough hook), combine the flour, instant yeast, sugar, baking powder, and salt. Whisk briefly to combine. Add the neutral oil and warm water. Mix on low speed (or by hand) until a shaggy dough forms. Increase speed to medium (or knead vigorously by hand) for 8-10 minutes, until the dough is smooth, elastic, and no longer sticky. It should pass the "windowpane test" – you can stretch a small piece thin enough to see light through it without tearing.
- First Rise: Lightly grease a clean bowl with a little oil. Place the dough in the bowl, turning it once to coat. Cover the bowl tightly with plastic wrap or a damp towel. Let it rise in a warm place (ideally around 75-80°F / 24-27°C) for 1 to 1.5 hours, or until doubled in size. If your kitchen is cold, you can place the bowl in a slightly warm (but turned off) oven with the light on, or in a warm water bath.
- Portion + Shape: Once the dough has doubled, gently punch it down to release the air. Transfer the dough to a lightly floured surface. Roll the dough into a log and divide it into 12-16 equal pieces (about 45-50g each for 16 buns). A kitchen scale is strongly recommended for accuracy. Keep the unworked dough covered with a damp cloth or plastic wrap to prevent it from drying out. Flatten each piece into a round disc, about 3-4 inches in diameter, with the edges slightly thinner than the center.
- Fill + Pleat: Hold a flattened dough wrapper in one hand. Place about 1.5 to 2 tablespoons of the cooled char siu filling in the center. Bring the edges of the dough up and around the filling, gathering them together. Using your thumb and forefinger, create small pleats around the circumference, working your way around until the bun is completely sealed at the top. Pinch firmly to seal, then twist slightly to create a small "top knot." Place each bun, sealed-side down, on a small square of parchment paper.
- Final Proof: Arrange the filled buns on the parchment squares inside your steamer basket, leaving ample space between them as they will expand. Cover the steamer basket with its lid (or plastic wrap if using a metal basket). Let the buns proof in a warm place for another 30-45 minutes, or until they look noticeably puffier and feel light when gently pressed (the "touch test" – they should spring back slowly). This step is crucial for fluffy buns!
- Steam: While the buns are proofing, set up your steamer. Fill a wok or large pot with about 1-2 inches of water, ensuring the water level is below the bottom of your steamer basket. Bring the water to a rolling boil over high heat. Once boiling, carefully place the steamer basket with the proofed buns into the wok/pot. Cover tightly. Steam the buns for 10-12 minutes for medium-sized buns (adjust slightly for larger or smaller buns). Do not lift the lid during steaming! After the time is up, turn off the heat and let the buns rest in the steamer with the lid on for 5 minutes. This prevents the dreaded collapse.
- Serve: Carefully remove the steamer basket. Gently peel the buns off their parchment paper. Serve your homemade Hong Kong dim sum immediately, while they are warm and fluffy. They are perfect on their own or with a side of chili oil. Pair with your favorite Chinese tea for an authentic dim sum brunch experience!
Make Fluffy Char Siu Bao at Home - Dim Sum
- Serves: 12 People
- Prepare Time: 1 hour 15 m
- Cooking Time: 15 minutes
- Calories: -
- Difficulty: Medium
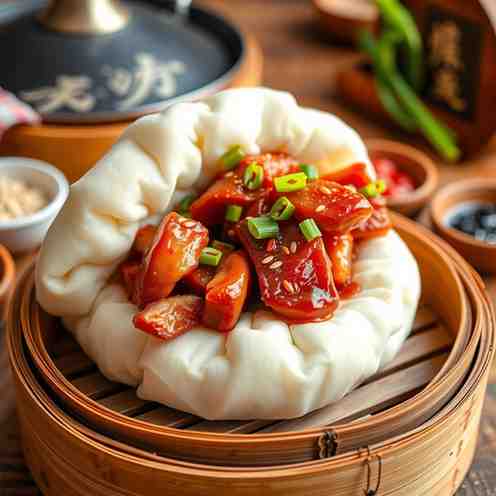
Welcome to the wonderful world of dim sum brunch! If you've ever dreamt of recreating that bustling Hong Kong teahouse experience right in your own kitchen, you're in the right place. While the array of home cooked Chinese recipes can seem daunting, there's one dish that stands out as the ultimate "first project" for any aspiring home dim sum chef: Char Siu Bao, or Chinese steamed buns filled with savory-sweet BBQ pork.
These fluffy, cloud-like buns, bursting with rich char siu BBQ pork, are a true delight. They're a staple of Hong Kong Chinese cuisine and a guaranteed crowd-pleaser. What makes this recipe different? We're cutting through the guesswork to give you crystal-clear cues, precise timing, and comprehensive troubleshooting tips, ensuring your buns don't collapse, your filling stays put, and your steamed bao buns are perfectly tender every single time. Get ready to master a classic and elevate your dim sum brunch game!
Ingredients
Directions
- Make the Filling Sauce: In a small saucepan, combine the light soy sauce, dark soy sauce (if using), hoisin sauce, oyster sauce, sugar, and Shaoxing wine (if using). Bring to a gentle simmer over medium heat, stirring until the sugar dissolves. In a separate small bowl, whisk together the cornstarch and cold water to create a slurry. Pour the slurry into the simmering sauce, whisking constantly until the sauce thickens to a glossy consistency. Remove from heat and stir in the sesame oil and sliced scallions. Add the chopped char siu to the sauce, mixing well to coat. Let the filling cool completely before using – chilling it in the fridge for at least 30 minutes (or overnight) helps it firm up and prevents leakage.
- Mix the Dough: In a large mixing bowl (or the bowl of a stand mixer fitted with a dough hook), combine the flour, instant yeast, sugar, baking powder, and salt. Whisk briefly to combine. Add the neutral oil and warm water. Mix on low speed (or by hand) until a shaggy dough forms. Increase speed to medium (or knead vigorously by hand) for 8-10 minutes, until the dough is smooth, elastic, and no longer sticky. It should pass the "windowpane test" – you can stretch a small piece thin enough to see light through it without tearing.
- First Rise: Lightly grease a clean bowl with a little oil. Place the dough in the bowl, turning it once to coat. Cover the bowl tightly with plastic wrap or a damp towel. Let it rise in a warm place (ideally around 75-80°F / 24-27°C) for 1 to 1.5 hours, or until doubled in size. If your kitchen is cold, you can place the bowl in a slightly warm (but turned off) oven with the light on, or in a warm water bath.
- Portion + Shape: Once the dough has doubled, gently punch it down to release the air. Transfer the dough to a lightly floured surface. Roll the dough into a log and divide it into 12-16 equal pieces (about 45-50g each for 16 buns). A kitchen scale is strongly recommended for accuracy. Keep the unworked dough covered with a damp cloth or plastic wrap to prevent it from drying out. Flatten each piece into a round disc, about 3-4 inches in diameter, with the edges slightly thinner than the center.
- Fill + Pleat: Hold a flattened dough wrapper in one hand. Place about 1.5 to 2 tablespoons of the cooled char siu filling in the center. Bring the edges of the dough up and around the filling, gathering them together. Using your thumb and forefinger, create small pleats around the circumference, working your way around until the bun is completely sealed at the top. Pinch firmly to seal, then twist slightly to create a small "top knot." Place each bun, sealed-side down, on a small square of parchment paper.
- Final Proof: Arrange the filled buns on the parchment squares inside your steamer basket, leaving ample space between them as they will expand. Cover the steamer basket with its lid (or plastic wrap if using a metal basket). Let the buns proof in a warm place for another 30-45 minutes, or until they look noticeably puffier and feel light when gently pressed (the "touch test" – they should spring back slowly). This step is crucial for fluffy buns!
- Steam: While the buns are proofing, set up your steamer. Fill a wok or large pot with about 1-2 inches of water, ensuring the water level is below the bottom of your steamer basket. Bring the water to a rolling boil over high heat. Once boiling, carefully place the steamer basket with the proofed buns into the wok/pot. Cover tightly. Steam the buns for 10-12 minutes for medium-sized buns (adjust slightly for larger or smaller buns). Do not lift the lid during steaming! After the time is up, turn off the heat and let the buns rest in the steamer with the lid on for 5 minutes. This prevents the dreaded collapse.
- Serve: Carefully remove the steamer basket. Gently peel the buns off their parchment paper. Serve your homemade Hong Kong dim sum immediately, while they are warm and fluffy. They are perfect on their own or with a side of chili oil. Pair with your favorite Chinese tea for an authentic dim sum brunch experience!
You may also like


Hey there! I’m just someone who seriously loves good food and believes that cooking doesn’t have to be complicated to be amazing. Whether it’s a quick weeknight dinner or a cozy weekend meal, I’m all about sharing easy, tasty recipes that actually work.


