
Twice-Cooked Pork - Sichuan Recipe for Home Cooks
Twice-Cooked Pork - Sichuan Recipe for Home Cooks
- Serves: 4 People
- Prepare Time: 20 minutes
- Cooking Time: 60 minutes
- Calories: -
- Difficulty: Medium
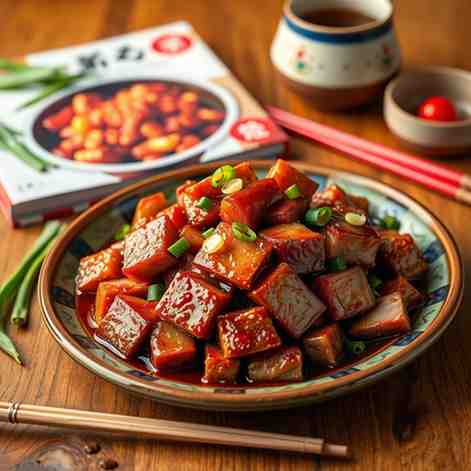
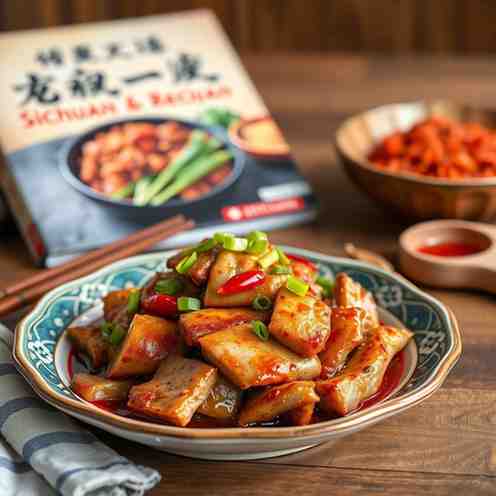
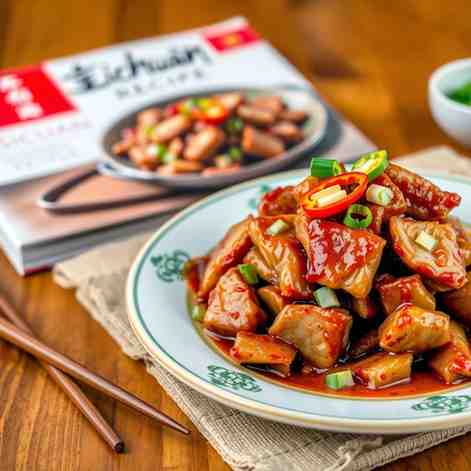
Ready to bring the vibrant flavors of Sichuan cuisine into your kitchen? If you're looking to master cooking Chinese at home, then Twice-Cooked Pork, or Hui Guo Rou, is an absolute must-try. This iconic dish features succulent pork belly that's simmered until tender, chilled, then thinly sliced and stir-fried to crispy perfection. It's tossed with a medley of aromatic chili bean paste, fermented black beans, and fresh leeks, creating a symphony of savory, spicy, and slightly sweet notes that will transport your taste buds straight to Chengdu.
Don't let the "twice-cooked" part intimidate you! While it sounds fancy, this recipe breaks down the process into easy, manageable steps, promising restaurant-level flavor right from your own stove. We'll show you how to achieve that perfect balance of textures and tastes, all while offering practical tips for gluten-free and low-carb eaters, ensuring everyone can enjoy the soul of this incredible dish. It’s a rich, celebratory meal that's surprisingly achievable for a weeknight, making healthy and easy food a delicious reality.
Learn exactly how to cook Twice-Cooked Pork Slices step by step.
Make an authentic Sichuan pork recipe at home with realistic ingredient options.
See gluten-free tweaks, health & low-carb tips, and simple meal ideas without juggling multiple versions of the recipe.
Ingredients
Directions
- Par-Cook the Pork Belly
- Place the whole pork belly in a large pot and cover it with cold water. Add the ginger slices and 1 tablespoon of Shaoxing wine.
- Bring the water to a boil over high heat, then immediately reduce the heat to a gentle simmer.
- Simmer the pork belly for 30-45 minutes, depending on its thickness. You want it cooked through but still firm enough to slice easily – don't let it become fall-apart tender, as this will prevent it from crisping properly in the second cook. A chopstick should pierce through with slight resistance.
- Remove the pork belly from the pot and immediately plunge it into an ice bath or cool running water to stop the cooking process and rinse off any impurities.
- Cool, Chill, and Slice Thin
- Once cooled, pat the pork belly thoroughly dry with paper towels.
- Transfer the pork belly to the refrigerator and chill for at least 1-2 hours, or even overnight. Chilling is crucial as it firms up the pork, making it much easier to slice thinly. You can also pop it in the freezer for 20-30 minutes for a quicker firm-up.
- Using a very sharp knife, slice the chilled pork belly against the grain into thin pieces, about ⅛-inch (3mm) thick. Think "bacon-thin" slices. If your belly is very fatty, you can slice it slightly thicker; if it's very lean, go a bit thinner.
- Render & Crisp the Pork
- Heat your wok or large skillet over medium-high heat until hot. There's no need to add oil yet, as the pork belly will render its own fat.
- Add the thinly sliced pork belly in a single layer. Don't overcrowd the pan; cook in batches if necessary.
- Cook the pork slices, stirring occasionally, until their edges are lightly browned and curled, and a good amount of fat has rendered out. This stage can be a bit splattery at first, but it will calm down as the moisture cooks off. Aim for a nice crispiness without making the pork brittle.
- Once the pork is rendered and lightly crisped, scoop out any excess rendered fat from the wok, leaving just 1-2 tablespoons in the pan. This is key to preventing a greasy dish.
- Bloom Doubanjiang & Aromatics in Pork Fat
- Push the rendered pork slices to one side of the wok, or temporarily remove them if your pan is crowded.
- Lower the heat to medium-low. Add the doubanjiang, minced ginger, minced garlic, and fermented black beans to the hot pork fat in the center of the wok.
- Gently fry the pastes and aromatics, stirring constantly, for 1-2 minutes. You'll notice the oil turning a beautiful bright red color, and a fragrant aroma will fill your kitchen. Be careful not to burn them.
- Stir-Fry with Veg and Seasonings
- Once the paste is fragrant, stir the pork slices back into the center of the wok, coating them evenly with the aromatic oil and paste.
- Add the sliced peppers and leeks/scallions to the wok.
- Increase the heat to high. Deglaze with 1 tablespoon of Shaoxing wine, then add the light soy sauce and sugar.
- Toss everything together vigorously for 1-2 minutes, just until the vegetables are bright, tender-crisp, and beautifully coated in the glossy sauce. You want the sauce to cling to the ingredients, not create a watery pool at the bottom of the wok.
- Taste & Adjust, Then Serve
- Quickly taste a piece of pork and some vegetables. Adjust for saltiness (a splash more soy sauce), sweetness (a pinch more sugar), or heat (a tiny bit more doubanjiang if you like it spicier).
- Serve immediately with steamed white rice. Remember, this is a rich dish; a portion of about a quarter of the plate pork, with the rest as rice or steamed vegetables, is a good balance. Enjoy your authentic Chinese food gluten free (if using GF swaps) and delicious meal!
Twice-Cooked Pork - Sichuan Recipe for Home Cooks
- Serves: 4 People
- Prepare Time: 20 minutes
- Cooking Time: 60 minutes
- Calories: -
- Difficulty: Medium
Ready to bring the vibrant flavors of Sichuan cuisine into your kitchen? If you're looking to master cooking Chinese at home, then Twice-Cooked Pork, or Hui Guo Rou, is an absolute must-try. This iconic dish features succulent pork belly that's simmered until tender, chilled, then thinly sliced and stir-fried to crispy perfection. It's tossed with a medley of aromatic chili bean paste, fermented black beans, and fresh leeks, creating a symphony of savory, spicy, and slightly sweet notes that will transport your taste buds straight to Chengdu.
Don't let the "twice-cooked" part intimidate you! While it sounds fancy, this recipe breaks down the process into easy, manageable steps, promising restaurant-level flavor right from your own stove. We'll show you how to achieve that perfect balance of textures and tastes, all while offering practical tips for gluten-free and low-carb eaters, ensuring everyone can enjoy the soul of this incredible dish. It’s a rich, celebratory meal that's surprisingly achievable for a weeknight, making healthy and easy food a delicious reality.
Learn exactly how to cook Twice-Cooked Pork Slices step by step.
Make an authentic Sichuan pork recipe at home with realistic ingredient options.
See gluten-free tweaks, health & low-carb tips, and simple meal ideas without juggling multiple versions of the recipe.
Ingredients
Directions
- Par-Cook the Pork Belly
- Place the whole pork belly in a large pot and cover it with cold water. Add the ginger slices and 1 tablespoon of Shaoxing wine.
- Bring the water to a boil over high heat, then immediately reduce the heat to a gentle simmer.
- Simmer the pork belly for 30-45 minutes, depending on its thickness. You want it cooked through but still firm enough to slice easily – don't let it become fall-apart tender, as this will prevent it from crisping properly in the second cook. A chopstick should pierce through with slight resistance.
- Remove the pork belly from the pot and immediately plunge it into an ice bath or cool running water to stop the cooking process and rinse off any impurities.
- Cool, Chill, and Slice Thin
- Once cooled, pat the pork belly thoroughly dry with paper towels.
- Transfer the pork belly to the refrigerator and chill for at least 1-2 hours, or even overnight. Chilling is crucial as it firms up the pork, making it much easier to slice thinly. You can also pop it in the freezer for 20-30 minutes for a quicker firm-up.
- Using a very sharp knife, slice the chilled pork belly against the grain into thin pieces, about ⅛-inch (3mm) thick. Think "bacon-thin" slices. If your belly is very fatty, you can slice it slightly thicker; if it's very lean, go a bit thinner.
- Render & Crisp the Pork
- Heat your wok or large skillet over medium-high heat until hot. There's no need to add oil yet, as the pork belly will render its own fat.
- Add the thinly sliced pork belly in a single layer. Don't overcrowd the pan; cook in batches if necessary.
- Cook the pork slices, stirring occasionally, until their edges are lightly browned and curled, and a good amount of fat has rendered out. This stage can be a bit splattery at first, but it will calm down as the moisture cooks off. Aim for a nice crispiness without making the pork brittle.
- Once the pork is rendered and lightly crisped, scoop out any excess rendered fat from the wok, leaving just 1-2 tablespoons in the pan. This is key to preventing a greasy dish.
- Bloom Doubanjiang & Aromatics in Pork Fat
- Push the rendered pork slices to one side of the wok, or temporarily remove them if your pan is crowded.
- Lower the heat to medium-low. Add the doubanjiang, minced ginger, minced garlic, and fermented black beans to the hot pork fat in the center of the wok.
- Gently fry the pastes and aromatics, stirring constantly, for 1-2 minutes. You'll notice the oil turning a beautiful bright red color, and a fragrant aroma will fill your kitchen. Be careful not to burn them.
- Stir-Fry with Veg and Seasonings
- Once the paste is fragrant, stir the pork slices back into the center of the wok, coating them evenly with the aromatic oil and paste.
- Add the sliced peppers and leeks/scallions to the wok.
- Increase the heat to high. Deglaze with 1 tablespoon of Shaoxing wine, then add the light soy sauce and sugar.
- Toss everything together vigorously for 1-2 minutes, just until the vegetables are bright, tender-crisp, and beautifully coated in the glossy sauce. You want the sauce to cling to the ingredients, not create a watery pool at the bottom of the wok.
- Taste & Adjust, Then Serve
- Quickly taste a piece of pork and some vegetables. Adjust for saltiness (a splash more soy sauce), sweetness (a pinch more sugar), or heat (a tiny bit more doubanjiang if you like it spicier).
- Serve immediately with steamed white rice. Remember, this is a rich dish; a portion of about a quarter of the plate pork, with the rest as rice or steamed vegetables, is a good balance. Enjoy your authentic Chinese food gluten free (if using GF swaps) and delicious meal!
You may also like


Hey there! I’m just someone who seriously loves good food and believes that cooking doesn’t have to be complicated to be amazing. Whether it’s a quick weeknight dinner or a cozy weekend meal, I’m all about sharing easy, tasty recipes that actually work.


