
Crispy Roast Pork Belly with Danish Parsley Sauce – Easy Recipe
Crispy Roast Pork Belly with Danish Parsley Sauce – Easy Recipe

- Serves: 4 People
- Prepare Time: 30 minutes
- Cooking Time: 60 minutes
- Calories: -
- Difficulty: Medium
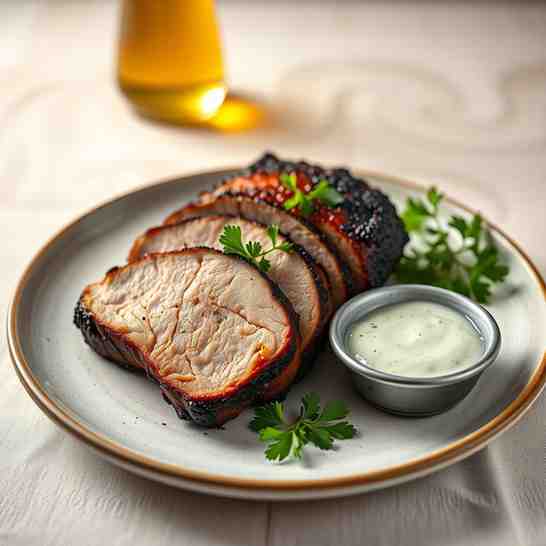
Get ready to discover Denmark's ultimate comfort food! Imagine perfectly crispy pork belly strips, a rich and creamy parsley sauce, and tender boiled potatoes all on one plate. This isn't just a meal; it's an experience, widely considered the national dish of Denmark: Stegt Flæsk med Persillesovs. If you're looking for an easy, ultra-crispy `roast pork belly` recipe, or a simple `sauce for pork recipe` that elevates any dinner, you've come to the right place. We've spent time perfecting this classic, focusing on an oven strip method that guarantees consistent, shatteringly crisp skin without the mess of traditional pan-frying. It’s ideal for beginners and seasoned cooks alike, bringing a taste of `European cuisine recipes` right to your kitchen. Say goodbye to dry pork and hello to juicy meat with incredible `baking pork skin` that will make you feel like a pro! This `roast pork recipe easy` will quickly become a family favorite.
Ingredients
Directions
- Prep the Potatoes
- If using larger potatoes, cut them into even, bite-sized pieces. Smaller baby potatoes can be left whole.
- Rinse the cut potatoes under cold water to remove excess starch.
- Place the potatoes in a medium pot and cover them with cold water by about an inch. Add a generous pinch of salt to the water.
- Bring the water to a simmer over medium-high heat, then reduce heat to medium-low and cook until the potatoes are just tender when pierced with a fork, about 15-20 minutes depending on size.
- Once cooked, drain the potatoes well, reserving about ¼ cup of the cooking water if you plan to use it in the sauce. Keep the potatoes warm in the pot with the lid on until ready to serve.
- Prep and Roast the Pork Belly
- Preheat your oven to 400°F (200°C).
- Line a sturdy sheet pan with aluminum foil for easier cleanup, then place a wire rack on top. This allows air to circulate around the pork belly strips, promoting crispiness.
- Ensure your pork belly strips are sliced evenly, about ½ inch (1.25 cm) thick. If they are very wet, pat them thoroughly dry with paper towels – especially the skin side!
- Lay the pork belly strips in a single layer on the wire rack, skin side up, making sure not to crowd the pan. This is key for even crisping.
- Lightly rub the skin side of the strips with neutral oil, then season generously with Kosher salt and black pepper.
- Roast the pork belly in the preheated oven for 40-50 minutes, or until the skin is beautifully golden brown and crackling. Place the pan on the middle rack.
- Mini troubleshooting:
- Skin not crisp yet? If the skin isn't crackling after the initial roasting time, extend the cooking time by another 5-10 minutes.
- Uneven browning? Rotate the pan halfway through cooking for more consistent crisping.
- Excess fat? Around the 30-minute mark, if there's a lot of rendered fat pooled on the sheet pan (under the rack), carefully remove the pan from the oven and pour off the excess fat. This prevents the pork from frying in its own fat, which can hinder crispiness.
- For maximum crackle, if needed, you can move the pan to the top rack and broil for an additional 2-4 minutes. Watch it constantly during this stage, as it can go from perfect to burnt in seconds!
- Once crispy and golden, remove the pork belly from the oven and let it rest on the wire rack for 5-10 minutes before serving. This allows the juices to redistribute, keeping the meat tender.
- Make the Parsley Sauce
- While the pork belly is roasting or resting, melt the butter in a medium saucepan over medium heat.
- Once melted, whisk in the all-purpose flour. Cook, whisking constantly, for 1-2 minutes until it forms a smooth paste (a roux) and smells slightly nutty, but don't let it brown.
- Slowly pour in the cold whole milk (and optional reserved potato water), whisking continuously to prevent lumps. Start with a small amount of liquid, whisk until smooth, then add more gradually.
- Mini troubleshooting:
- Lumpy sauce? Whisk vigorously to smooth out lumps. If it's very lumpy, you can pass it through a fine-mesh sieve before adding parsley. Next time, add liquid slower and whisk constantly.
- Bring the sauce to a gentle simmer, whisking occasionally, and cook until it thickens enough to coat the back of a spoon, about 5-7 minutes.
- Remove the saucepan from the heat. Stir in the salt, pepper, and nutmeg. Add the tiny pinch of sugar if desired.
- Finally, stir in the finely chopped fresh parsley. Stirring it in off the heat helps the parsley retain its vibrant green color and fresh flavor.
- Mini troubleshooting:
- Sauce too thick? Whisk in a splash more milk or potato water until desired consistency is reached.
- Sauce too thin? Return to low heat and simmer gently for a few more minutes, whisking, until it thickens.
- Plate & Serve
- Drain the cooked potatoes thoroughly again, then return them to the pot. Add a small knob of butter and a pinch of salt, tossing gently to coat.
- Arrange the crispy pork belly strips and potatoes on individual plates.
- Spoon a generous amount of the warm parsley sauce over the pork and potatoes.
- Serve immediately, optionally alongside pickled beets, a quick cucumber salad, or your chosen side dish. Enjoy your authentic Danish delight!
Crispy Roast Pork Belly with Danish Parsley Sauce – Easy Recipe

- Serves: 4 People
- Prepare Time: 30 minutes
- Cooking Time: 60 minutes
- Calories: -
- Difficulty: Medium
Get ready to discover Denmark's ultimate comfort food! Imagine perfectly crispy pork belly strips, a rich and creamy parsley sauce, and tender boiled potatoes all on one plate. This isn't just a meal; it's an experience, widely considered the national dish of Denmark: Stegt Flæsk med Persillesovs. If you're looking for an easy, ultra-crispy `roast pork belly` recipe, or a simple `sauce for pork recipe` that elevates any dinner, you've come to the right place. We've spent time perfecting this classic, focusing on an oven strip method that guarantees consistent, shatteringly crisp skin without the mess of traditional pan-frying. It’s ideal for beginners and seasoned cooks alike, bringing a taste of `European cuisine recipes` right to your kitchen. Say goodbye to dry pork and hello to juicy meat with incredible `baking pork skin` that will make you feel like a pro! This `roast pork recipe easy` will quickly become a family favorite.
Ingredients
Directions
- Prep the Potatoes
- If using larger potatoes, cut them into even, bite-sized pieces. Smaller baby potatoes can be left whole.
- Rinse the cut potatoes under cold water to remove excess starch.
- Place the potatoes in a medium pot and cover them with cold water by about an inch. Add a generous pinch of salt to the water.
- Bring the water to a simmer over medium-high heat, then reduce heat to medium-low and cook until the potatoes are just tender when pierced with a fork, about 15-20 minutes depending on size.
- Once cooked, drain the potatoes well, reserving about ¼ cup of the cooking water if you plan to use it in the sauce. Keep the potatoes warm in the pot with the lid on until ready to serve.
- Prep and Roast the Pork Belly
- Preheat your oven to 400°F (200°C).
- Line a sturdy sheet pan with aluminum foil for easier cleanup, then place a wire rack on top. This allows air to circulate around the pork belly strips, promoting crispiness.
- Ensure your pork belly strips are sliced evenly, about ½ inch (1.25 cm) thick. If they are very wet, pat them thoroughly dry with paper towels – especially the skin side!
- Lay the pork belly strips in a single layer on the wire rack, skin side up, making sure not to crowd the pan. This is key for even crisping.
- Lightly rub the skin side of the strips with neutral oil, then season generously with Kosher salt and black pepper.
- Roast the pork belly in the preheated oven for 40-50 minutes, or until the skin is beautifully golden brown and crackling. Place the pan on the middle rack.
- Mini troubleshooting:
- Skin not crisp yet? If the skin isn't crackling after the initial roasting time, extend the cooking time by another 5-10 minutes.
- Uneven browning? Rotate the pan halfway through cooking for more consistent crisping.
- Excess fat? Around the 30-minute mark, if there's a lot of rendered fat pooled on the sheet pan (under the rack), carefully remove the pan from the oven and pour off the excess fat. This prevents the pork from frying in its own fat, which can hinder crispiness.
- For maximum crackle, if needed, you can move the pan to the top rack and broil for an additional 2-4 minutes. Watch it constantly during this stage, as it can go from perfect to burnt in seconds!
- Once crispy and golden, remove the pork belly from the oven and let it rest on the wire rack for 5-10 minutes before serving. This allows the juices to redistribute, keeping the meat tender.
- Make the Parsley Sauce
- While the pork belly is roasting or resting, melt the butter in a medium saucepan over medium heat.
- Once melted, whisk in the all-purpose flour. Cook, whisking constantly, for 1-2 minutes until it forms a smooth paste (a roux) and smells slightly nutty, but don't let it brown.
- Slowly pour in the cold whole milk (and optional reserved potato water), whisking continuously to prevent lumps. Start with a small amount of liquid, whisk until smooth, then add more gradually.
- Mini troubleshooting:
- Lumpy sauce? Whisk vigorously to smooth out lumps. If it's very lumpy, you can pass it through a fine-mesh sieve before adding parsley. Next time, add liquid slower and whisk constantly.
- Bring the sauce to a gentle simmer, whisking occasionally, and cook until it thickens enough to coat the back of a spoon, about 5-7 minutes.
- Remove the saucepan from the heat. Stir in the salt, pepper, and nutmeg. Add the tiny pinch of sugar if desired.
- Finally, stir in the finely chopped fresh parsley. Stirring it in off the heat helps the parsley retain its vibrant green color and fresh flavor.
- Mini troubleshooting:
- Sauce too thick? Whisk in a splash more milk or potato water until desired consistency is reached.
- Sauce too thin? Return to low heat and simmer gently for a few more minutes, whisking, until it thickens.
- Plate & Serve
- Drain the cooked potatoes thoroughly again, then return them to the pot. Add a small knob of butter and a pinch of salt, tossing gently to coat.
- Arrange the crispy pork belly strips and potatoes on individual plates.
- Spoon a generous amount of the warm parsley sauce over the pork and potatoes.
- Serve immediately, optionally alongside pickled beets, a quick cucumber salad, or your chosen side dish. Enjoy your authentic Danish delight!
You may also like


Hey there! I’m just someone who seriously loves good food and believes that cooking doesn’t have to be complicated to be amazing. Whether it’s a quick weeknight dinner or a cozy weekend meal, I’m all about sharing easy, tasty recipes that actually work.


