
Easy Gluten-Free Rice Bread - Sweet & Spongy Loaf Recipe
Easy Gluten-Free Rice Bread - Sweet & Spongy Loaf Recipe
- Serves: 10 People
- Prepare Time: 25 minutes
- Cooking Time: 55 minutes
- Calories: -
- Difficulty: Easy
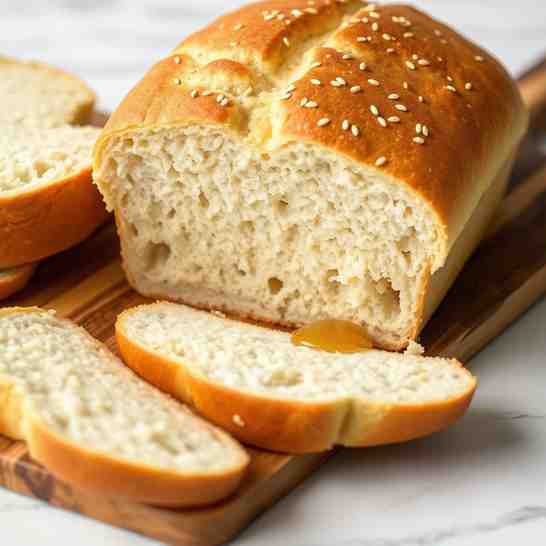
Say goodbye to dense, crumbly gluten-free bread! This sweet and spongy gluten-free rice bread recipe is a game-changer, proving that truly delightful gluten-free bread with rice flour (well, soaked whole rice!) is not only possible but incredibly easy to make right in your blender. Forget complicated flour blends or endless kneading; this soft gluten-free bread comes together with minimal fuss, delivering a beautifully bouncy, slightly sweet loaf that's perfect for toast, sandwiches, or simply enjoying on its own. It's the best gluten-free bread recipe for anyone looking for an easy and healthy bread recipe that truly satisfies.
Ingredients
Directions
- Soak the Rice
- Place the short-grain white rice in a fine-mesh sieve and rinse it under cold running water until the water runs mostly clear. This removes excess starch.
- Transfer the rinsed rice to a bowl and cover it with at least 2 inches of cool water. Let it soak at room temperature for a minimum of 4 hours, or preferably overnight (8-12 hours). The longer it soaks, the softer it will become, making it easier to blend. You'll know it's ready when a grain of rice crushes easily between your fingers, almost powdery.
- Blend the Batter Until Silky
- Drain the soaked rice thoroughly and transfer it to your blender.
- Add the warm liquid (water or milk), sweetener, neutral oil or melted butter, and fine salt to the blender.
- Blend on high speed until the mixture is completely smooth and gluey, without any discernible rice grains. This can take 2-5 minutes depending on your blender. Scrape down the sides as needed. The batter should have the consistency of a thick pancake batter.
- Check the batter's temperature with an instant-read thermometer. It should be between 90-100°F (32-38°C). If it's too hot (above 115°F/46°C), let it cool slightly. If it's too cold (below 85°F/29°C), warm it gently (e.g., in a microwave-safe bowl for 10-15 seconds, stirring well). If your blender starts to overheat, blend in short bursts with pauses.
- Add Yeast + Prep the Pan
- Add the instant yeast to the silky batter in the blender. Blend for just 5-10 seconds on low speed, just enough to incorporate the yeast without overmixing. Overblending yeast can damage it.
- Grease your loaf pan well or line it with parchment paper, leaving an overhang on the long sides to create "handles."
- Pour the batter into the prepared loaf pan. It will be thick.
- Proof
- Cover the loaf pan loosely with plastic wrap or a clean kitchen towel.
- Let the batter proof in a warm, draft-free spot until it has visibly doubled in volume and looks puffy. This typically takes 1 to 2 hours, but can vary based on your room temperature. A "proof mode" setting in an oven (around 85-90°F/29-32°C) or a warm spot near a sunny window works great.
- To tell if you've overproofed, the batter might look overly bubbly, have a sour smell, or start to deflate slightly if gently jiggled. Overproofing can lead to collapse during baking.
- Bake with Steam
- Preheat your oven to 375°F (190°C) with an empty, small oven-safe pan (like a cast iron skillet or broiler pan) on the bottom rack. Position your main oven rack in the middle.
- Once preheated, carefully pour about ½ cup of boiling water into the hot pan on the bottom rack to create steam. Immediately place the proofed loaf pan on the middle rack and quickly close the oven door.
- Bake for 45-60 minutes. After 15 minutes, spritz the inside of the oven walls with water from your spray bottle (be quick to avoid losing too much heat), then repeat at 30 minutes. This steam helps keep the crust thin and the inside tender.
- The bread is done when the top is a deep golden brown, and an instant-read thermometer inserted into the center reads 200-210°F (93-99°C). It should also sound hollow when tapped on the bottom.
- Cool Completely (Non-Negotiable)
- Once baked, immediately remove the loaf from the pan and place it on a wire rack to cool completely.
- This is the most crucial step! It needs to cool for at least 2-3 hours, or even longer, before slicing. Slicing early will result in a gummy, unpleasantly dense texture because the internal structure is still setting. Patience is key for that perfect spongy crumb!
Easy Gluten-Free Rice Bread - Sweet & Spongy Loaf Recipe
- Serves: 10 People
- Prepare Time: 25 minutes
- Cooking Time: 55 minutes
- Calories: -
- Difficulty: Easy
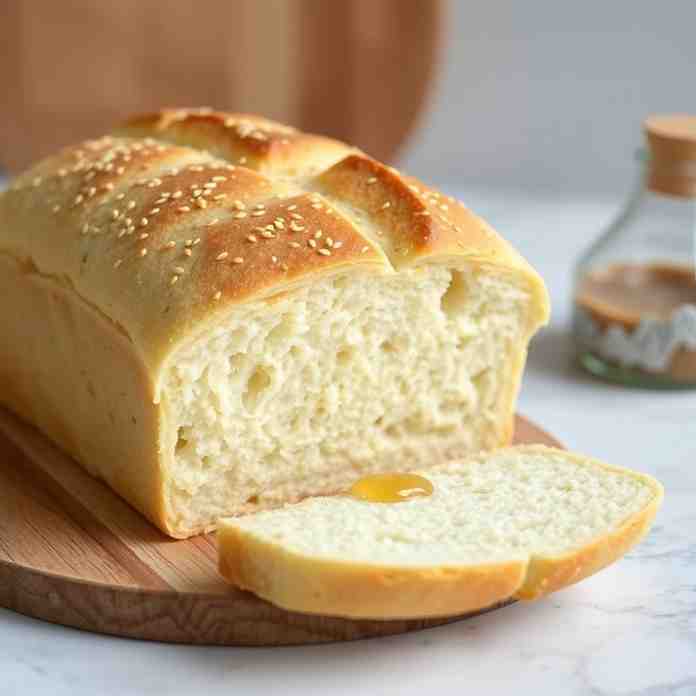
Say goodbye to dense, crumbly gluten-free bread! This sweet and spongy gluten-free rice bread recipe is a game-changer, proving that truly delightful gluten-free bread with rice flour (well, soaked whole rice!) is not only possible but incredibly easy to make right in your blender. Forget complicated flour blends or endless kneading; this soft gluten-free bread comes together with minimal fuss, delivering a beautifully bouncy, slightly sweet loaf that's perfect for toast, sandwiches, or simply enjoying on its own. It's the best gluten-free bread recipe for anyone looking for an easy and healthy bread recipe that truly satisfies.
Ingredients
Directions
- Soak the Rice
- Place the short-grain white rice in a fine-mesh sieve and rinse it under cold running water until the water runs mostly clear. This removes excess starch.
- Transfer the rinsed rice to a bowl and cover it with at least 2 inches of cool water. Let it soak at room temperature for a minimum of 4 hours, or preferably overnight (8-12 hours). The longer it soaks, the softer it will become, making it easier to blend. You'll know it's ready when a grain of rice crushes easily between your fingers, almost powdery.
- Blend the Batter Until Silky
- Drain the soaked rice thoroughly and transfer it to your blender.
- Add the warm liquid (water or milk), sweetener, neutral oil or melted butter, and fine salt to the blender.
- Blend on high speed until the mixture is completely smooth and gluey, without any discernible rice grains. This can take 2-5 minutes depending on your blender. Scrape down the sides as needed. The batter should have the consistency of a thick pancake batter.
- Check the batter's temperature with an instant-read thermometer. It should be between 90-100°F (32-38°C). If it's too hot (above 115°F/46°C), let it cool slightly. If it's too cold (below 85°F/29°C), warm it gently (e.g., in a microwave-safe bowl for 10-15 seconds, stirring well). If your blender starts to overheat, blend in short bursts with pauses.
- Add Yeast + Prep the Pan
- Add the instant yeast to the silky batter in the blender. Blend for just 5-10 seconds on low speed, just enough to incorporate the yeast without overmixing. Overblending yeast can damage it.
- Grease your loaf pan well or line it with parchment paper, leaving an overhang on the long sides to create "handles."
- Pour the batter into the prepared loaf pan. It will be thick.
- Proof
- Cover the loaf pan loosely with plastic wrap or a clean kitchen towel.
- Let the batter proof in a warm, draft-free spot until it has visibly doubled in volume and looks puffy. This typically takes 1 to 2 hours, but can vary based on your room temperature. A "proof mode" setting in an oven (around 85-90°F/29-32°C) or a warm spot near a sunny window works great.
- To tell if you've overproofed, the batter might look overly bubbly, have a sour smell, or start to deflate slightly if gently jiggled. Overproofing can lead to collapse during baking.
- Bake with Steam
- Preheat your oven to 375°F (190°C) with an empty, small oven-safe pan (like a cast iron skillet or broiler pan) on the bottom rack. Position your main oven rack in the middle.
- Once preheated, carefully pour about ½ cup of boiling water into the hot pan on the bottom rack to create steam. Immediately place the proofed loaf pan on the middle rack and quickly close the oven door.
- Bake for 45-60 minutes. After 15 minutes, spritz the inside of the oven walls with water from your spray bottle (be quick to avoid losing too much heat), then repeat at 30 minutes. This steam helps keep the crust thin and the inside tender.
- The bread is done when the top is a deep golden brown, and an instant-read thermometer inserted into the center reads 200-210°F (93-99°C). It should also sound hollow when tapped on the bottom.
- Cool Completely (Non-Negotiable)
- Once baked, immediately remove the loaf from the pan and place it on a wire rack to cool completely.
- This is the most crucial step! It needs to cool for at least 2-3 hours, or even longer, before slicing. Slicing early will result in a gummy, unpleasantly dense texture because the internal structure is still setting. Patience is key for that perfect spongy crumb!
You may also like


Hey there! I’m just someone who seriously loves good food and believes that cooking doesn’t have to be complicated to be amazing. Whether it’s a quick weeknight dinner or a cozy weekend meal, I’m all about sharing easy, tasty recipes that actually work.


