
Easy Microwave Mochi Balls Recipe - Soft, Chewy & Simple
Easy Microwave Mochi Balls Recipe - Soft, Chewy & Simple
- Serves: 10 People
- Prepare Time: 15 minutes
- Cooking Time: 10 minutes
- Calories: -
- Difficulty: Easy
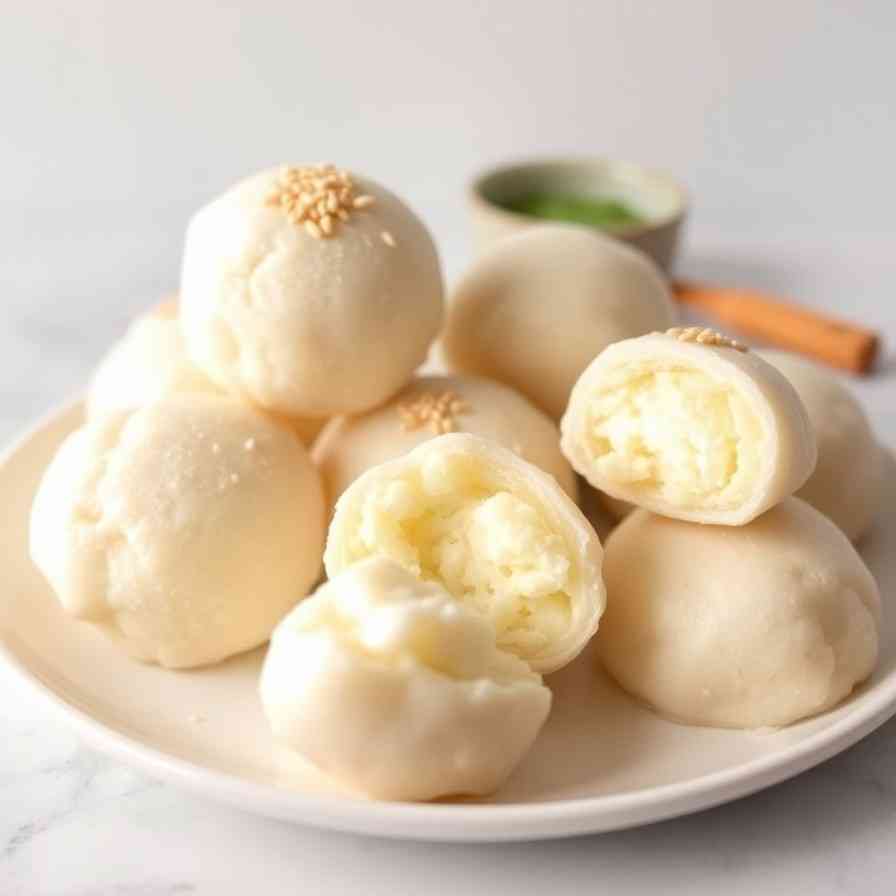
Ever wondered how to make those delightfully soft, chewy, and slightly sweet mochi balls you find at your favorite dessert spot? Or maybe you've only ever had mochi ice cream and are curious about the classic, unfilled or simply paste-filled versions? Good news! You don't need fancy equipment or a trip to Japan to enjoy authentic homemade mochi. This isn't just another one of those complex easy recipes that turn out to be anything but. Our recipe focuses on a super simple, classic Daifuku-style filled mochi that you can whip up right in your kitchen microwave. We'll guide you through making perfectly pliable dough, filling it with sweet red bean paste, and dusting it just right. What makes it so easy? We're using the microwave method for quick cooking, combined with clear visual cues to ensure your mochi turns out perfectly every time. Get ready to impress your friends and satisfy your sweet tooth with these wonderfully chewy treats!
Ingredients
Directions
- Prep the FillingTake your sweet red bean paste and roll it into 10-12 small, uniform balls (about 1 tablespoon each). Place them on a plate lined with parchment paper and chill them in the refrigerator or freezer for about 10-15 minutes. This makes them much easier to handle and wrap later.
- Mix the Mochi BatterIn a large microwave-safe bowl, combine the glutinous rice flour and granulated sugar. Whisk them together thoroughly until well combined. Gradually add the water, whisking continuously to ensure there are no dry pockets or lumps. You want a smooth, milk-like batter. If using, whisk in optional matcha, vanilla, or salt now.
- Microwave Cook (with Doneness Cues)Cover the bowl with a microwave-safe lid or a plate (leaving a small gap for steam to escape).
- Microwave for 1 minute. Remove and stir vigorously with a silicone spatula. The mixture will still be very liquidy.
- Microwave for another 1 minute. Stir again. You'll notice it starting to thicken around the edges.
- Microwave for 30-second bursts, stirring vigorously after each burst. Continue this process. The mochi will gradually transform from a liquid to a thick, translucent, glossy, and bouncy dough. What "done" looks like: it will be firm, sticky, translucent (not opaque white), and have a uniform, glossy sheen with no liquid batter remaining. The dough should pull away from the sides of the bowl easily.
- Mini Timing Guide: For an 800-1000W microwave, total cooking time is usually 3-5 minutes. Adjust based on your microwave's wattage.
- Cool to the "Safe Handling Window"Once cooked, carefully remove the hot mochi dough from the microwave. Allow it to cool in the bowl for about 10-15 minutes. It needs to be cool enough to touch without burning your hands, but still warm and pliable enough to stretch and shape easily.
- Portion + FlattenGenerously dust your clean work surface (or a large piece of parchment paper) with cornstarch or potato starch. Transfer the warm mochi dough onto the dusted surface. Dust your hands lightly with starch. Using a bench scraper or knife, divide the dough into 10-12 equal portions. Take one portion and gently flatten it into a circle about 3-4 inches in diameter. Aim for a thickness that's thin enough to wrap easily but not so thin it tears.
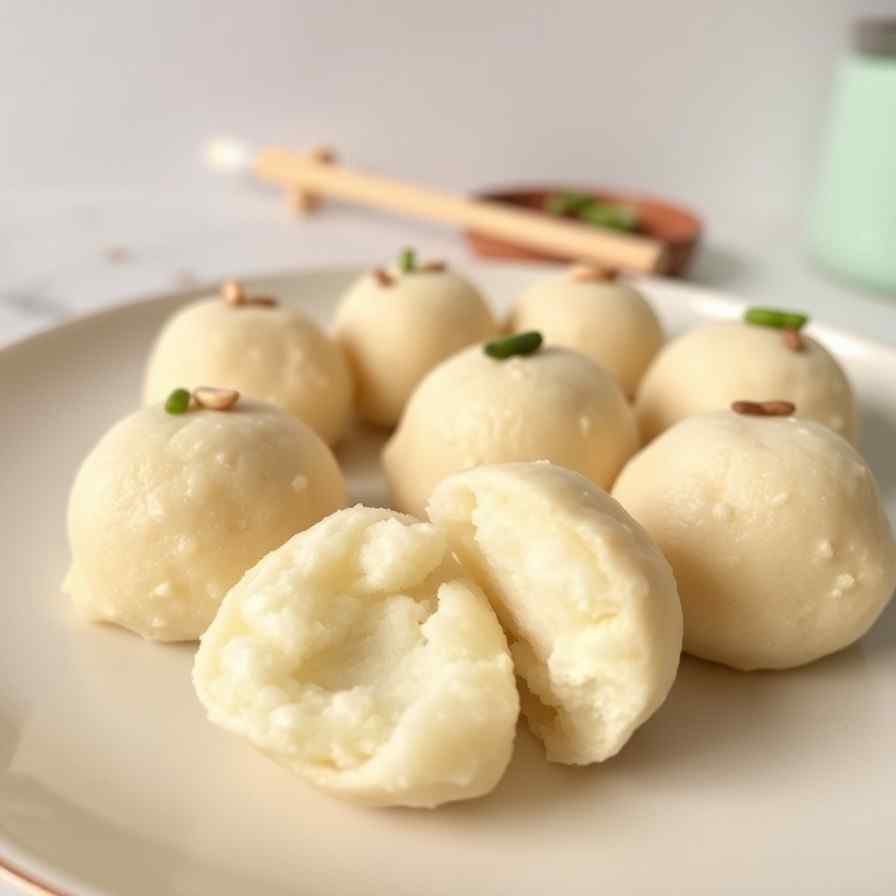
- Fill + SealPlace one chilled red bean paste ball in the center of a flattened mochi circle. Carefully bring the edges of the mochi dough up and around the filling, pinching them together at the top to seal. The pinch technique is key: gather the dough like a little purse, then gently twist and pinch the seam completely closed. If you get small tears, gently stretch and press the dough together to fix them. Place the sealed mochi seam-side down on your dusted surface to keep the seams from popping open.
- Final Dusting and ServingOnce all your mochi balls are filled and sealed, give them a final light dusting of cornstarch or potato starch to prevent sticking. Be careful not to overdo it, as too much starch can make the mochi taste dry or chalky. Serve immediately and enjoy!
Easy Microwave Mochi Balls Recipe - Soft, Chewy & Simple

- Serves: 10 People
- Prepare Time: 15 minutes
- Cooking Time: 10 minutes
- Calories: -
- Difficulty: Easy
Ever wondered how to make those delightfully soft, chewy, and slightly sweet mochi balls you find at your favorite dessert spot? Or maybe you've only ever had mochi ice cream and are curious about the classic, unfilled or simply paste-filled versions? Good news! You don't need fancy equipment or a trip to Japan to enjoy authentic homemade mochi. This isn't just another one of those complex easy recipes that turn out to be anything but. Our recipe focuses on a super simple, classic Daifuku-style filled mochi that you can whip up right in your kitchen microwave. We'll guide you through making perfectly pliable dough, filling it with sweet red bean paste, and dusting it just right. What makes it so easy? We're using the microwave method for quick cooking, combined with clear visual cues to ensure your mochi turns out perfectly every time. Get ready to impress your friends and satisfy your sweet tooth with these wonderfully chewy treats!
Ingredients
Directions
- Prep the FillingTake your sweet red bean paste and roll it into 10-12 small, uniform balls (about 1 tablespoon each). Place them on a plate lined with parchment paper and chill them in the refrigerator or freezer for about 10-15 minutes. This makes them much easier to handle and wrap later.
- Mix the Mochi BatterIn a large microwave-safe bowl, combine the glutinous rice flour and granulated sugar. Whisk them together thoroughly until well combined. Gradually add the water, whisking continuously to ensure there are no dry pockets or lumps. You want a smooth, milk-like batter. If using, whisk in optional matcha, vanilla, or salt now.
- Microwave Cook (with Doneness Cues)Cover the bowl with a microwave-safe lid or a plate (leaving a small gap for steam to escape).
- Microwave for 1 minute. Remove and stir vigorously with a silicone spatula. The mixture will still be very liquidy.
- Microwave for another 1 minute. Stir again. You'll notice it starting to thicken around the edges.
- Microwave for 30-second bursts, stirring vigorously after each burst. Continue this process. The mochi will gradually transform from a liquid to a thick, translucent, glossy, and bouncy dough. What "done" looks like: it will be firm, sticky, translucent (not opaque white), and have a uniform, glossy sheen with no liquid batter remaining. The dough should pull away from the sides of the bowl easily.
- Mini Timing Guide: For an 800-1000W microwave, total cooking time is usually 3-5 minutes. Adjust based on your microwave's wattage.
- Cool to the "Safe Handling Window"Once cooked, carefully remove the hot mochi dough from the microwave. Allow it to cool in the bowl for about 10-15 minutes. It needs to be cool enough to touch without burning your hands, but still warm and pliable enough to stretch and shape easily.
- Portion + FlattenGenerously dust your clean work surface (or a large piece of parchment paper) with cornstarch or potato starch. Transfer the warm mochi dough onto the dusted surface. Dust your hands lightly with starch. Using a bench scraper or knife, divide the dough into 10-12 equal portions. Take one portion and gently flatten it into a circle about 3-4 inches in diameter. Aim for a thickness that's thin enough to wrap easily but not so thin it tears.
- Fill + SealPlace one chilled red bean paste ball in the center of a flattened mochi circle. Carefully bring the edges of the mochi dough up and around the filling, pinching them together at the top to seal. The pinch technique is key: gather the dough like a little purse, then gently twist and pinch the seam completely closed. If you get small tears, gently stretch and press the dough together to fix them. Place the sealed mochi seam-side down on your dusted surface to keep the seams from popping open.
- Final Dusting and ServingOnce all your mochi balls are filled and sealed, give them a final light dusting of cornstarch or potato starch to prevent sticking. Be careful not to overdo it, as too much starch can make the mochi taste dry or chalky. Serve immediately and enjoy!
You may also like


Hey there! I’m just someone who seriously loves good food and believes that cooking doesn’t have to be complicated to be amazing. Whether it’s a quick weeknight dinner or a cozy weekend meal, I’m all about sharing easy, tasty recipes that actually work.


