
Fluffy Idli at Home - Easy Batter Recipe & Tips
Fluffy Idli at Home - Easy Batter Recipe & Tips


- Serves: 4 People
- Prepare Time: 30 minutes
- Cooking Time: 15 minutes
- Calories: -
- Difficulty: Medium
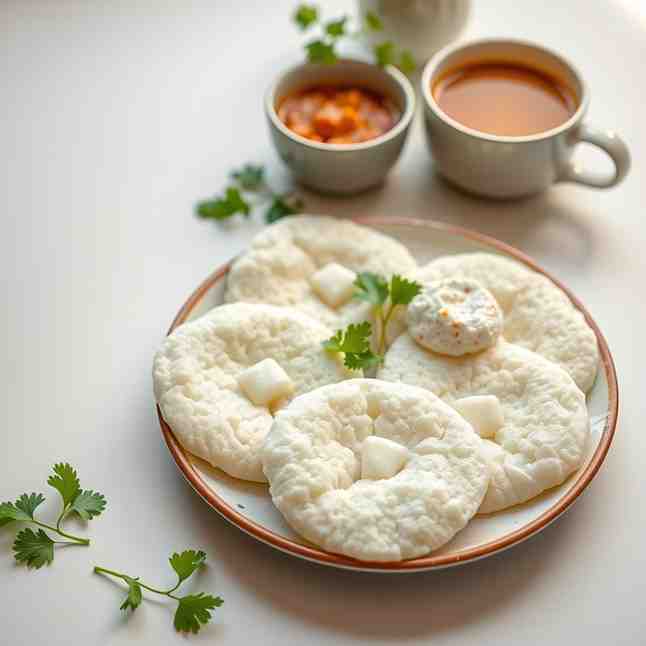
Idli are soft, pillowy steamed rice cakes, a beloved staple of South Indian food and one of the healthiest Indian home cooking options. This easy idli recipe will guide you through making perfectly fluffy idli right in your own kitchen, demystifying the process of creating the ideal idli dosa batter from scratch. Forget dense, flat idlis – our foolproof method focuses on key techniques for aeration and fermentation, ensuring you achieve light, melt-in-your-mouth results every single time, making a homemade idli recipe a breeze. Perfect for anyone looking for healthy recipes to make at home and experience authentic flavors.
Here’s a quick look at what’s involved:
Day 1: Soak rice & dal (4-6 hours), Grind batter (30 minutes), Ferment (8-12 hours overnight)
Day 2: Steam idli (10-15 minutes), Serve!
Yield: Approx. 20-24 idlis
Active Prep Time: 30 minutes (rinsing, grinding, mixing)
Active Cook Time: 10-15 minutes (steaming)
Passive Time: 4-6 hours for soaking + 8-12 hours for fermentation
Ingredients
Directions
- Soak (Setting Yourself Up for Fluffy Idli)
- Rinse Thoroughly: In separate bowls, rinse the idli rice and urad dal (along with fenugreek seeds, if using). Rinse them under cold running water, rubbing gently, until the water runs mostly clear. This removes excess starch and impurities.
- Soak Separately: Place the rinsed rice in one bowl and the rinsed urad dal (with fenugreek, if using) in another. Add enough fresh water to each bowl to cover the ingredients by at least an inch.
- Soak Time: Allow both to soak for 4-6 hours. If your kitchen is very cold, you can soak for up to 8 hours. The dal should plump up significantly.
- Grind (The “Fluff” Step for Your Idli Dosa Batter)
- Grind the Dal First: Drain the soaked dal and fenugreek. Transfer them to your blender or wet grinder. Add about ½ cup of ice-cold water. Grind until the dal is incredibly light, airy, and fluffy. It should be smooth to the touch and double in volume. This aeration is key to fluffy idlis! Add a tablespoon or two more cold water if needed to keep the blades moving, but avoid adding too much.
- Grind the Rice: Drain the soaked rice. Transfer it to your blender or wet grinder. Add about 1 to 1¼ cups of cold water. Grind the rice until it forms a smooth-ish batter with a slight, fine grit – think fine semolina. You don't want it completely smooth like cream, but also not chunky.
- Combine & Mix: Pour the ground dal batter into a large, clean fermentation bowl. Add the ground rice batter to the same bowl. Gently mix them together. Using your clean hands is often recommended as the warmth from your hands can aid fermentation, but a clean spoon works just fine. Mix until just combined; don’t overmix.
- Ferment (How to Know Your Batter Worked)
- Ideal Fermentation Conditions: Cover the bowl loosely with a lid or plate (do not seal tightly; gas needs to escape). For optimal fermentation, the batter needs warmth, ideally between 75-85°F (24-30°C).
- Warming Options for US Homes:
- Oven with Light On: Place the bowl in an oven with just the oven light on (this creates a gentle warmth).
- Warm Spot: Find a naturally warm spot in your kitchen, like near a sunny window or on top of the fridge.
- Instant Pot (Yogurt Setting): If you have an Instant Pot, you can use the yogurt setting (set to "less" for a lower temperature) for a controlled warm environment.
- Check for Readiness: Allow the batter to ferment for 8-12 hours, or until it has noticeably increased in volume (it should double!) and has a light, bubbly texture. It will also develop a mild, pleasant tangy aroma, indicating successful fermentation.
- Add Salt: Once fermented, gently stir in the salt. Avoid vigorous stirring, as this can deflate the batter. If using iodized salt, add it after fermentation to avoid potential interference with the process.
- Steam Idli (Soft Centers, Not Dry)
- Prep Molds: Lightly grease your idli molds with oil using a silicone brush or a dab of oil on a paper towel. This prevents sticking.
- Fill Molds: Gently spoon the fermented id
Fluffy Idli at Home - Easy Batter Recipe & Tips
- Serves: 4 People
- Prepare Time: 30 minutes
- Cooking Time: 15 minutes
- Calories: -
- Difficulty: Medium
Idli are soft, pillowy steamed rice cakes, a beloved staple of South Indian food and one of the healthiest Indian home cooking options. This easy idli recipe will guide you through making perfectly fluffy idli right in your own kitchen, demystifying the process of creating the ideal idli dosa batter from scratch. Forget dense, flat idlis – our foolproof method focuses on key techniques for aeration and fermentation, ensuring you achieve light, melt-in-your-mouth results every single time, making a homemade idli recipe a breeze. Perfect for anyone looking for healthy recipes to make at home and experience authentic flavors.
Here’s a quick look at what’s involved:
Day 1: Soak rice & dal (4-6 hours), Grind batter (30 minutes), Ferment (8-12 hours overnight)
Day 2: Steam idli (10-15 minutes), Serve!
Yield: Approx. 20-24 idlis
Active Prep Time: 30 minutes (rinsing, grinding, mixing)
Active Cook Time: 10-15 minutes (steaming)
Passive Time: 4-6 hours for soaking + 8-12 hours for fermentation
Ingredients
Directions
- Soak (Setting Yourself Up for Fluffy Idli)
- Rinse Thoroughly: In separate bowls, rinse the idli rice and urad dal (along with fenugreek seeds, if using). Rinse them under cold running water, rubbing gently, until the water runs mostly clear. This removes excess starch and impurities.
- Soak Separately: Place the rinsed rice in one bowl and the rinsed urad dal (with fenugreek, if using) in another. Add enough fresh water to each bowl to cover the ingredients by at least an inch.
- Soak Time: Allow both to soak for 4-6 hours. If your kitchen is very cold, you can soak for up to 8 hours. The dal should plump up significantly.
- Grind (The “Fluff” Step for Your Idli Dosa Batter)
- Grind the Dal First: Drain the soaked dal and fenugreek. Transfer them to your blender or wet grinder. Add about ½ cup of ice-cold water. Grind until the dal is incredibly light, airy, and fluffy. It should be smooth to the touch and double in volume. This aeration is key to fluffy idlis! Add a tablespoon or two more cold water if needed to keep the blades moving, but avoid adding too much.
- Grind the Rice: Drain the soaked rice. Transfer it to your blender or wet grinder. Add about 1 to 1¼ cups of cold water. Grind the rice until it forms a smooth-ish batter with a slight, fine grit – think fine semolina. You don't want it completely smooth like cream, but also not chunky.
- Combine & Mix: Pour the ground dal batter into a large, clean fermentation bowl. Add the ground rice batter to the same bowl. Gently mix them together. Using your clean hands is often recommended as the warmth from your hands can aid fermentation, but a clean spoon works just fine. Mix until just combined; don’t overmix.
- Ferment (How to Know Your Batter Worked)
- Ideal Fermentation Conditions: Cover the bowl loosely with a lid or plate (do not seal tightly; gas needs to escape). For optimal fermentation, the batter needs warmth, ideally between 75-85°F (24-30°C).
- Warming Options for US Homes:
- Oven with Light On: Place the bowl in an oven with just the oven light on (this creates a gentle warmth).
- Warm Spot: Find a naturally warm spot in your kitchen, like near a sunny window or on top of the fridge.
- Instant Pot (Yogurt Setting): If you have an Instant Pot, you can use the yogurt setting (set to "less" for a lower temperature) for a controlled warm environment.
- Check for Readiness: Allow the batter to ferment for 8-12 hours, or until it has noticeably increased in volume (it should double!) and has a light, bubbly texture. It will also develop a mild, pleasant tangy aroma, indicating successful fermentation.
- Add Salt: Once fermented, gently stir in the salt. Avoid vigorous stirring, as this can deflate the batter. If using iodized salt, add it after fermentation to avoid potential interference with the process.
- Steam Idli (Soft Centers, Not Dry)
- Prep Molds: Lightly grease your idli molds with oil using a silicone brush or a dab of oil on a paper towel. This prevents sticking.
- Fill Molds: Gently spoon the fermented id
You may also like


Hey there! I’m just someone who seriously loves good food and believes that cooking doesn’t have to be complicated to be amazing. Whether it’s a quick weeknight dinner or a cozy weekend meal, I’m all about sharing easy, tasty recipes that actually work.


