
Pate Kòde - Haitian Fritay Recipe You'll Love!
Pate Kòde - Haitian Fritay Recipe You'll Love!

- Serves: 12 People
- Prepare Time: 60 minutes
- Cooking Time: 25 minutes
- Calories: -
- Difficulty: Medium
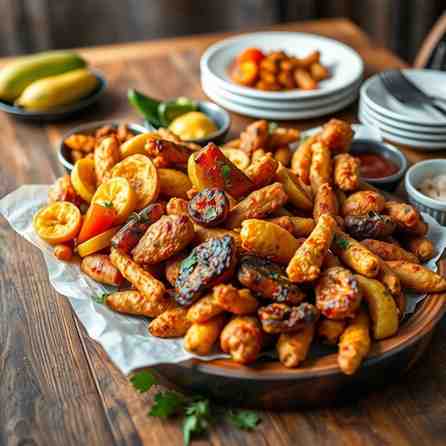
Welcome to the vibrant world of Haitian fritay food! If you're looking to dive into the heart of Haitian street food, you've come to the right place. Today, we're making Pate Kòde, those irresistible fried Haitian patties that are a true staple of Haitian cuisine. Imagine a perfectly crispy, golden-brown shell giving way to a savory, flavorful filling – that's the magic of pate kòde! People absolutely adore them for their incredible texture and rich taste, making them perfect as a hearty snack, appetizer, or party food.
Forget greasy, complicated recipes. In this guide, you'll learn a truly traditional, step-by-step, not-greasy method for making authentic pate kòde right in your own kitchen. We'll walk you through every secret to achieve that perfect crispness without the heavy oil, ensuring your patties are not just delicious, but also something you can be proud to share.
Before we jump into the full recipe, let's get a quick overview and clarify what makes pate kòde so special.
Key Tools: Rolling pin, fry thermometer
The 3 Success Rules:
1. Keep the filling dry-ish to prevent blowouts.
2. Seal the patties tightly for a perfect fry.
3. Fry at the right temperature for crisp, not greasy, results.
In simple, US-friendly terms, pate kòde is essentially a Haitian street-food empanada. It's a fried pastry, typically filled with a savory mixture, most commonly smoked herring, but sometimes ground meat or vegetables. It's a beloved quick appetizer or snack, found everywhere from bustling street vendors to family parties across Haiti.
Now, let's clear up a common point of confusion: pate kòde (fried, part of the `fritay haitian food` tradition) is not the same as Haitian pâté. Haitian pâté, while also delicious, refers to a baked puff pastry, often with a similar savory filling, but prepared with a completely different dough and cooking method. Pate kòde is all about that crispy, fried exterior!
Ingredients
Directions
- Prep the Smoked Herring (Flavorful, Not Salty)
- Rinse & Soak: Give your smoked herring a quick rinse under cold water. Place it in a bowl and cover with fresh cold water. Let it soak for at least 30 minutes, or up to 2 hours, changing the water once or twice. This significantly reduces the saltiness.
- Boil (Optional, for texture): Some prefer to quickly boil the herring for 5-7 minutes after soaking to further soften it and remove any remaining salt. Drain well.
- Clean & Flake: Once cooled enough to handle, carefully remove the skin and any bones. Flake the fish into small, bite-sized pieces.
- Taste Checkpoint: Taste a small piece of the flaked herring. If it's still too salty for your liking, you can give it another quick rinse or soak. This step is crucial to avoid ruining your batch!
- Make the Filling (Savory, Not Wet)
- Sauté Aromatics: Heat 1 tablespoon of neutral oil in a medium skillet over medium heat. Add the diced onion, bell pepper, and sliced scallions. Sauté for 3-5 minutes until softened and fragrant.
- Add Garlic & Heat: Stir in the minced garlic and Scotch bonnet/habanero pepper. Cook for another minute until fragrant.
- Combine with Herring: Add the flaked smoked herring to the skillet. Stir to combine with the aromatics.
- Add Cabbage & Seasoning: Stir in the shredded cabbage, black pepper, and optional salt (remember the herring is already seasoned). Cook for 3-5 minutes, stirring occasionally, until the cabbage softens slightly and any excess moisture evaporates. The goal is a savory, relatively dry filling.
- Fold in Egg & Lime: Remove the skillet from heat. Stir in the finely chopped hard-boiled egg and optional lime juice.
- Cool Completely: Transfer the filling to a plate or shallow dish and spread it out. Let it cool completely to room temperature. This is essential to prevent steam from building up inside the patties, which can cause them to burst open during frying.
- Make the Dough (Street-Style Fried Dough)
- Combine Dry Ingredients: In a large bowl, whisk together the flour and salt.
- Add Oil: Pour in the 1/4 cup of neutral oil. Use your fingertips to rub the oil into the flour until the mixture resembles coarse crumbs.
- Add Water & Knead: Gradually add the warm water, mixing with a wooden spoon or your hands until a shaggy dough forms. Turn the dough out onto a lightly floured surface and knead for 5-7 minutes, just until it's smooth and elastic. Avoid over-kneading, which can make the dough tough.
- Dough Texture Cues: The dough should feel soft, pliable, and slightly tacky, but not sticky.
- Rest Time: Form the dough into a ball, lightly grease the bowl, place the dough back in, and cover with plastic wrap. Let it rest at room temperature for at least 30 minutes. This resting period allows the gluten to relax, making the dough easier to roll out and preventing toughness.
- Roll, Fill, and Seal
- Divide Dough: Divide the rested dough into 12-16 equal pieces. Roll each piece into a smooth ball.
- Roll Out Patties: On a lightly floured surface, roll one dough ball into a thin circle, about 4-5 inches in diameter and approximately 1/8 inch thick. The thickness is key for a crispy, not greasy, patty.
- Portion & Fill: Place about 1-2 tablespoons of the cooled filling onto one half of the dough circle, leaving a small border around the edge. Don't overstuff!
- Seal Method: Fold the other half of the dough over the filling to create a half-moon shape. Gently press around the edges to seal. Then, use the tines of a fork to crimp the edges firmly, ensuring a tight seal. This prevents leaks and blowouts during frying.
- Docking (Tiny Holes): Optionally, use a toothpick or fork to poke 2-3 tiny holes (docking) on the top of each patty. This allows steam to escape, further preventing puffing up too much or bursting.
- Repeat: Place the assembled patties on a baking sheet lined with parchment paper as you go.
- Fry (Crispy, Not Greasy)
- Heat Oil: Pour the frying oil into a deep, heavy-bottomed pot or Dutch oven. Heat over medium-high heat to 350-360°F (175-180°C). Use a fry thermometer to monitor the temperature.
- Test Oil (No Thermometer): If you don't have a thermometer, drop a tiny piece of dough into the oil. If it immediately sizzles and floats to the top, the oil is ready. If it sinks or doesn't sizzle, it's too cool. If it browns too quickly, it's too hot.
- Fry in Batches: Carefully lower 3-4 patties into the hot oil, ensuring you don't overcrowd the pot. Overcrowding will drop the oil temperature and lead to greasy patties.
- Fry Time & Color Cues: Fry for 3-5 minutes per side, or until the patties are golden brown and crispy. Flip them gently with tongs or a slotted spoon.
- Drain Correctly: Once golden, remove the patties from the oil and immediately transfer them to the prepared wire rack set over a sheet pan. This allows excess oil to drip off and air to circulate, keeping them crisp. Avoid draining on paper towels directly, as they can steam and soften the crust.
- Keep Warm (Optional): If making a large batch, you can keep fried patties warm in a preheated oven at 200°F (95°C) while you fry the rest. Again, keep them on a wire rack to prevent steaming.
- Serve
- Best Served Hot: Pate kòde are best enjoyed fresh and hot from the fryer.
- What to Serve With: Traditionally, they are served with pikliz (a spicy Haitian pickled cabbage relish) or a dab of Haitian hot sauce. A simple green salad can also be a refreshing accompaniment.
Pate Kòde - Haitian Fritay Recipe You'll Love!

- Serves: 12 People
- Prepare Time: 60 minutes
- Cooking Time: 25 minutes
- Calories: -
- Difficulty: Medium
Welcome to the vibrant world of Haitian fritay food! If you're looking to dive into the heart of Haitian street food, you've come to the right place. Today, we're making Pate Kòde, those irresistible fried Haitian patties that are a true staple of Haitian cuisine. Imagine a perfectly crispy, golden-brown shell giving way to a savory, flavorful filling – that's the magic of pate kòde! People absolutely adore them for their incredible texture and rich taste, making them perfect as a hearty snack, appetizer, or party food.
Forget greasy, complicated recipes. In this guide, you'll learn a truly traditional, step-by-step, not-greasy method for making authentic pate kòde right in your own kitchen. We'll walk you through every secret to achieve that perfect crispness without the heavy oil, ensuring your patties are not just delicious, but also something you can be proud to share.
Before we jump into the full recipe, let's get a quick overview and clarify what makes pate kòde so special.
Key Tools: Rolling pin, fry thermometer
The 3 Success Rules:
1. Keep the filling dry-ish to prevent blowouts.
2. Seal the patties tightly for a perfect fry.
3. Fry at the right temperature for crisp, not greasy, results.
In simple, US-friendly terms, pate kòde is essentially a Haitian street-food empanada. It's a fried pastry, typically filled with a savory mixture, most commonly smoked herring, but sometimes ground meat or vegetables. It's a beloved quick appetizer or snack, found everywhere from bustling street vendors to family parties across Haiti.
Now, let's clear up a common point of confusion: pate kòde (fried, part of the `fritay haitian food` tradition) is not the same as Haitian pâté. Haitian pâté, while also delicious, refers to a baked puff pastry, often with a similar savory filling, but prepared with a completely different dough and cooking method. Pate kòde is all about that crispy, fried exterior!
Ingredients
Directions
- Prep the Smoked Herring (Flavorful, Not Salty)
- Rinse & Soak: Give your smoked herring a quick rinse under cold water. Place it in a bowl and cover with fresh cold water. Let it soak for at least 30 minutes, or up to 2 hours, changing the water once or twice. This significantly reduces the saltiness.
- Boil (Optional, for texture): Some prefer to quickly boil the herring for 5-7 minutes after soaking to further soften it and remove any remaining salt. Drain well.
- Clean & Flake: Once cooled enough to handle, carefully remove the skin and any bones. Flake the fish into small, bite-sized pieces.
- Taste Checkpoint: Taste a small piece of the flaked herring. If it's still too salty for your liking, you can give it another quick rinse or soak. This step is crucial to avoid ruining your batch!
- Make the Filling (Savory, Not Wet)
- Sauté Aromatics: Heat 1 tablespoon of neutral oil in a medium skillet over medium heat. Add the diced onion, bell pepper, and sliced scallions. Sauté for 3-5 minutes until softened and fragrant.
- Add Garlic & Heat: Stir in the minced garlic and Scotch bonnet/habanero pepper. Cook for another minute until fragrant.
- Combine with Herring: Add the flaked smoked herring to the skillet. Stir to combine with the aromatics.
- Add Cabbage & Seasoning: Stir in the shredded cabbage, black pepper, and optional salt (remember the herring is already seasoned). Cook for 3-5 minutes, stirring occasionally, until the cabbage softens slightly and any excess moisture evaporates. The goal is a savory, relatively dry filling.
- Fold in Egg & Lime: Remove the skillet from heat. Stir in the finely chopped hard-boiled egg and optional lime juice.
- Cool Completely: Transfer the filling to a plate or shallow dish and spread it out. Let it cool completely to room temperature. This is essential to prevent steam from building up inside the patties, which can cause them to burst open during frying.
- Make the Dough (Street-Style Fried Dough)
- Combine Dry Ingredients: In a large bowl, whisk together the flour and salt.
- Add Oil: Pour in the 1/4 cup of neutral oil. Use your fingertips to rub the oil into the flour until the mixture resembles coarse crumbs.
- Add Water & Knead: Gradually add the warm water, mixing with a wooden spoon or your hands until a shaggy dough forms. Turn the dough out onto a lightly floured surface and knead for 5-7 minutes, just until it's smooth and elastic. Avoid over-kneading, which can make the dough tough.
- Dough Texture Cues: The dough should feel soft, pliable, and slightly tacky, but not sticky.
- Rest Time: Form the dough into a ball, lightly grease the bowl, place the dough back in, and cover with plastic wrap. Let it rest at room temperature for at least 30 minutes. This resting period allows the gluten to relax, making the dough easier to roll out and preventing toughness.
- Roll, Fill, and Seal
- Divide Dough: Divide the rested dough into 12-16 equal pieces. Roll each piece into a smooth ball.
- Roll Out Patties: On a lightly floured surface, roll one dough ball into a thin circle, about 4-5 inches in diameter and approximately 1/8 inch thick. The thickness is key for a crispy, not greasy, patty.
- Portion & Fill: Place about 1-2 tablespoons of the cooled filling onto one half of the dough circle, leaving a small border around the edge. Don't overstuff!
- Seal Method: Fold the other half of the dough over the filling to create a half-moon shape. Gently press around the edges to seal. Then, use the tines of a fork to crimp the edges firmly, ensuring a tight seal. This prevents leaks and blowouts during frying.
- Docking (Tiny Holes): Optionally, use a toothpick or fork to poke 2-3 tiny holes (docking) on the top of each patty. This allows steam to escape, further preventing puffing up too much or bursting.
- Repeat: Place the assembled patties on a baking sheet lined with parchment paper as you go.
- Fry (Crispy, Not Greasy)
- Heat Oil: Pour the frying oil into a deep, heavy-bottomed pot or Dutch oven. Heat over medium-high heat to 350-360°F (175-180°C). Use a fry thermometer to monitor the temperature.
- Test Oil (No Thermometer): If you don't have a thermometer, drop a tiny piece of dough into the oil. If it immediately sizzles and floats to the top, the oil is ready. If it sinks or doesn't sizzle, it's too cool. If it browns too quickly, it's too hot.
- Fry in Batches: Carefully lower 3-4 patties into the hot oil, ensuring you don't overcrowd the pot. Overcrowding will drop the oil temperature and lead to greasy patties.
- Fry Time & Color Cues: Fry for 3-5 minutes per side, or until the patties are golden brown and crispy. Flip them gently with tongs or a slotted spoon.
- Drain Correctly: Once golden, remove the patties from the oil and immediately transfer them to the prepared wire rack set over a sheet pan. This allows excess oil to drip off and air to circulate, keeping them crisp. Avoid draining on paper towels directly, as they can steam and soften the crust.
- Keep Warm (Optional): If making a large batch, you can keep fried patties warm in a preheated oven at 200°F (95°C) while you fry the rest. Again, keep them on a wire rack to prevent steaming.
- Serve
- Best Served Hot: Pate kòde are best enjoyed fresh and hot from the fryer.
- What to Serve With: Traditionally, they are served with pikliz (a spicy Haitian pickled cabbage relish) or a dab of Haitian hot sauce. A simple green salad can also be a refreshing accompaniment.
You may also like


Hey there! I’m just someone who seriously loves good food and believes that cooking doesn’t have to be complicated to be amazing. Whether it’s a quick weeknight dinner or a cozy weekend meal, I’m all about sharing easy, tasty recipes that actually work.


