
Haupia - Easy Gluten-Free Dairy-Free Pudding Recipe
Haupia - Easy Gluten-Free Dairy-Free Pudding Recipe
- Serves: 8 People
- Prepare Time: 15 minutes
- Cooking Time: 10 minutes
- Calories: -
- Difficulty: Easy
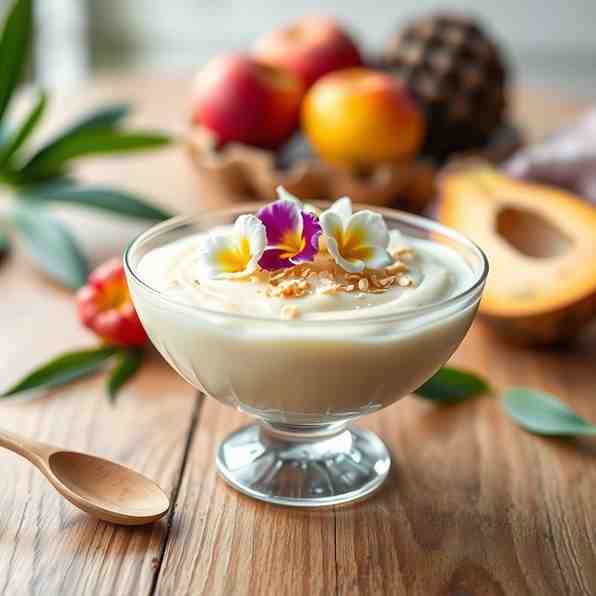
Aloha, dessert lovers! Get ready to whisk yourself away to the sunny shores of Hawaii with Haupia, the most delightful and iconic gluten-free dairy-free pudding you'll ever taste. Imagine a silky-smooth, subtly sweet coconut treat that melts in your mouth, yet holds its shape like a dream. That's Haupia! It's a staple at every Hawaiian luau and a beloved everyday indulgence, celebrated for its simple elegance and irresistible flavor. The best part? You only need a few pantry staples and no fancy tools to whip up this easy, gluten free dairy free pudding that’s also naturally vegan and can even be made sugar-free. Let's dive into making a taste of paradise right in your own kitchen!
Ingredients
Directions
- Prep Your Pan: Lightly oil an 8x8-inch baking pan, or for easy removal, line it with parchment paper, leaving an overhang on two sides. This makes lifting out the set haupia a breeze!
- Make the Slurry: In a small bowl, combine the cornstarch and cold water. Whisk them together until completely smooth and lump-free. This is your "slurry" and it's key to a silky pudding.
- Heat the Coconut Milk Mixture: Pour the full-fat coconut milk into a medium saucepan. Stir in the granulated sugar and the pinch of salt (if using). Place the saucepan over medium heat and cook, stirring occasionally, until the mixture is steaming gently and the sugar has fully dissolved. Don't let it boil vigorously yet.
- Whisk in the Slurry: Give your cornstarch slurry another quick whisk to ensure it’s still smooth. While continuously whisking the hot coconut milk mixture, slowly pour in the cornstarch slurry. Keep whisking steadily as you pour.
- Cook Until Thick & Glossy: Continue to whisk constantly over medium heat. The mixture will start to thicken quite quickly, going from a thin liquid to a thick, glossy pudding texture. This usually takes about 3-5 minutes after adding the slurry. Keep cooking and whisking for another minute or two after it thickens to ensure the cornstarch is fully cooked through and there's no starchy taste.
- Pour & Cool: Immediately pour the hot haupia mixture into your prepared 8x8-inch pan. Use a spatula to smooth the top if needed. Let it cool on the countertop for about 30 minutes to an hour.
- Chill Until Set: Once it's cooled down a bit, transfer the pan to the refrigerator. Chill for at least 3-4 hours, or preferably overnight, until the haupia is completely firm and set.
- Slice & Serve: Once thoroughly chilled, use the parchment paper overhang (or a knife around the edges) to carefully lift the haupia out of the pan. Place it on a cutting board and slice it into 1-inch squares. Serve immediately and enjoy your taste of Hawaii!
Haupia - Easy Gluten-Free Dairy-Free Pudding Recipe
- Serves: 8 People
- Prepare Time: 15 minutes
- Cooking Time: 10 minutes
- Calories: -
- Difficulty: Easy
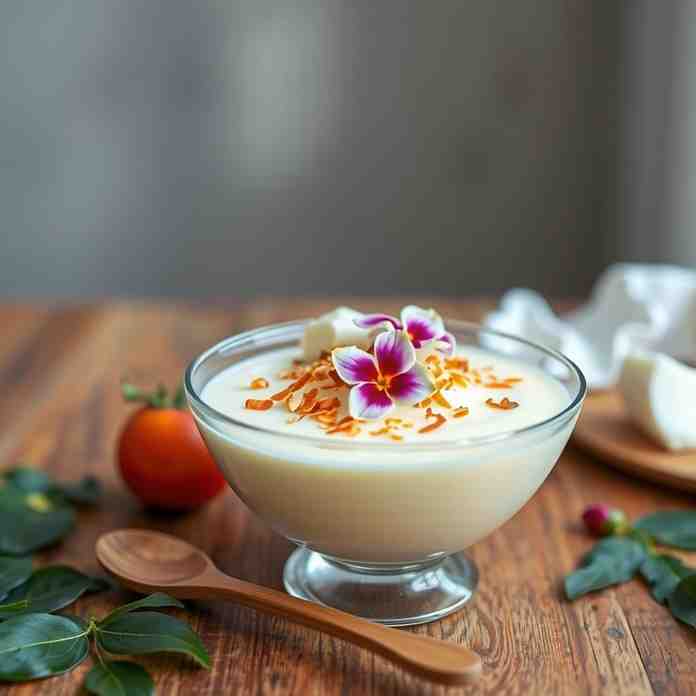
Aloha, dessert lovers! Get ready to whisk yourself away to the sunny shores of Hawaii with Haupia, the most delightful and iconic gluten-free dairy-free pudding you'll ever taste. Imagine a silky-smooth, subtly sweet coconut treat that melts in your mouth, yet holds its shape like a dream. That's Haupia! It's a staple at every Hawaiian luau and a beloved everyday indulgence, celebrated for its simple elegance and irresistible flavor. The best part? You only need a few pantry staples and no fancy tools to whip up this easy, gluten free dairy free pudding that’s also naturally vegan and can even be made sugar-free. Let's dive into making a taste of paradise right in your own kitchen!
Ingredients
Directions
- Prep Your Pan: Lightly oil an 8x8-inch baking pan, or for easy removal, line it with parchment paper, leaving an overhang on two sides. This makes lifting out the set haupia a breeze!
- Make the Slurry: In a small bowl, combine the cornstarch and cold water. Whisk them together until completely smooth and lump-free. This is your "slurry" and it's key to a silky pudding.
- Heat the Coconut Milk Mixture: Pour the full-fat coconut milk into a medium saucepan. Stir in the granulated sugar and the pinch of salt (if using). Place the saucepan over medium heat and cook, stirring occasionally, until the mixture is steaming gently and the sugar has fully dissolved. Don't let it boil vigorously yet.
- Whisk in the Slurry: Give your cornstarch slurry another quick whisk to ensure it’s still smooth. While continuously whisking the hot coconut milk mixture, slowly pour in the cornstarch slurry. Keep whisking steadily as you pour.
- Cook Until Thick & Glossy: Continue to whisk constantly over medium heat. The mixture will start to thicken quite quickly, going from a thin liquid to a thick, glossy pudding texture. This usually takes about 3-5 minutes after adding the slurry. Keep cooking and whisking for another minute or two after it thickens to ensure the cornstarch is fully cooked through and there's no starchy taste.
- Pour & Cool: Immediately pour the hot haupia mixture into your prepared 8x8-inch pan. Use a spatula to smooth the top if needed. Let it cool on the countertop for about 30 minutes to an hour.
- Chill Until Set: Once it's cooled down a bit, transfer the pan to the refrigerator. Chill for at least 3-4 hours, or preferably overnight, until the haupia is completely firm and set.
- Slice & Serve: Once thoroughly chilled, use the parchment paper overhang (or a knife around the edges) to carefully lift the haupia out of the pan. Place it on a cutting board and slice it into 1-inch squares. Serve immediately and enjoy your taste of Hawaii!
You may also like

Hey there! I’m just someone who seriously loves good food and believes that cooking doesn’t have to be complicated to be amazing. Whether it’s a quick weeknight dinner or a cozy weekend meal, I’m all about sharing easy, tasty recipes that actually work.


