| CulinaryCreationss alt=")
Hawaiian Manapua - Steamed Pork Buns Recipe (Beginner)
Hawaiian Manapua - Steamed Pork Buns Recipe (Beginner)
- Serves: 12 People
- Prepare Time: 1 hour 30 m
- Cooking Time: 45 minutes
- Calories: -
- Difficulty: Medium
If you've ever dreamt of biting into a warm, fluffy steamed bao bun filled with sweet and savory char siu pork, you're in the right place! This guide is your definitive, beginner-proof playbook for making authentic Hawaiian Manapua right in your own kitchen. Forget dry dough or soggy tops; we're going to master the art of these beloved pork bao buns, from crafting the perfect char siu pork filling to achieving that cloud-like steamed texture. Whether you're a seasoned home cook or just starting your journey into home cooked Chinese dishes and Asian steamed buns, get ready to discover the secrets to Hawaii's favorite snack. This recipe will teach you to make steamed dim sum quality manapua that tastes just like the real local-style deal. Let's get steaming!
Manapua is Hawaii's beloved take on the Chinese char siu bao. While both are delicious steamed buns filled with char siu pork, manapua has its own unique story and characteristics. Originating from Chinese immigrants who arrived in Hawaii during the plantation era, manapua adapted to local tastes and ingredients. Hawaiian versions are often larger, with a slightly different dough texture, and are ubiquitous across the islands—found everywhere from dedicated manapua bakeries to convenience stores and even sold by the "manapua man" from the back of a truck. It’s more than just a snack; it’s a taste of Hawaiian culture and a staple in island life.
This comprehensive guide will equip you with all the knowledge and techniques to become a manapua master:
Learn to make Hawaiian Manapua from scratch, covering both the pillowy dough and the flavorful filling.
Craft authentic char siu pork that tastes just like what you’d find in Hawaii.
Master the art of steaming bao buns without common pitfalls like soggy tops or collapsed buns.
Get expert tips on how to prep, freeze, and reheat your manapua like a pro.
Ingredients
Directions
- Make the Char Siu Pork
- In a large bowl, whisk together the soy sauce, hoisin, honey (or brown sugar), Chinese five-spice, minced garlic, Shaoxing wine, and optional red food coloring.
- Add the cubed pork shoulder to the marinade, tossing to coat thoroughly. Cover the bowl and marinate in the refrigerator for at least 4 hours, or preferably overnight, for maximum flavor.
- Preheat your oven to 375°F (190°C). Line a baking sheet with foil for easy cleanup.
- Remove the pork from the marinade (reserve the marinade for the filling sauce) and spread it in a single layer on the prepared baking sheet.
- Roast for 30-45 minutes, flipping halfway, until the pork is cooked through and slightly caramelized. An instant-read thermometer should register 145°F (63°C).
- Remove from the oven and let the pork rest for 10 minutes. This helps keep it juicy.
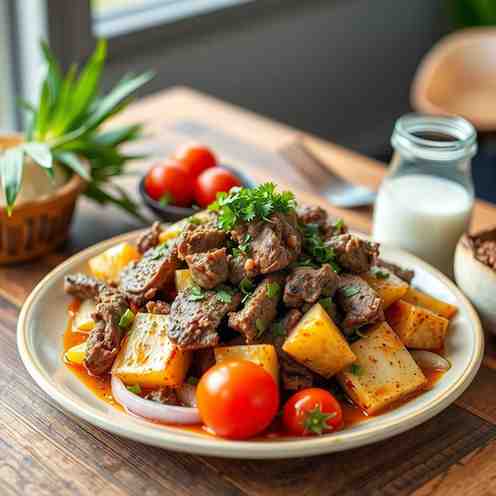
- Once cooled slightly, chop the char siu pork into small, ¼-inch pieces. (Small pieces are key for easy filling and an even distribution of flavor in each bun.)
- Turn the Char Siu into Manapua Filling
- Pour the reserved char siu marinade into a small saucepan. Bring to a simmer over medium heat.
- In a small bowl, whisk together the cornstarch and cold water to create a slurry.
- Slowly whisk the cornstarch slurry into the simmering marinade. Continue whisking until the sauce thickens and becomes glossy.
- Remove the sauce from heat and add the chopped char siu pork. Toss everything together until the pork is well coated.
- Consistency Target: The filling should be glossy and scoopable, not runny or dry. If it's too thick, add a tablespoon of water; if too thin, simmer gently for another minute to reduce.
- Allow the filling to cool completely to room temperature before using. This prevents the dough from becoming greasy or tearing when filled.
- Make the Dough
- In a small bowl, combine the warm water, warm milk, and yeast. Stir gently and let it sit for 5-10 minutes until it becomes foamy. (This "blooming" indicates your yeast is active and ready to work!)
- In a large mixing bowl, whisk together the flour, sugar, baking powder, and salt.
- Pour the bloomed yeast mixture and the neutral oil into the dry ingredients.
- Mix with a wooden spoon or your hands until a shaggy dough forms.
- Turn the dough out onto a lightly floured surface and knead for 8-10 minutes, or until it's smooth, elastic, and no longer sticky. (The dough should feel soft and springy.)
- Lightly grease a clean bowl with a little oil. Place the dough in the bowl, turning it once to coat. Cover the bowl with plastic wrap or a damp kitchen towel.
- First Rise: Let the dough rise in a warm place for 1 to 1 ½ hours, or until it has doubled in size. (To check if it’s ready, gently poke two fingers into the dough; if the indentations remain, it's proofed.)
- Portion & Roll (with Sizing Targets)
- Once the dough has risen, gently punch it down to release the air.
- Turn the dough out onto a lightly floured surface and roll it into a log.
- Divide the dough into 12 equal pieces. Each piece should weigh approximately 2 ounces (55-60g).
- Take one piece of dough and flatten it slightly. Using a rolling pin, roll it into a 4-5 inch (10-12 cm) diameter disk. (Aim for the center to be slightly thicker than the edges; this helps hold the filling without tearing.) Keep the remaining dough covered to prevent it from drying out.
- Fill & Seal (Leak-Proof Technique)
- Hold a dough disk in the palm of one hand. Place about 2-3 tablespoons of the cooled char siu filling in the center. (Don't overfill, or they'll be hard to seal.)
- Bring the edges of the dough up around the filling, pleating and pinching them together at the top to form a tight seal. Twist the top slightly to secure.
- Seal Test: Gently press on the bun. If you see any thin spots or feel the filling about to burst through, reinforce the seal. A good seal is crucial to prevent leakage during steaming.
- Place each sealed bun on a square of parchment paper. This prevents sticking and makes transferring to the steamer easy.
- Second Proof (Short Rest)
- Arrange the filled buns (on their parchment squares) in your steamer basket, ensuring there's enough space between them for expansion. You'll likely need to steam in batches.
- Cover the steamer basket with the towel-wrapped lid.
- Let the buns proof for another 20-30 minutes in the steamer, or until they look visibly puffy and light. (This second proof is vital for achieving that incredibly fluffy texture.)
- Steam
- While the buns are proofing, prepare your steaming pot. Fill a large pot or wok with about 1-2 inches of water and bring it to a gentle simmer.
- Once the buns are proofed and the water is simmering, carefully place the steamer basket with the buns over the pot. Ensure the water is not touching the bottom of the basket.
- Steam the buns for 10-12 minutes. The exact timing may vary slightly depending on the size of your buns and your steamer.
- How to know they’re done: The buns will look puffed, shiny, and feel light and springy to the touch.
- Once steaming is complete, turn off the heat and do not open the lid immediately. Let the buns rest in the closed steamer for 5 minutes. This prevents them from collapsing due to a sudden temperature change.
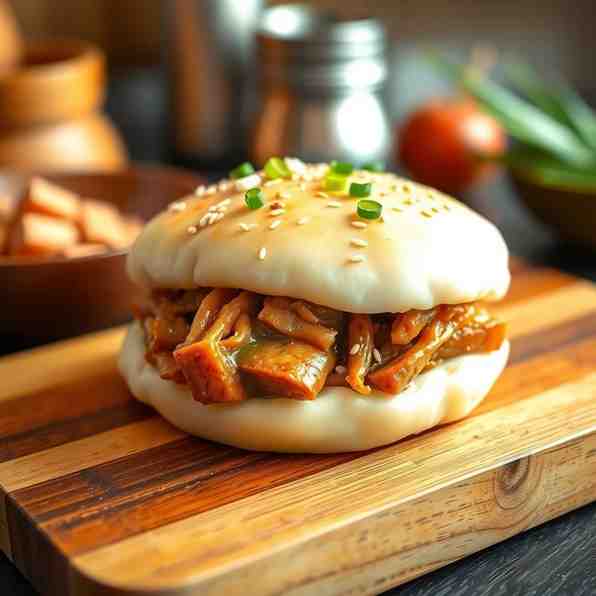
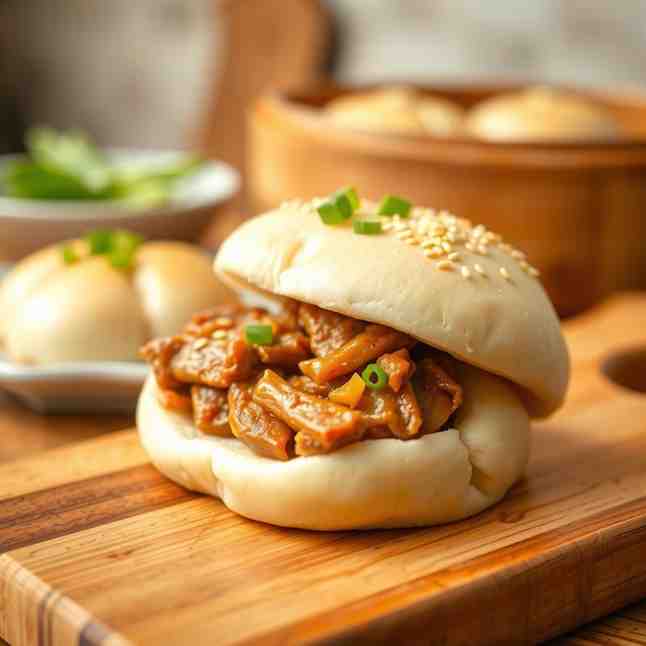
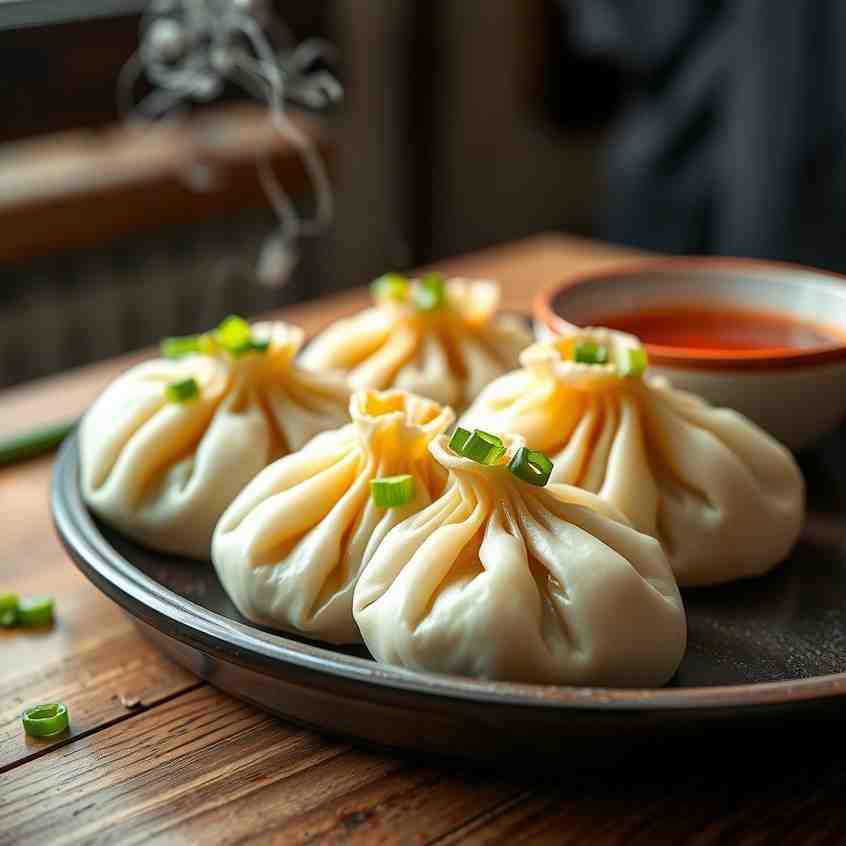
- Carefully remove the steamer basket and transfer the hot manapua to a serving plate. Serve immediately, perhaps with a sprinkle of green onions.
Hawaiian Manapua - Steamed Pork Buns Recipe (Beginner)
.jpg)
- Serves: 12 People
- Prepare Time: 1 hour 30 m
- Cooking Time: 45 minutes
- Calories: -
- Difficulty: Medium
If you've ever dreamt of biting into a warm, fluffy steamed bao bun filled with sweet and savory char siu pork, you're in the right place! This guide is your definitive, beginner-proof playbook for making authentic Hawaiian Manapua right in your own kitchen. Forget dry dough or soggy tops; we're going to master the art of these beloved pork bao buns, from crafting the perfect char siu pork filling to achieving that cloud-like steamed texture. Whether you're a seasoned home cook or just starting your journey into home cooked Chinese dishes and Asian steamed buns, get ready to discover the secrets to Hawaii's favorite snack. This recipe will teach you to make steamed dim sum quality manapua that tastes just like the real local-style deal. Let's get steaming!
Manapua is Hawaii's beloved take on the Chinese char siu bao. While both are delicious steamed buns filled with char siu pork, manapua has its own unique story and characteristics. Originating from Chinese immigrants who arrived in Hawaii during the plantation era, manapua adapted to local tastes and ingredients. Hawaiian versions are often larger, with a slightly different dough texture, and are ubiquitous across the islands—found everywhere from dedicated manapua bakeries to convenience stores and even sold by the "manapua man" from the back of a truck. It’s more than just a snack; it’s a taste of Hawaiian culture and a staple in island life.
This comprehensive guide will equip you with all the knowledge and techniques to become a manapua master:
Learn to make Hawaiian Manapua from scratch, covering both the pillowy dough and the flavorful filling.
Craft authentic char siu pork that tastes just like what you’d find in Hawaii.
Master the art of steaming bao buns without common pitfalls like soggy tops or collapsed buns.
Get expert tips on how to prep, freeze, and reheat your manapua like a pro.
Ingredients
Directions
- Make the Char Siu Pork
- In a large bowl, whisk together the soy sauce, hoisin, honey (or brown sugar), Chinese five-spice, minced garlic, Shaoxing wine, and optional red food coloring.
- Add the cubed pork shoulder to the marinade, tossing to coat thoroughly. Cover the bowl and marinate in the refrigerator for at least 4 hours, or preferably overnight, for maximum flavor.
- Preheat your oven to 375°F (190°C). Line a baking sheet with foil for easy cleanup.
- Remove the pork from the marinade (reserve the marinade for the filling sauce) and spread it in a single layer on the prepared baking sheet.
- Roast for 30-45 minutes, flipping halfway, until the pork is cooked through and slightly caramelized. An instant-read thermometer should register 145°F (63°C).
- Remove from the oven and let the pork rest for 10 minutes. This helps keep it juicy.
- Once cooled slightly, chop the char siu pork into small, ¼-inch pieces. (Small pieces are key for easy filling and an even distribution of flavor in each bun.)
- Turn the Char Siu into Manapua Filling
- Pour the reserved char siu marinade into a small saucepan. Bring to a simmer over medium heat.
- In a small bowl, whisk together the cornstarch and cold water to create a slurry.
- Slowly whisk the cornstarch slurry into the simmering marinade. Continue whisking until the sauce thickens and becomes glossy.
- Remove the sauce from heat and add the chopped char siu pork. Toss everything together until the pork is well coated.
- Consistency Target: The filling should be glossy and scoopable, not runny or dry. If it's too thick, add a tablespoon of water; if too thin, simmer gently for another minute to reduce.
- Allow the filling to cool completely to room temperature before using. This prevents the dough from becoming greasy or tearing when filled.
- Make the Dough
- In a small bowl, combine the warm water, warm milk, and yeast. Stir gently and let it sit for 5-10 minutes until it becomes foamy. (This "blooming" indicates your yeast is active and ready to work!)
- In a large mixing bowl, whisk together the flour, sugar, baking powder, and salt.
- Pour the bloomed yeast mixture and the neutral oil into the dry ingredients.
- Mix with a wooden spoon or your hands until a shaggy dough forms.
- Turn the dough out onto a lightly floured surface and knead for 8-10 minutes, or until it's smooth, elastic, and no longer sticky. (The dough should feel soft and springy.)
- Lightly grease a clean bowl with a little oil. Place the dough in the bowl, turning it once to coat. Cover the bowl with plastic wrap or a damp kitchen towel.
- First Rise: Let the dough rise in a warm place for 1 to 1 ½ hours, or until it has doubled in size. (To check if it’s ready, gently poke two fingers into the dough; if the indentations remain, it's proofed.)
- Portion & Roll (with Sizing Targets)
- Once the dough has risen, gently punch it down to release the air.
- Turn the dough out onto a lightly floured surface and roll it into a log.
- Divide the dough into 12 equal pieces. Each piece should weigh approximately 2 ounces (55-60g).
- Take one piece of dough and flatten it slightly. Using a rolling pin, roll it into a 4-5 inch (10-12 cm) diameter disk. (Aim for the center to be slightly thicker than the edges; this helps hold the filling without tearing.) Keep the remaining dough covered to prevent it from drying out.
- Fill & Seal (Leak-Proof Technique)
- Hold a dough disk in the palm of one hand. Place about 2-3 tablespoons of the cooled char siu filling in the center. (Don't overfill, or they'll be hard to seal.)
- Bring the edges of the dough up around the filling, pleating and pinching them together at the top to form a tight seal. Twist the top slightly to secure.
- Seal Test: Gently press on the bun. If you see any thin spots or feel the filling about to burst through, reinforce the seal. A good seal is crucial to prevent leakage during steaming.
- Place each sealed bun on a square of parchment paper. This prevents sticking and makes transferring to the steamer easy.
- Second Proof (Short Rest)
- Arrange the filled buns (on their parchment squares) in your steamer basket, ensuring there's enough space between them for expansion. You'll likely need to steam in batches.
- Cover the steamer basket with the towel-wrapped lid.
- Let the buns proof for another 20-30 minutes in the steamer, or until they look visibly puffy and light. (This second proof is vital for achieving that incredibly fluffy texture.)
- Steam
- While the buns are proofing, prepare your steaming pot. Fill a large pot or wok with about 1-2 inches of water and bring it to a gentle simmer.
- Once the buns are proofed and the water is simmering, carefully place the steamer basket with the buns over the pot. Ensure the water is not touching the bottom of the basket.
- Steam the buns for 10-12 minutes. The exact timing may vary slightly depending on the size of your buns and your steamer.
- How to know they’re done: The buns will look puffed, shiny, and feel light and springy to the touch.
- Once steaming is complete, turn off the heat and do not open the lid immediately. Let the buns rest in the closed steamer for 5 minutes. This prevents them from collapsing due to a sudden temperature change.
- Carefully remove the steamer basket and transfer the hot manapua to a serving plate. Serve immediately, perhaps with a sprinkle of green onions.
You may also like


Hey there! I’m just someone who seriously loves good food and believes that cooking doesn’t have to be complicated to be amazing. Whether it’s a quick weeknight dinner or a cozy weekend meal, I’m all about sharing easy, tasty recipes that actually work.