Make Easy Hawaiian Poi - Gluten-Free & Vegan
Make Easy Hawaiian Poi - Gluten-Free & Vegan

- Serves: 6 People
- Prepare Time: 20 minutes
- Cooking Time: 45-60 minut
- Calories: -
- Difficulty: Easy
Aloha, food adventurers! Are you searching for gluten free vegetarian recipes easy to make that also connect you to a rich cultural tradition? Look no further than Hawaiian Poi! This incredible dish, made from mashed taro (kalo) root, is a beloved staple in Hawaiian culture and surprisingly simple to prepare right in your own kitchen. This guide will show you how to make traditional Hawaiian Poi – a naturally gluten-free vegan recipe that’s perfect for first-timers, those with gluten intolerant needs, or anyone looking to build an authentic Hawaiian plate. We’ll cover everything from its fascinating history to a beginner-friendly modern method that makes achieving that perfect "two-finger" consistency a breeze. Get ready to dive into the earthy, subtly sweet flavor of fresh poi, or explore the tangy depths of its fermented cousin. Let's get cooking!
Ingredients
Directions
- Scrub and Prep Your Taro Begin by thoroughly scrubbing your taro root under cold running water. Don't peel it yet! Keeping the peel on during cooking makes the taro much easier to handle once it's tender.
- Cook Until Truly Tender Place the scrubbed taro root in a large pot and cover it with water by at least an inch. Bring the water to a boil, then reduce the heat to a simmer. Cook the taro for 45-60 minutes, or until it is incredibly tender. You should be able to easily slide a fork into the thickest part of the root with almost no resistance. Alternatively, you can steam the taro for a similar duration. Once cooked, drain the water and let the taro cool briefly until it's safe to handle without burning yourself.
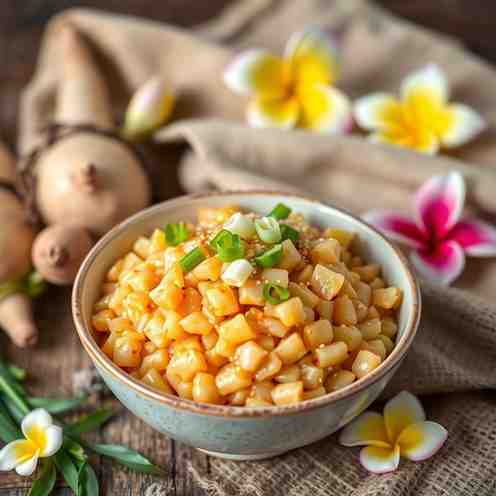
- Peel and Cut Once cooled enough, carefully peel the skin from the cooked taro. It should come off quite easily. Discard the peels, then cut the taro flesh into rough chunks about 1-2 inches in size.
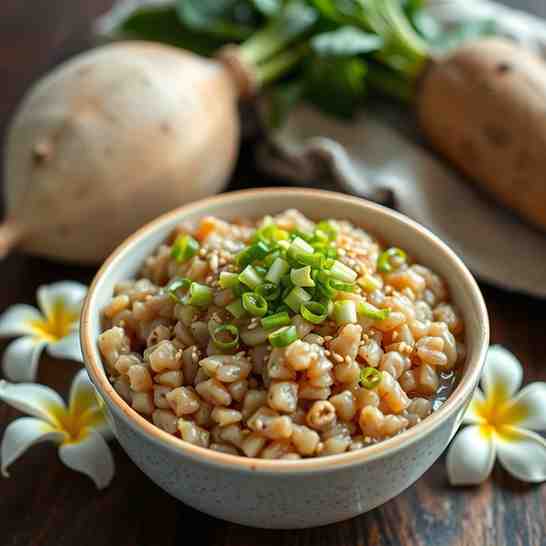
- Mash/Process to Smooth Perfection Transfer the taro chunks to a food processor (this is the easiest method!). Add 2 cups of water to start. Process the taro, scraping down the sides as needed. Gradually add more water, about 1/4 cup at a time, until the mixture transforms into a thick, sticky, and completely smooth paste. The goal is no visible chunks and a uniform consistency. If you don't have a food processor, a high-powered blender can work, or you can use a sturdy potato masher and some serious elbow grease!
- Adjust to "Finger" Thickness The traditional target for fresh poi is "two-finger poi," meaning it's thick enough that you can scoop it up with two fingers without it dripping excessively. If your poi is too thick, add water one tablespoon at a time, processing after each addition, until you reach your desired consistency. If it's too thin, let it rest for a bit – it will thicken slightly as it cools. For your next batch, simply use a little less water from the start.
- Serve (Fresh) Your fresh Hawaiian Poi is ready to enjoy! Serve it immediately at room temperature or chilled. Poi is traditionally paired with salty foods like kalua pork, lomi lomi salmon, simple roasted chicken, grilled fish, or even sautéed vegetables.
- Optional Note: Fermenting for Sour Poi If you prefer the tangier flavor of fermented poi, simply transfer your fresh poi to a non-reactive bowl or container. Cover it loosely and leave it at room temperature (ideally between 70-80°F / 21-27°C) for 1-3 days. The longer it sits, the tangier and more "sour" the flavor will become. Once it reaches your preferred level of fermentation, cover it tightly and refrigerate it.
Make Easy Hawaiian Poi - Gluten-Free & Vegan
- Serves: 6 People
- Prepare Time: 20 minutes
- Cooking Time: 45-60 minut
- Calories: -
- Difficulty: Easy
Aloha, food adventurers! Are you searching for gluten free vegetarian recipes easy to make that also connect you to a rich cultural tradition? Look no further than Hawaiian Poi! This incredible dish, made from mashed taro (kalo) root, is a beloved staple in Hawaiian culture and surprisingly simple to prepare right in your own kitchen. This guide will show you how to make traditional Hawaiian Poi – a naturally gluten-free vegan recipe that’s perfect for first-timers, those with gluten intolerant needs, or anyone looking to build an authentic Hawaiian plate. We’ll cover everything from its fascinating history to a beginner-friendly modern method that makes achieving that perfect "two-finger" consistency a breeze. Get ready to dive into the earthy, subtly sweet flavor of fresh poi, or explore the tangy depths of its fermented cousin. Let's get cooking!
Ingredients
Directions
- Scrub and Prep Your Taro Begin by thoroughly scrubbing your taro root under cold running water. Don't peel it yet! Keeping the peel on during cooking makes the taro much easier to handle once it's tender.
- Cook Until Truly Tender Place the scrubbed taro root in a large pot and cover it with water by at least an inch. Bring the water to a boil, then reduce the heat to a simmer. Cook the taro for 45-60 minutes, or until it is incredibly tender. You should be able to easily slide a fork into the thickest part of the root with almost no resistance. Alternatively, you can steam the taro for a similar duration. Once cooked, drain the water and let the taro cool briefly until it's safe to handle without burning yourself.
- Peel and Cut Once cooled enough, carefully peel the skin from the cooked taro. It should come off quite easily. Discard the peels, then cut the taro flesh into rough chunks about 1-2 inches in size.
- Mash/Process to Smooth Perfection Transfer the taro chunks to a food processor (this is the easiest method!). Add 2 cups of water to start. Process the taro, scraping down the sides as needed. Gradually add more water, about 1/4 cup at a time, until the mixture transforms into a thick, sticky, and completely smooth paste. The goal is no visible chunks and a uniform consistency. If you don't have a food processor, a high-powered blender can work, or you can use a sturdy potato masher and some serious elbow grease!
- Adjust to "Finger" Thickness The traditional target for fresh poi is "two-finger poi," meaning it's thick enough that you can scoop it up with two fingers without it dripping excessively. If your poi is too thick, add water one tablespoon at a time, processing after each addition, until you reach your desired consistency. If it's too thin, let it rest for a bit – it will thicken slightly as it cools. For your next batch, simply use a little less water from the start.
- Serve (Fresh) Your fresh Hawaiian Poi is ready to enjoy! Serve it immediately at room temperature or chilled. Poi is traditionally paired with salty foods like kalua pork, lomi lomi salmon, simple roasted chicken, grilled fish, or even sautéed vegetables.
- Optional Note: Fermenting for Sour Poi If you prefer the tangier flavor of fermented poi, simply transfer your fresh poi to a non-reactive bowl or container. Cover it loosely and leave it at room temperature (ideally between 70-80°F / 21-27°C) for 1-3 days. The longer it sits, the tangier and more "sour" the flavor will become. Once it reaches your preferred level of fermentation, cover it tightly and refrigerate it.
You may also like


Hey there! I’m just someone who seriously loves good food and believes that cooking doesn’t have to be complicated to be amazing. Whether it’s a quick weeknight dinner or a cozy weekend meal, I’m all about sharing easy, tasty recipes that actually work.