Homemade Berry Jam Recipe - Easy & Delicious
Homemade Berry Jam Recipe - Easy & Delicious

- Serves: 4 People
- Prepare Time: 15 minutes
- Cooking Time: 20-30 minut
- Calories: -
- Difficulty: Easy
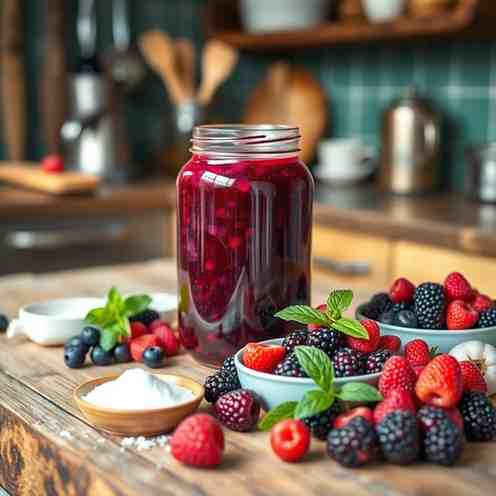
Welcome to the wonderful world of homemade berry jam! If you've ever dreamt of spreading vibrant, fruity goodness on your morning toast or swirling it into your yogurt, you're in the right place. This isn't just any recipe for homemade preserves; it's your go-to guide for a delicious, small-batch berry jam that you can whip up on your stovetop, even on a weeknight. Forget complicated equipment or endless hours of stirring; we're talking about a one-pot wonder that delivers big berry flavor without being overly sweet.
This recipe focuses on creating a small-batch berry jam that’s incredibly approachable. We’ll show you the exact cues to look for so your jam sets perfectly every time, ensuring you get that ideal texture. It works beautifully with both fresh or frozen mixed berry blends, making it a perfect few ingredients recipe any time of year. Get ready for a low-risk, fast-payoff kitchen adventure that will fill your home with the sweet scent of summer, all from this easy to make home recipes guide.
Ingredients
Directions
- Macerate (Optional but Recommended): In your wide saucepan, combine the berries and granulated white sugar. If using fresh berries, let them sit for 10-15 minutes. This draws out their natural juices, making for a richer jam. If using frozen, you can skip this step or let them sit for a bit as they thaw and release liquid.
- Bring to a Boil: Place the pan over medium-high heat. Stir occasionally until the sugar fully dissolves and the mixture comes to a steady, rolling boil.
- Simmer to Reduce: Reduce the heat to medium-low and continue to simmer, stirring frequently. Use your wooden spoon or spatula to scrape the bottom of the pan to prevent sticking and burning. This process will evaporate excess water, thickening your jam. This could take anywhere from 15-25 minutes, depending on your berries and pan.
- Texture Control: As the jam simmers, you can use a potato masher (or the back of your spoon) to gently mash some of the berries. This creates a thicker body for your jam while still allowing some whole berry pieces to remain for a lovely texture.
- Set Tests: This is the crucial part to ensure your jam sets!
- Chilled Plate Test: Before you start cooking, put a small plate in your freezer. When you think the jam is done, spoon a small amount onto the chilled plate. Return it to the freezer for 1-2 minutes. Then, push the jam with your finger. If it wrinkles and holds its shape, it's ready! If it's still runny, continue cooking and re-test.
- Spoon Test ("Sheeting"): Dip a cold spoon into the hot jam, then lift it and let the jam drip off. If the jam forms a "sheet" or a few large drops that cling together rather than individual drops, it's ready.
- Visual Cue: Look at the bubbles. Early in the cooking process, they will be large and watery. As the jam thickens, the bubbles will become smaller, tighter, and the jam will look glossier.
- Optional Temperature Cue: If you have a candy thermometer, you can look for the jam to reach 218-220°F (103-104°C) at sea level. This is a good supporting indicator, but the chilled plate and spoon tests are often more reliable for home cooks.
- Jar It: Once your jam is set, remove it from the heat. Carefully ladle the warm jam into a clean jar (like mason jars for jam). Leave about ½ inch of headspace. Let it cool slightly on the counter before securing the lid and transferring it to the refrigerator.
Homemade Berry Jam Recipe - Easy & Delicious
- Serves: 4 People
- Prepare Time: 15 minutes
- Cooking Time: 20-30 minut
- Calories: -
- Difficulty: Easy
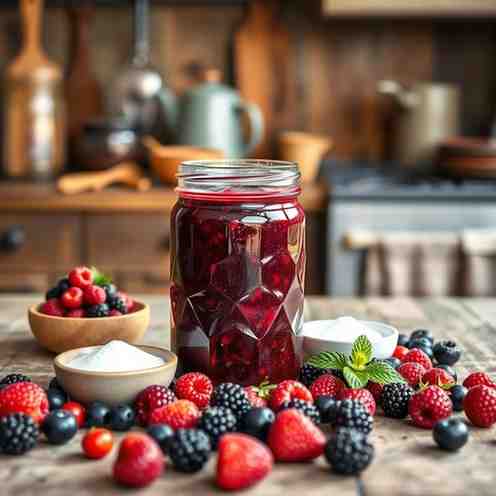
Welcome to the wonderful world of homemade berry jam! If you've ever dreamt of spreading vibrant, fruity goodness on your morning toast or swirling it into your yogurt, you're in the right place. This isn't just any recipe for homemade preserves; it's your go-to guide for a delicious, small-batch berry jam that you can whip up on your stovetop, even on a weeknight. Forget complicated equipment or endless hours of stirring; we're talking about a one-pot wonder that delivers big berry flavor without being overly sweet.
This recipe focuses on creating a small-batch berry jam that’s incredibly approachable. We’ll show you the exact cues to look for so your jam sets perfectly every time, ensuring you get that ideal texture. It works beautifully with both fresh or frozen mixed berry blends, making it a perfect few ingredients recipe any time of year. Get ready for a low-risk, fast-payoff kitchen adventure that will fill your home with the sweet scent of summer, all from this easy to make home recipes guide.
Ingredients
Directions
- Macerate (Optional but Recommended): In your wide saucepan, combine the berries and granulated white sugar. If using fresh berries, let them sit for 10-15 minutes. This draws out their natural juices, making for a richer jam. If using frozen, you can skip this step or let them sit for a bit as they thaw and release liquid.
- Bring to a Boil: Place the pan over medium-high heat. Stir occasionally until the sugar fully dissolves and the mixture comes to a steady, rolling boil.
- Simmer to Reduce: Reduce the heat to medium-low and continue to simmer, stirring frequently. Use your wooden spoon or spatula to scrape the bottom of the pan to prevent sticking and burning. This process will evaporate excess water, thickening your jam. This could take anywhere from 15-25 minutes, depending on your berries and pan.
- Texture Control: As the jam simmers, you can use a potato masher (or the back of your spoon) to gently mash some of the berries. This creates a thicker body for your jam while still allowing some whole berry pieces to remain for a lovely texture.
- Set Tests: This is the crucial part to ensure your jam sets!
- Chilled Plate Test: Before you start cooking, put a small plate in your freezer. When you think the jam is done, spoon a small amount onto the chilled plate. Return it to the freezer for 1-2 minutes. Then, push the jam with your finger. If it wrinkles and holds its shape, it's ready! If it's still runny, continue cooking and re-test.
- Spoon Test ("Sheeting"): Dip a cold spoon into the hot jam, then lift it and let the jam drip off. If the jam forms a "sheet" or a few large drops that cling together rather than individual drops, it's ready.
- Visual Cue: Look at the bubbles. Early in the cooking process, they will be large and watery. As the jam thickens, the bubbles will become smaller, tighter, and the jam will look glossier.
- Optional Temperature Cue: If you have a candy thermometer, you can look for the jam to reach 218-220°F (103-104°C) at sea level. This is a good supporting indicator, but the chilled plate and spoon tests are often more reliable for home cooks.
- Jar It: Once your jam is set, remove it from the heat. Carefully ladle the warm jam into a clean jar (like mason jars for jam). Leave about ½ inch of headspace. Let it cool slightly on the counter before securing the lid and transferring it to the refrigerator.
You may also like


Hey there! I’m just someone who seriously loves good food and believes that cooking doesn’t have to be complicated to be amazing. Whether it’s a quick weeknight dinner or a cozy weekend meal, I’m all about sharing easy, tasty recipes that actually work.