
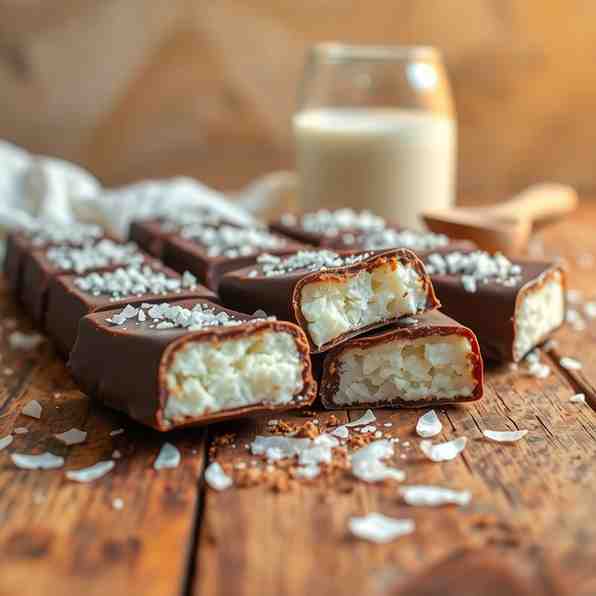
Homemade Bounty Chocolate Bars - Easy Recipe
Homemade Bounty Chocolate Bars - Easy Recipe

- Serves: 12 People
- Prepare Time: 20 minutes
- Cooking Time: 5 minutes
- Calories: -
- Difficulty: Easy
Ever dreamed of making your own delicious ``bounty chocolate bar`` right at home? Well, you're in luck! Forget those store-bought versions; we're diving into the delightful world of homemade chocolate bars, inspired by the pure, wild flavors of the Faroe Islands. This isn't just any recipe; it’s your ticket to creating ``homemade chocolate bars with coconut and berries`` that are not only incredibly easy to make but also completely ``vegan and dairy-free``.
Whether you're a seasoned baker or just starting out, this guide will walk you through crafting the perfect chocolate coconut squares. We’ll cover everything from the best ``chocolate melting techniques`` to how to whip up an irresistible ``dark chocolate and sea salt option``. Get ready to impress your taste buds and your friends with these plant-based beauties. Let’s get baking!
Ingredients
Directions
- Prepare the Coconut Berry Filling: In a medium bowl, combine the shredded coconut, thick coconut cream (scoop from the top of your chilled can of coconut milk), maple syrup, vanilla extract, and pinch of sea salt. Mix well until everything is evenly combined and the mixture is sticky.
- Add the Berries: Gently fold in the finely chopped or lightly mashed mixed berries. Be careful not to overmix, as too much mashing can release excess liquid and make the filling too wet. The berries should be distributed throughout the coconut mixture.
- Shape the Bars: Line a baking sheet or a small rectangular dish (about 8x8 inches) with parchment paper. Press the coconut berry mixture firmly and evenly into the prepared dish. You can also hand-shape individual bars or rounds. For uniform bars, aim for about 12 pieces.
- Chill Time: Place the shaped coconut bars in the freezer for at least 30-45 minutes. This step is crucial to ensure they firm up and hold their shape when dipped in chocolate.
- Melt the Chocolate: While the bars are chilling, prepare your chocolate coating. In a microwave-safe bowl or a double boiler, combine the dark chocolate chips and coconut oil (if using).
- Microwave Method: Heat in 30-second intervals, stirring well after each, until the chocolate is mostly melted and smooth. Be careful not to overheat.
- Double Boiler Method: Place a heat-proof bowl over a saucepan of simmering water (make sure the bowl doesn't touch the water). Stir constantly until the chocolate is smooth and glossy.
- Dip the Bars: Once the coconut bars are firm, remove them from the freezer. Using a fork or dipping tools, carefully dip each bar into the melted chocolate, ensuring it's fully coated. Lift the bar out, letting any excess chocolate drip off.
- Set the Chocolate: Place the coated bars back onto the parchment-lined baking sheet. If desired, sprinkle a little flaky sea salt on top of some bars while the chocolate is still wet.
- Final Chill: Return the finished ``chocolate coconut squares`` to the freezer or refrigerator for another 15-30 minutes, or until the chocolate coating is completely set.Serve and Enjoy: Once firm, your homemade ``bounty chocolate bar`` creations are ready to be devoured!
You may also like


Hey there! I’m just someone who seriously loves good food and believes that cooking doesn’t have to be complicated to be amazing. Whether it’s a quick weeknight dinner or a cozy weekend meal, I’m all about sharing easy, tasty recipes that actually work.


