
Homemade Pirukad Recipe - Estonian Beef Pastries
Homemade Pirukad Recipe - Estonian Beef Pastries
- Serves: 12 People
- Prepare Time: 45 minutes
- Cooking Time: 20-25 minut
- Calories: -
- Difficulty: Medium
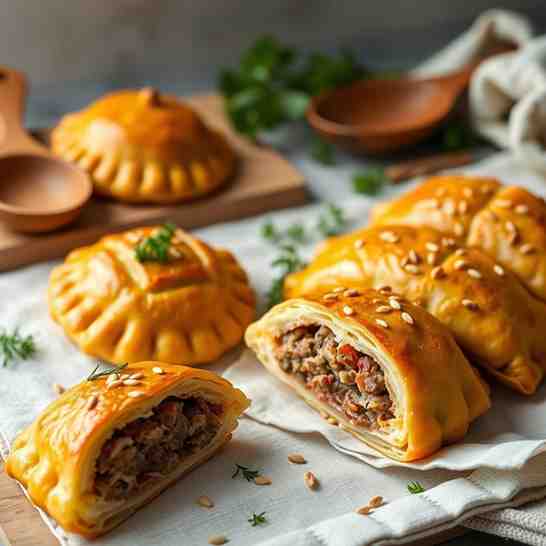
Ready to dive into a delicious Estonian tradition? You're about to master a truly special homemade recipe for bread! Forget dry, bland pastries or complicated yeast doughs. Our guide to Estonian Pirukad (Baked Beef-Filled Yeast Pastries) is designed to give you from-scratch dough, a savory beef filling that's bursting with flavor, and step-by-step shaping instructions you can actually nail. This isn't just another recipe; it's your ticket to creating tender, slightly sweet pastries with a perfectly seasoned, juicy filling that will have everyone asking for more.
In Estonia, "pirukas" (singular) and "pirukad" (plural) refer to small, savory pastries that are a staple of their food culture. You'll often find them gracing the "külm laud" (cold table) at gatherings, or served warm with a comforting cup of broth. Unlike some other recipes that might leave you with dry dough or a watery filling, our approach ensures a tender, slightly sweet yeast dough cradling a rich, savory beef mixture. Get ready for a delightful culinary journey!
Many recipes for these delightful pastries often leave bakers frustrated. We've tackled the common pitfalls head-on. Our instructions provide crystal-clear guidance on yeast dough, ensuring yours is soft and pliable, not a mystery. We've perfected a savory beef filling that's packed with flavor and, crucially, avoids being watery – a common issue with boiled or underseasoned approaches. Finally, we break down the shaping process for small, consistent pastries, so you won't end up with confusing loaf-style creations. This recipe is built for success, every time.
Ingredients
Directions
- Make and Proof the Yeast In a small bowl, combine the warm water and 1 teaspoon of the sugar. Sprinkle the yeast over the top and let it sit for 5-10 minutes. It should become foamy and bubbly, indicating the yeast is active. If it doesn't foam, your water might have been too hot or too cold, or your yeast is old. Start over with fresh yeast and properly tempered water.
- Mix, Knead, and Rise the Dough In a large mixing bowl (or the bowl of a stand mixer fitted with a dough hook), combine the proofed yeast mixture, remaining sugar, salt, melted butter, beaten egg, warm milk/half-and-half, and optional cardamom. Gradually add the flour, mixing until a shaggy dough forms.
Knead the dough on a lightly floured surface (or with the stand mixer) for 8-10 minutes, until it's smooth, elastic, and slightly tacky, but not gluey.
Lightly grease a clean bowl. Place the dough in the bowl, turning once to coat. Cover with plastic wrap or a clean kitchen towel and let it rise in a warm place for 1.5 to 2 hours, or until it has visibly doubled in size. - Cook the Savory Beef Filling While the dough is rising, prepare the filling. Heat olive oil or butter in a large skillet over medium heat. Add the ground beef and cook, breaking it up with a spoon, until it's browned all over. Drain off any excess grease.
Add the finely diced onion to the skillet with the beef and cook until softened, about 5-7 minutes.
Stir in the salt, black pepper, and beef broth. Cook for another 2-3 minutes, allowing the liquid to mostly absorb. If using, stir in the chopped hard-boiled egg.
Remove the filling from the heat and spread it out on a plate or shallow dish to cool completely. This cool-down rule is crucial; hot filling will melt the dough and cause leaks during shaping. - Shape the Pirukad
- Once the dough has risen, gently punch it down. Turn it out onto a lightly floured surface.
- Divide the dough into 12-16 equal pieces (about 1.5 to 2 ounces each). Roll each piece into a smooth ball.
- Working with one ball at a time, roll it into a thin oval or circle, about 3-4 inches in diameter and about ⅛ inch thick. If you're using a 3-inch cutter, cut rounds and then gently stretch them into slight ovals.
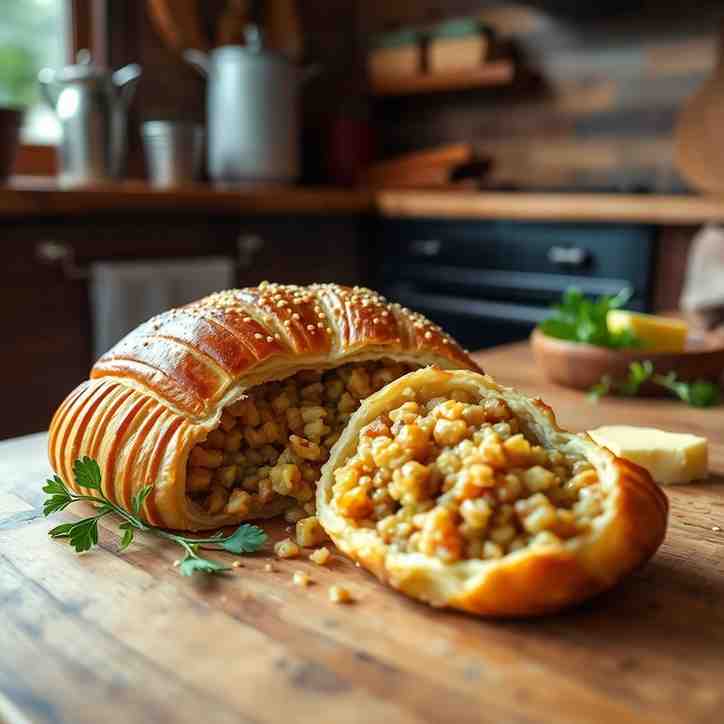
- Place about 1-1.5 tablespoons of the cooled beef filling in the center of each dough oval.
- Brush a little of the beaten egg wash around the edges of the dough. Fold one side of the dough over the filling to meet the other side, forming a half-moon shape. Pinch the edges firmly together to seal. For extra security and a decorative touch, use the tines of a fork to crimp the sealed edges.
- Place the shaped pirukad on a baking sheet lined with parchment paper, leaving some space between each.
- Bake
- Preheat your oven to 375°F (190°C).
- Brush the tops of the shaped pirukad generously with the remaining beaten egg wash.
- Bake for 20-25 minutes, or until the pirukad are golden brown on top and firm to the touch on the bottom.
- Serve Serve your Estonian Pirukad warm for the best flavor and texture. For a truly authentic experience, offer them alongside a cup of hot broth (puljong-style). Enjoy!
Homemade Pirukad Recipe - Estonian Beef Pastries

- Serves: 12 People
- Prepare Time: 45 minutes
- Cooking Time: 20-25 minut
- Calories: -
- Difficulty: Medium
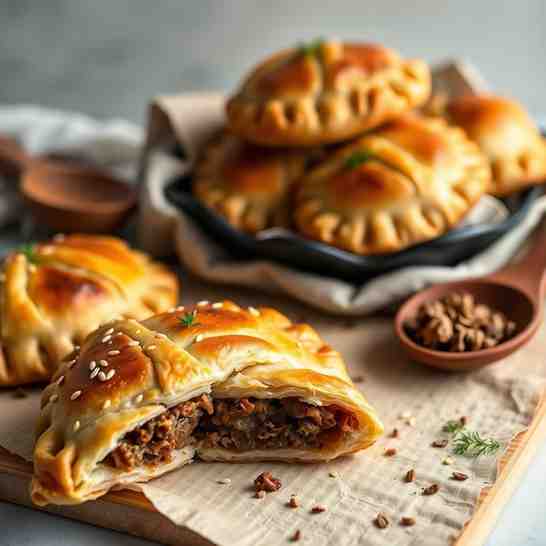
Ready to dive into a delicious Estonian tradition? You're about to master a truly special homemade recipe for bread! Forget dry, bland pastries or complicated yeast doughs. Our guide to Estonian Pirukad (Baked Beef-Filled Yeast Pastries) is designed to give you from-scratch dough, a savory beef filling that's bursting with flavor, and step-by-step shaping instructions you can actually nail. This isn't just another recipe; it's your ticket to creating tender, slightly sweet pastries with a perfectly seasoned, juicy filling that will have everyone asking for more.
In Estonia, "pirukas" (singular) and "pirukad" (plural) refer to small, savory pastries that are a staple of their food culture. You'll often find them gracing the "külm laud" (cold table) at gatherings, or served warm with a comforting cup of broth. Unlike some other recipes that might leave you with dry dough or a watery filling, our approach ensures a tender, slightly sweet yeast dough cradling a rich, savory beef mixture. Get ready for a delightful culinary journey!
Many recipes for these delightful pastries often leave bakers frustrated. We've tackled the common pitfalls head-on. Our instructions provide crystal-clear guidance on yeast dough, ensuring yours is soft and pliable, not a mystery. We've perfected a savory beef filling that's packed with flavor and, crucially, avoids being watery – a common issue with boiled or underseasoned approaches. Finally, we break down the shaping process for small, consistent pastries, so you won't end up with confusing loaf-style creations. This recipe is built for success, every time.
Ingredients
Directions
- Make and Proof the Yeast In a small bowl, combine the warm water and 1 teaspoon of the sugar. Sprinkle the yeast over the top and let it sit for 5-10 minutes. It should become foamy and bubbly, indicating the yeast is active. If it doesn't foam, your water might have been too hot or too cold, or your yeast is old. Start over with fresh yeast and properly tempered water.
- Mix, Knead, and Rise the Dough In a large mixing bowl (or the bowl of a stand mixer fitted with a dough hook), combine the proofed yeast mixture, remaining sugar, salt, melted butter, beaten egg, warm milk/half-and-half, and optional cardamom. Gradually add the flour, mixing until a shaggy dough forms.
Knead the dough on a lightly floured surface (or with the stand mixer) for 8-10 minutes, until it's smooth, elastic, and slightly tacky, but not gluey.
Lightly grease a clean bowl. Place the dough in the bowl, turning once to coat. Cover with plastic wrap or a clean kitchen towel and let it rise in a warm place for 1.5 to 2 hours, or until it has visibly doubled in size. - Cook the Savory Beef Filling While the dough is rising, prepare the filling. Heat olive oil or butter in a large skillet over medium heat. Add the ground beef and cook, breaking it up with a spoon, until it's browned all over. Drain off any excess grease.
Add the finely diced onion to the skillet with the beef and cook until softened, about 5-7 minutes.
Stir in the salt, black pepper, and beef broth. Cook for another 2-3 minutes, allowing the liquid to mostly absorb. If using, stir in the chopped hard-boiled egg.
Remove the filling from the heat and spread it out on a plate or shallow dish to cool completely. This cool-down rule is crucial; hot filling will melt the dough and cause leaks during shaping. - Shape the Pirukad
- Once the dough has risen, gently punch it down. Turn it out onto a lightly floured surface.
- Divide the dough into 12-16 equal pieces (about 1.5 to 2 ounces each). Roll each piece into a smooth ball.
- Working with one ball at a time, roll it into a thin oval or circle, about 3-4 inches in diameter and about ⅛ inch thick. If you're using a 3-inch cutter, cut rounds and then gently stretch them into slight ovals.
- Place about 1-1.5 tablespoons of the cooled beef filling in the center of each dough oval.
- Brush a little of the beaten egg wash around the edges of the dough. Fold one side of the dough over the filling to meet the other side, forming a half-moon shape. Pinch the edges firmly together to seal. For extra security and a decorative touch, use the tines of a fork to crimp the sealed edges.
- Place the shaped pirukad on a baking sheet lined with parchment paper, leaving some space between each.
- Bake
- Preheat your oven to 375°F (190°C).
- Brush the tops of the shaped pirukad generously with the remaining beaten egg wash.
- Bake for 20-25 minutes, or until the pirukad are golden brown on top and firm to the touch on the bottom.
- Serve Serve your Estonian Pirukad warm for the best flavor and texture. For a truly authentic experience, offer them alongside a cup of hot broth (puljong-style). Enjoy!
You may also like


Hey there! I’m just someone who seriously loves good food and believes that cooking doesn’t have to be complicated to be amazing. Whether it’s a quick weeknight dinner or a cozy weekend meal, I’m all about sharing easy, tasty recipes that actually work.


