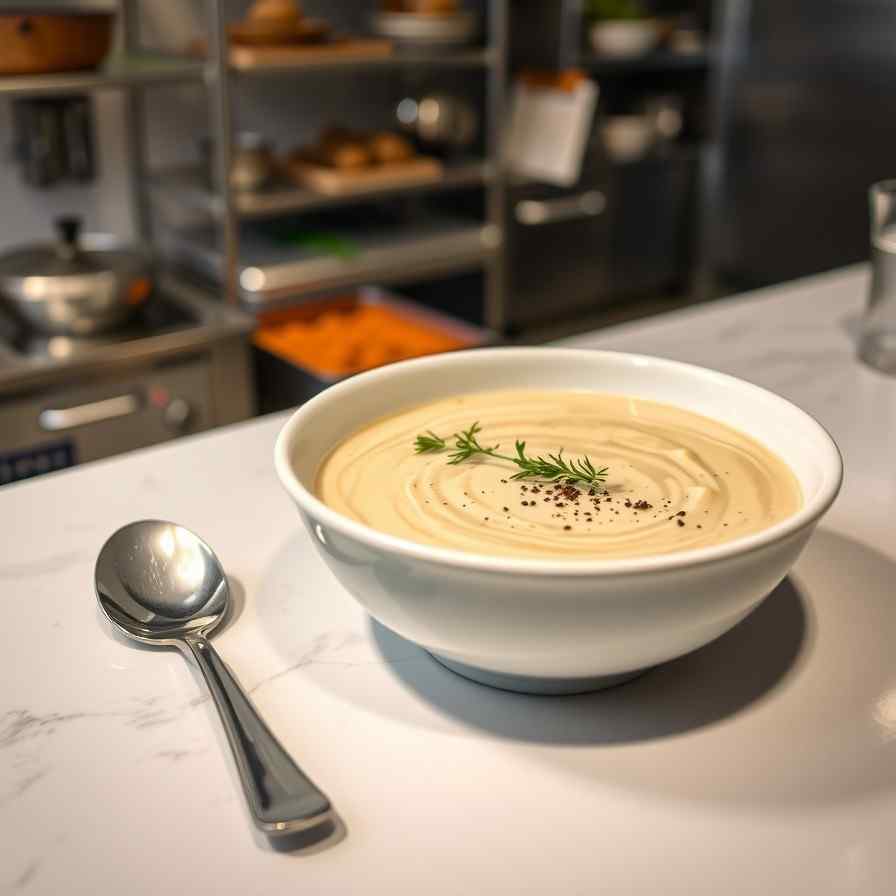
Homemade Cream of Mushroom Soup - Better Than Canned
Homemade Cream of Mushroom Soup - Better Than Canned

- Serves: 6 People
- Prepare Time: 15 minutes
- Cooking Time: 35-40 minut
- Calories: -
- Difficulty: Easy
Ready to discover a savory delight from Scandinavia? While our recipe is a universal crowd-pleaser, it draws inspiration from the comforting spirit of Aland Sienikeitto, a truly exquisite mushroom soup. Forget everything you know about that grayish, gelatinous stuff from a can. Our homemade cream of mushroom soup is a game-changer, bursting with deep, earthy mushroom flavor and a luxurious creaminess that’s simply unmatched. This isn't just a recipe; it's an experience designed to show you how easy it is to create something truly spectacular from scratch.
You’ll absolutely love this version because it delivers an incredibly rich cream of mushroom soup experience in under an hour. It's wonderfully creamy without feeling heavy, allowing you to adjust the richness to your exact preference. Using everyday ingredients you likely already have, this recipe is incredibly versatile—perfect for a comforting bowl on a chilly evening, or as a fantastic base for your favorite casseroles with just a small tweak. Trust us, once you taste this, you'll never go back to canned cream and mushroom soup again. It offers unparalleled flavor and gives you complete control over every delicious spoonful.
Ingredients
Directions
- Prep the Mushrooms & Aromatics Start by gently cleaning your mushrooms. You can quickly rinse them under cold water and pat them thoroughly dry, or simply wipe them clean with a damp paper towel. Slice the mushrooms evenly. Next, finely chop your onion and mince the garlic. Choose a heavy-bottomed pot or Dutch oven for cooking; this helps with even heat distribution and better browning, which is key for flavor.
- Brown the Mushrooms for Maximum Flavor Heat 2 tablespoons of butter and/or olive oil in your heavy pot over medium-high heat. Once hot, add about half of your sliced mushrooms in a single layer. Resist the urge to stir constantly! Let them sear undisturbed for 3-5 minutes until they release their liquid, turn deep golden brown, and smell nutty. This browning step is crucial for developing deep, rich mushroom flavor. Season this batch with a pinch of salt and pepper as they brown. Remove the browned mushrooms from the pot and set aside. Repeat with the remaining mushrooms, adding more fat if needed.
- Build the Soup Base Reduce the heat to medium. Add the remaining 1 tablespoon of butter or oil to the pot. Add the chopped onion and cook, stirring occasionally, until it softens and becomes translucent, about 5-7 minutes. Stir in the minced garlic and cook for just 1 minute more until fragrant—be careful not to burn it! Sprinkle the all-purpose flour over the onions and garlic, stirring constantly for 1-2 minutes. This brief cooking time for the flour, known as making a roux, is essential to cook out the raw flour taste and prevent your soup from tasting pasty.
- Deglaze & Simmer Pour in the white wine (or part of your stock if avoiding alcohol) and scrape up any browned bits stuck to the bottom of the pot with a wooden spoon. This "deglazing" adds incredible flavor. Add the remaining chicken or vegetable stock, fresh thyme sprigs (if using), optional bay leaf, and any optional umami boosters (like a tiny splash of tamari or miso paste). Bring the soup to a gentle simmer, then reduce the heat to low, cover, and let it cook for 15-20 minutes to allow the flavors to meld beautifully.
- Blend to the Perfect Texture Remove the thyme sprigs and bay leaf. Carefully transfer about two-thirds of the soup to a standard blender, or use an immersion blender directly in the pot. If using a standard blender, be very cautious with hot liquids: fill the blender no more than halfway, secure the lid, and start on a low speed, gradually increasing. I recommend blending about two-thirds of the soup until smooth, leaving the remaining one-third with some whole mushrooms for a lovely textural contrast. If you prefer an ultra-smooth soup, feel free to blend it all. Return the blended soup to the pot along with the reserved browned mushrooms.
- Finish with Cream & Season to Taste Stir in the heavy cream or half-and-half (or whole milk) off the heat or on a very low setting. This prevents the cream from curdling. Taste the soup and adjust the seasoning as needed with salt and black pepper. If the soup tastes a little flat, a small squeeze of lemon juice or a dash of mild vinegar can brighten the flavors beautifully. Garnish with chopped fresh parsley or thyme, and perhaps a drizzle of good olive oil.
- Adjust Thickness (Troubleshooting) If your soup is too thick for your liking, simply whisk in a bit of warm stock or milk, a tablespoon at a time, until it reaches your desired consistency. If it's too thin, you have a couple of options: you can simmer the soup uncovered for a bit longer to allow it to reduce and thicken, or you can whisk together a teaspoon of cornstarch with a tablespoon of cold water to create a slurry, then stir it into the simmering soup and cook for another minute or two until thickened. Remember that the soup will naturally thicken a bit more as it cools.
You may also like

.jpg)


Hey there! I’m just someone who seriously loves good food and believes that cooking doesn’t have to be complicated to be amazing. Whether it’s a quick weeknight dinner or a cozy weekend meal, I’m all about sharing easy, tasty recipes that actually work.