
Honduran Tamales - Banana Leaf Recipe & Tips
Honduran Tamales - Banana Leaf Recipe & Tips
- Serves: 14 People
- Prepare Time: 2 hours 30
- Cooking Time: 2 hours
- Calories: -
- Difficulty: Medium
Get ready to embark on a culinary adventure that brings the heart of Honduras right into your kitchen! If you've ever dreamt of making authentic, soul-satisfying tamales, but felt intimidated by the process, you're in the right place. Our Tamales Hondureños recipe, beautifully wrapped in fragrant `banana leaf`, is your ultimate guide to creating these deeply flavorful, "full meal" tamales that are a staple at family gatherings and holidays.
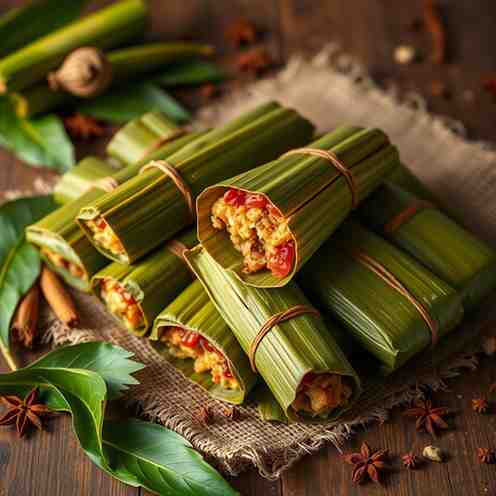
Unlike their Mexican counterparts, Honduran tamales (often called nacatamales) are known for their generous, hearty fillings and the unique aroma imparted by the `banana leaf` wrapper. This isn't just a snack; it's a celebration in every bite, packed with seasoned meat, rice, potatoes, and a rich recado sauce. This recipe is perfect for anyone looking to feed a crowd, prepare ahead for a special occasion, or simply dive deep into a rewarding batch-cooking project.
We promise to walk you through every step: from expertly prepping those essential `banana leaf` wrappers and achieving the perfect `masa harina` texture, to simmering a thick, luscious recado, and mastering a simple, stress-free assembly-line workflow. By the end, you'll have a batch of incredible `tamales hondureños` that taste like they came straight from a Honduran abuela's kitchen. Let's get cooking!
Best Make-Ahead Timeline: You can prep the recado and cook the meat, par-cook the add-ins, and prepare the banana leaves the day before.
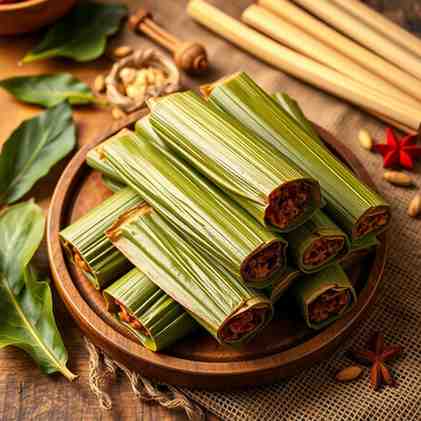
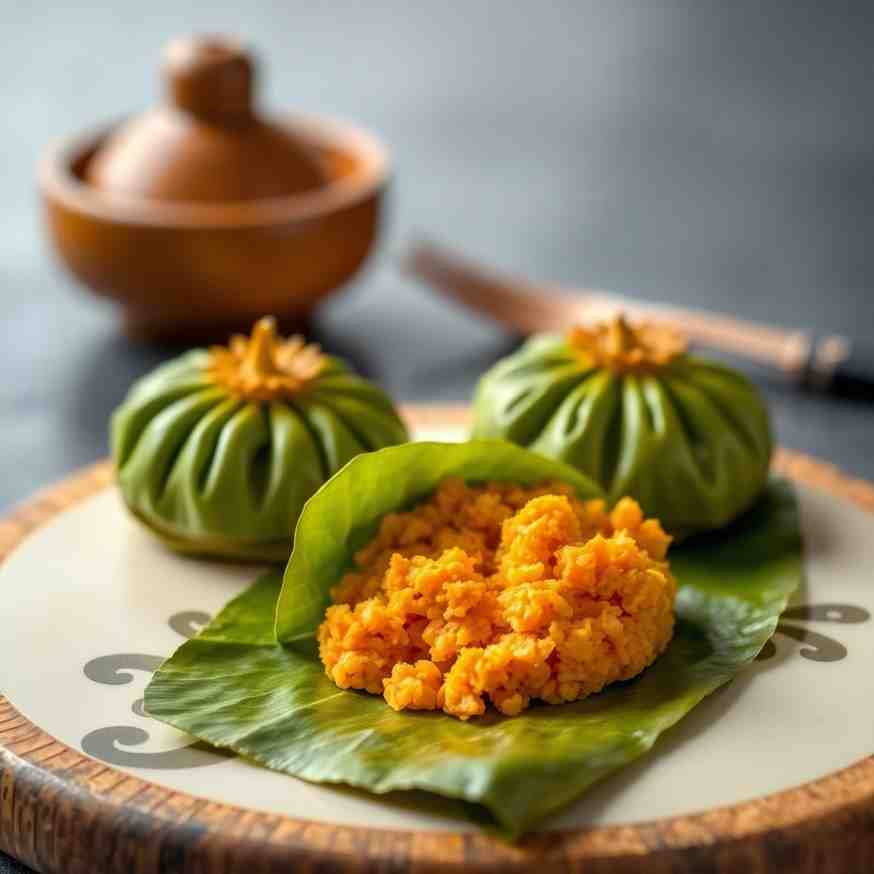
Tamales Hondureños, often referred to as nacatamales, are a beloved traditional dish from Honduras. These aren't just any tamales; they're a complete meal encased in a `banana leaf` wrapper, steamed to perfection. Typically, they’re filled with a savory mixture of pork or chicken, rice, potatoes, carrots, and sometimes olives, capers, or raisins, all bound together by a rich, reddish recado sauce made with `tomato sauce` and spices.
Making tamales is a cherished family gathering tradition in Honduras, especially around holidays like Christmas and New Year's. It's a communal effort, with everyone pitching in to prepare ingredients, assemble, and steam the tamales. This makes the cooking process as much a part of the celebration as eating them! While some may call them "nacatamales," in Honduras, they’re generally just known as "tamales" or "tamales hondureños" to distinguish them from other regional varieties.
Ingredients
Directions
- Prep the banana leaves (do this first)If using frozen `banana leaf` wrappers, thaw them completely overnight in the fridge or on the counter for a few hours. Once thawed, unroll them carefully. Rinse the leaves under cool water to remove any debris and pat them dry. Using kitchen shears, trim off the thick, woody rib that runs down the center of each leaf. Then, cut the leaves into roughly 12x12 inch squares or rectangles. You’ll need about 14-16 usable pieces.To soften the leaves and make them pliable for wrapping:
- Method A (Quick Blanch): Bring a large pot of water to a boil. Submerge a few `banana leaf` pieces at a time for 30-60 seconds until they turn a brighter green and become flexible. Carefully remove with tongs and lay flat to cool.
- Method B (Dry Skillet): Heat a large, dry skillet over medium heat. Pass each `banana leaf` piece over the hot surface for about 10-20 seconds per side until it softens and becomes pliable. Be careful not to scorch them.
- Troubleshooting: If leaves tear or have small holes, don't worry! You can layer two pieces together (offsetting the holes) or use a small piece to patch a hole during assembly. Stiff leaves mean they need more softening; repeat the process.
- Make the recado-style sauce and cook the meatIn a blender or food processor, combine the chopped onion, red bell pepper, garlic, `tomato paste`, achiote paste, cumin, oregano, black pepper, and culantro (or cilantro). Add 1 cup of `chicken stock` to help it blend. Process until completely smooth.Heat the vegetable oil or `vegetable shortening` in a large heavy-bottomed pot or Dutch oven over medium heat. Pour in the blended sauce. Bring to a simmer, then reduce the heat to low and cook, stirring occasionally, for about 15-20 minutes, until the sauce thickens and reduces to a "coats-a-spoon" consistency. It should be rich and fragrant.Add the chicken or pork pieces to the sauce. Pour in the remaining 3 cups of `chicken stock`. Bring to a simmer, then cover and cook on low heat for 45-60 minutes, or until the meat is tender and easily shredded. Taste and adjust salt as needed. If the sauce seems too thin after the meat is cooked, you can optionaly thicken it with a spoonful of `masa harina` mixed with a little water, stirring it into the simmering sauce.
- Prep the add-insCook 1 cup of long-grain `cooking rice` according to package directions, but aim for it to be slightly firm, not overly soft or mushy, as it will continue to cook in the steamer. Set aside to cool.Par-cook the diced potatoes and carrots. You can boil them in lightly salted water for about 5-7 minutes, or until they are slightly tender but still have a bite. They should not be fully cooked, as they will finish cooking inside the tamales. Drain and set aside to cool.
- Mix the masaIn a very large mixing bowl, combine the `masa harina`, salt, and baking powder. Whisk them together.Gradually add the melted `vegetable shortening` or lard to the masa mixture, rubbing it in with your fingertips until the mixture resembles coarse cornmeal.Slowly pour in the warm `chicken stock` or `chicken broth`, mixing with your hands or a sturdy spoon. Continue adding liquid until the masa forms a soft, pliable dough. The target texture should be like a thick, smooth peanut butter or a very soft play-dough – it should be spreadable but not sticky, and should hold its shape without crumbling.
- Visual cues: When you press it, it should feel moist and cohesive. If you drop a small ball of masa into a glass of cold water, it should float (this indicates enough air has been incorporated).
- Fixes: If too dry, add more warm `chicken stock` a tablespoon at a time. If too wet, add a tablespoon of `masa harina` at a time. If bland, add a pinch more salt.
- Assemble (assembly-line workflow)Set up your assembly station: Have your prepped `banana leaf` squares, masa dough, recado with meat, cooked rice, par-cooked potatoes and carrots, optional olives/capers/raisins, kitchen twine, and a sheet pan for assembled tamales all within easy reach.Lay a `banana leaf` square flat on your work surface. Take about 1/4 to 1/3 cup of masa dough and spread it evenly into a rectangle or oval shape in the center of the leaf, leaving a 1-inch border around the edges. This is your portion guide – ensure every tamal has a similar amount of masa for even cooking.Spoon 2-3 tablespoons of the recado with meat onto the center of the masa. Add a small spoonful of cooked rice, a few potato and carrot cubes, and a few optional olives/capers/raisins. Don’t overfill!To wrap:
- Fold the long sides of the `banana leaf` over the filling, meeting in the middle.
- Fold one of the short ends up over the bundle.
- Fold the other short end up to complete the package.
- Secure the tamal tightly with kitchen twine, wrapping it lengthwise and then crosswise, tying it snugly.
- Optional: For extra leak protection, especially if your leaves have tears, wrap the tied tamal in a square of aluminum foil after tying.
- SteamSet up your `steamer for tamales`. Place a steamer rack in the bottom of a large pot. Add 2-3 inches of water, ensuring the water level is below the rack. You can add a few extra `banana leaf` scraps or small coins at the bottom; they’ll rattle when the water is low, signaling you to add more.Arrange the tamales upright (open-end facing up, if any) or stacked horizontally in the steamer pot, making sure not to pack them too tightly, which can hinder steam circulation.Bring the water to a boil, then reduce heat to medium-low to maintain a steady, gentle steam. Cover the pot tightly. Steam the tamales for 1.5 to 2.5 hours. Check the water level every 30-45 minutes and add more boiling water if needed.
- Doneness checks: A tamal is cooked when the masa separates easily from the `banana leaf` wrapper. Carefully unwrap one tamal and check. The masa should be firm, not gooey, and the filling should be hot and tender.
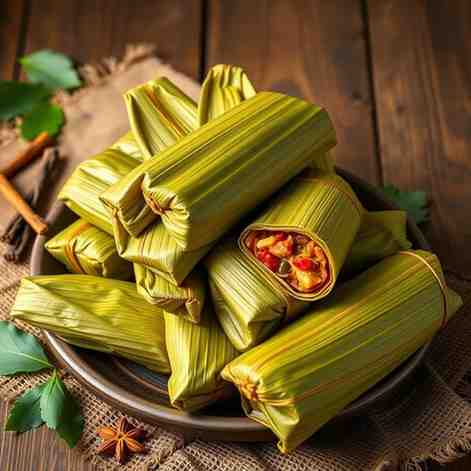
- ServingServe the `tamales hondureños` warm, unwrapped from the twine but still in their `banana leaf` wrapper, which acts as a natural plate. Guests can then unwrap them further at the table. They are a complete meal on their own, but can be served with simple sides like a fresh cabbage slaw, pickled onions, or a dollop of sour cream. If you're serving a crowd, you can keep the cooked tamales warm in the steamer for an hour or so after cooking, ensuring the water doesn't run dry.
Honduran Tamales - Banana Leaf Recipe & Tips
- Serves: 14 People
- Prepare Time: 2 hours 30
- Cooking Time: 2 hours
- Calories: -
- Difficulty: Medium
Get ready to embark on a culinary adventure that brings the heart of Honduras right into your kitchen! If you've ever dreamt of making authentic, soul-satisfying tamales, but felt intimidated by the process, you're in the right place. Our Tamales Hondureños recipe, beautifully wrapped in fragrant `banana leaf`, is your ultimate guide to creating these deeply flavorful, "full meal" tamales that are a staple at family gatherings and holidays.
Unlike their Mexican counterparts, Honduran tamales (often called nacatamales) are known for their generous, hearty fillings and the unique aroma imparted by the `banana leaf` wrapper. This isn't just a snack; it's a celebration in every bite, packed with seasoned meat, rice, potatoes, and a rich recado sauce. This recipe is perfect for anyone looking to feed a crowd, prepare ahead for a special occasion, or simply dive deep into a rewarding batch-cooking project.
We promise to walk you through every step: from expertly prepping those essential `banana leaf` wrappers and achieving the perfect `masa harina` texture, to simmering a thick, luscious recado, and mastering a simple, stress-free assembly-line workflow. By the end, you'll have a batch of incredible `tamales hondureños` that taste like they came straight from a Honduran abuela's kitchen. Let's get cooking!
Best Make-Ahead Timeline: You can prep the recado and cook the meat, par-cook the add-ins, and prepare the banana leaves the day before.
Tamales Hondureños, often referred to as nacatamales, are a beloved traditional dish from Honduras. These aren't just any tamales; they're a complete meal encased in a `banana leaf` wrapper, steamed to perfection. Typically, they’re filled with a savory mixture of pork or chicken, rice, potatoes, carrots, and sometimes olives, capers, or raisins, all bound together by a rich, reddish recado sauce made with `tomato sauce` and spices.
Making tamales is a cherished family gathering tradition in Honduras, especially around holidays like Christmas and New Year's. It's a communal effort, with everyone pitching in to prepare ingredients, assemble, and steam the tamales. This makes the cooking process as much a part of the celebration as eating them! While some may call them "nacatamales," in Honduras, they’re generally just known as "tamales" or "tamales hondureños" to distinguish them from other regional varieties.
Ingredients
Directions
- Prep the banana leaves (do this first)If using frozen `banana leaf` wrappers, thaw them completely overnight in the fridge or on the counter for a few hours. Once thawed, unroll them carefully. Rinse the leaves under cool water to remove any debris and pat them dry. Using kitchen shears, trim off the thick, woody rib that runs down the center of each leaf. Then, cut the leaves into roughly 12x12 inch squares or rectangles. You’ll need about 14-16 usable pieces.To soften the leaves and make them pliable for wrapping:
- Method A (Quick Blanch): Bring a large pot of water to a boil. Submerge a few `banana leaf` pieces at a time for 30-60 seconds until they turn a brighter green and become flexible. Carefully remove with tongs and lay flat to cool.
- Method B (Dry Skillet): Heat a large, dry skillet over medium heat. Pass each `banana leaf` piece over the hot surface for about 10-20 seconds per side until it softens and becomes pliable. Be careful not to scorch them.
- Troubleshooting: If leaves tear or have small holes, don't worry! You can layer two pieces together (offsetting the holes) or use a small piece to patch a hole during assembly. Stiff leaves mean they need more softening; repeat the process.
- Make the recado-style sauce and cook the meatIn a blender or food processor, combine the chopped onion, red bell pepper, garlic, `tomato paste`, achiote paste, cumin, oregano, black pepper, and culantro (or cilantro). Add 1 cup of `chicken stock` to help it blend. Process until completely smooth.Heat the vegetable oil or `vegetable shortening` in a large heavy-bottomed pot or Dutch oven over medium heat. Pour in the blended sauce. Bring to a simmer, then reduce the heat to low and cook, stirring occasionally, for about 15-20 minutes, until the sauce thickens and reduces to a "coats-a-spoon" consistency. It should be rich and fragrant.Add the chicken or pork pieces to the sauce. Pour in the remaining 3 cups of `chicken stock`. Bring to a simmer, then cover and cook on low heat for 45-60 minutes, or until the meat is tender and easily shredded. Taste and adjust salt as needed. If the sauce seems too thin after the meat is cooked, you can optionaly thicken it with a spoonful of `masa harina` mixed with a little water, stirring it into the simmering sauce.
- Prep the add-insCook 1 cup of long-grain `cooking rice` according to package directions, but aim for it to be slightly firm, not overly soft or mushy, as it will continue to cook in the steamer. Set aside to cool.Par-cook the diced potatoes and carrots. You can boil them in lightly salted water for about 5-7 minutes, or until they are slightly tender but still have a bite. They should not be fully cooked, as they will finish cooking inside the tamales. Drain and set aside to cool.
- Mix the masaIn a very large mixing bowl, combine the `masa harina`, salt, and baking powder. Whisk them together.Gradually add the melted `vegetable shortening` or lard to the masa mixture, rubbing it in with your fingertips until the mixture resembles coarse cornmeal.Slowly pour in the warm `chicken stock` or `chicken broth`, mixing with your hands or a sturdy spoon. Continue adding liquid until the masa forms a soft, pliable dough. The target texture should be like a thick, smooth peanut butter or a very soft play-dough – it should be spreadable but not sticky, and should hold its shape without crumbling.
- Visual cues: When you press it, it should feel moist and cohesive. If you drop a small ball of masa into a glass of cold water, it should float (this indicates enough air has been incorporated).
- Fixes: If too dry, add more warm `chicken stock` a tablespoon at a time. If too wet, add a tablespoon of `masa harina` at a time. If bland, add a pinch more salt.
- Assemble (assembly-line workflow)Set up your assembly station: Have your prepped `banana leaf` squares, masa dough, recado with meat, cooked rice, par-cooked potatoes and carrots, optional olives/capers/raisins, kitchen twine, and a sheet pan for assembled tamales all within easy reach.Lay a `banana leaf` square flat on your work surface. Take about 1/4 to 1/3 cup of masa dough and spread it evenly into a rectangle or oval shape in the center of the leaf, leaving a 1-inch border around the edges. This is your portion guide – ensure every tamal has a similar amount of masa for even cooking.Spoon 2-3 tablespoons of the recado with meat onto the center of the masa. Add a small spoonful of cooked rice, a few potato and carrot cubes, and a few optional olives/capers/raisins. Don’t overfill!To wrap:
- Fold the long sides of the `banana leaf` over the filling, meeting in the middle.
- Fold one of the short ends up over the bundle.
- Fold the other short end up to complete the package.
- Secure the tamal tightly with kitchen twine, wrapping it lengthwise and then crosswise, tying it snugly.
- Optional: For extra leak protection, especially if your leaves have tears, wrap the tied tamal in a square of aluminum foil after tying.
- SteamSet up your `steamer for tamales`. Place a steamer rack in the bottom of a large pot. Add 2-3 inches of water, ensuring the water level is below the rack. You can add a few extra `banana leaf` scraps or small coins at the bottom; they’ll rattle when the water is low, signaling you to add more.Arrange the tamales upright (open-end facing up, if any) or stacked horizontally in the steamer pot, making sure not to pack them too tightly, which can hinder steam circulation.Bring the water to a boil, then reduce heat to medium-low to maintain a steady, gentle steam. Cover the pot tightly. Steam the tamales for 1.5 to 2.5 hours. Check the water level every 30-45 minutes and add more boiling water if needed.
- Doneness checks: A tamal is cooked when the masa separates easily from the `banana leaf` wrapper. Carefully unwrap one tamal and check. The masa should be firm, not gooey, and the filling should be hot and tender.
- ServingServe the `tamales hondureños` warm, unwrapped from the twine but still in their `banana leaf` wrapper, which acts as a natural plate. Guests can then unwrap them further at the table. They are a complete meal on their own, but can be served with simple sides like a fresh cabbage slaw, pickled onions, or a dollop of sour cream. If you're serving a crowd, you can keep the cooked tamales warm in the steamer for an hour or so after cooking, ensuring the water doesn't run dry.
You may also like

Hey there! I’m just someone who seriously loves good food and believes that cooking doesn’t have to be complicated to be amazing. Whether it’s a quick weeknight dinner or a cozy weekend meal, I’m all about sharing easy, tasty recipes that actually work.


