
Make Turkish Baklava at Home – Easy Recipe
Make Turkish Baklava at Home – Easy Recipe
- Serves: 24 People
- Prepare Time: 45 minutes
- Cooking Time: 50-60 minut
- Calories: -
- Difficulty: Medium
Ever dreamt of biting into a piece of Turkish baklava that's perfectly crisp, wonderfully syrupy, and melts in your mouth without a hint of sogginess? You're in the right place! This isn't just another recipe; it’s your definitive guide to making Baghlava - A Nutty and Sweet Layered Pastry right in your own kitchen. Forget about searching for "turkish baklava near me" – you're about to bake from scratch a batch of these glorious middle eastern sweets that will impress everyone.
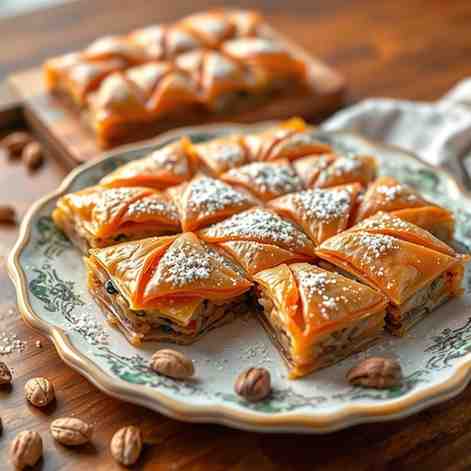
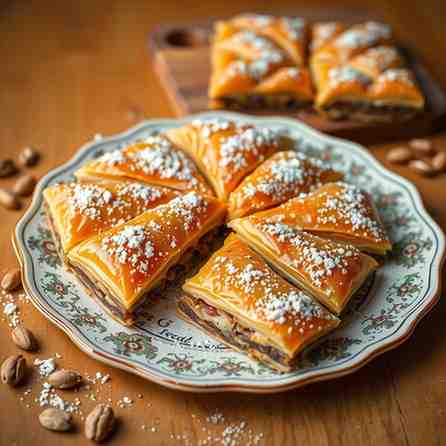
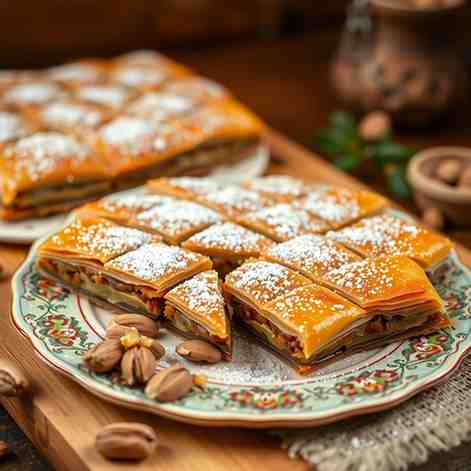
Baghlava (often called Baklava) is a true marvel: delicate layers of phyllo pastry, generously filled with a rich, aromatic mix of chopped nuts, all drenched in a sweet, fragrant syrup. What makes this recipe "the one"? We're talking about layers so crisp they practically sing, a sweetness that's perfectly balanced, and a foolproof syrup timing that guarantees no soggy bottoms. Whether you're a first-timer or someone who's had "soggy baklava trauma" in the past, get ready to master this classic nutty layered pastry. It’s perfect as christmas treats to bake, desserts for gifts, or simply treats for party gatherings.
Ingredients
Directions
- Thaw and Set Up Your Station
- Thaw Phyllo Dough: Plan ahead! Thaw your phyllo dough in its original packaging in the refrigerator overnight. This is crucial for easy handling.
- Preheat Oven: Before you start building, preheat your oven to 325°F (160°C).
- Melt Butter: In a small saucepan or microwave-safe bowl, melt your unsalted butter. You'll need this for brushing between layers.
- Prepare Phyllo Station: Unwrap the thawed phyllo dough and lay it flat. Cover it immediately with a clean, dry kitchen towel (and a slightly damp one underneath if your kitchen is very dry) to prevent it from drying out and cracking. This is your "phyllo parking spot."
- Make the Syrup First (So It Can Cool)
- Combine Ingredients: In your small saucepan, combine the sugar and water. Bring to a boil over medium-high heat, stirring until the sugar dissolves completely.
- Add Honey & Simmer: Reduce the heat to medium-low, add the honey, and simmer for about 5-7 minutes, until the syrup slightly thickens. It won't be super thick like jam, just a bit more viscous than water. Think of it like a rich `simple syrup for cake`.
- Flavor & Cool: Remove the saucepan from the heat. Stir in the lemon juice and your choice of orange blossom water or orange extract. Transfer the syrup to a heatproof bowl or jar and let it cool completely to room temperature. This is the #1 rule for crisp layers: hot baklava + cool syrup! To tell if it's cool enough, it should feel cool to the touch, not even lukewarm.
- Make the Nut Filling
- Chop Nuts: In a food processor or by hand, chop your chosen nuts (walnuts, pistachios, almonds – or a mix!) into small, pebbly pieces. You don't want a fine powder; a bit of texture is key.
- Mix Spices: In a medium bowl, combine the chopped nuts with the granulated sugar and ground cinnamon. If using, add the optional ground clove. Mix well to ensure the `brown sugar and cinnamon` (or rather, granulated sugar and cinnamon) are evenly distributed.
- Build the Layers
- Butter the Pan: Using your pastry brush, generously butter the bottom and sides of your 9×13 inch baking dish.
- Layering Plan (Example Blueprint): The exact number of phyllo sheets can vary slightly depending on the brand, but here’s a common approach for a 16 oz box (typically 20-24 sheets):
- Bottom Layers (Thicker Base): Place 6-8 sheets of phyllo dough in the bottom of the pan, buttering lightly between each sheet. Make sure each sheet is fully brushed with butter.
- First Nut Layer: Spread half of the nut mixture evenly over the buttered phyllo layers.
- Middle Phyllo Layers: Place another 4-6 sheets of phyllo dough over the nut layer, buttering between each sheet.
- Second Nut Layer: Spread the remaining half of the nut mixture evenly over these middle phyllo layers.
- Top Layers (Thickest & Most Robust): Finish with the remaining 8-10 sheets of phyllo dough, buttering generously between each sheet. The top layers should be the thickest to create that beautiful, crisp crust.
- Fit the Pan: If your phyllo sheets are larger than your pan, you can either fold them to fit or carefully trim them with a sharp knife. Don't worry too much about small tears; the butter and subsequent layers will hide them.
- Cut Before Baking
- Diamond or Square Cuts: This is a crucial step! Using a very sharp knife, cut the baklava into diamond shapes or squares. For diamonds, make diagonal cuts in one direction, then diagonal cuts in the opposite direction.
- Cut All the Way Through: It’s important to cut all the way down to the bottom of the pan. This allows the syrup to fully penetrate every layer after baking and helps prevent the top from shattering when you serve it.
- Bake Until Deep Golden
- Bake Time: Place the baking dish in your preheated oven. Bake for about 50-60 minutes, or until the top is a beautiful deep golden brown and the layers are visibly crisp. If it starts browning too quickly, you can loosely tent it with foil.
- Syrup It the Right Way
- Pour Cool Syrup Over Hot Baklava: As soon as you pull the hot baklava out of the oven, immediately and slowly pour the completely cooled syrup evenly over the entire surface. You'll hear a satisfying sizzle! This temperature contrast is what ensures those gloriously crisp layers.
- Let It Absorb and Set: Allow the baklava to rest at room temperature for at least 4-6 hours, or ideally overnight. This resting time is essential for the baklava to fully absorb all that delicious syrup and for the flavors to meld perfectly.
- Cool, Garnish, Serve
- Final Cut-Through: Once fully cooled and absorbed, use your sharp knife to cut through the pre-cut lines again, ensuring each piece is separated.
- Garnish (Optional): For a beautiful presentation, garnish with finely chopped pistachios or a sprinkle of cinnamon just before serving. Enjoy your homemade egg free treats!
Make Turkish Baklava at Home – Easy Recipe
- Serves: 24 People
- Prepare Time: 45 minutes
- Cooking Time: 50-60 minut
- Calories: -
- Difficulty: Medium
Ever dreamt of biting into a piece of Turkish baklava that's perfectly crisp, wonderfully syrupy, and melts in your mouth without a hint of sogginess? You're in the right place! This isn't just another recipe; it’s your definitive guide to making Baghlava - A Nutty and Sweet Layered Pastry right in your own kitchen. Forget about searching for "turkish baklava near me" – you're about to bake from scratch a batch of these glorious middle eastern sweets that will impress everyone.
Baghlava (often called Baklava) is a true marvel: delicate layers of phyllo pastry, generously filled with a rich, aromatic mix of chopped nuts, all drenched in a sweet, fragrant syrup. What makes this recipe "the one"? We're talking about layers so crisp they practically sing, a sweetness that's perfectly balanced, and a foolproof syrup timing that guarantees no soggy bottoms. Whether you're a first-timer or someone who's had "soggy baklava trauma" in the past, get ready to master this classic nutty layered pastry. It’s perfect as christmas treats to bake, desserts for gifts, or simply treats for party gatherings.
Ingredients
Directions
- Thaw and Set Up Your Station
- Thaw Phyllo Dough: Plan ahead! Thaw your phyllo dough in its original packaging in the refrigerator overnight. This is crucial for easy handling.
- Preheat Oven: Before you start building, preheat your oven to 325°F (160°C).
- Melt Butter: In a small saucepan or microwave-safe bowl, melt your unsalted butter. You'll need this for brushing between layers.
- Prepare Phyllo Station: Unwrap the thawed phyllo dough and lay it flat. Cover it immediately with a clean, dry kitchen towel (and a slightly damp one underneath if your kitchen is very dry) to prevent it from drying out and cracking. This is your "phyllo parking spot."
- Make the Syrup First (So It Can Cool)
- Combine Ingredients: In your small saucepan, combine the sugar and water. Bring to a boil over medium-high heat, stirring until the sugar dissolves completely.
- Add Honey & Simmer: Reduce the heat to medium-low, add the honey, and simmer for about 5-7 minutes, until the syrup slightly thickens. It won't be super thick like jam, just a bit more viscous than water. Think of it like a rich `simple syrup for cake`.
- Flavor & Cool: Remove the saucepan from the heat. Stir in the lemon juice and your choice of orange blossom water or orange extract. Transfer the syrup to a heatproof bowl or jar and let it cool completely to room temperature. This is the #1 rule for crisp layers: hot baklava + cool syrup! To tell if it's cool enough, it should feel cool to the touch, not even lukewarm.
- Make the Nut Filling
- Chop Nuts: In a food processor or by hand, chop your chosen nuts (walnuts, pistachios, almonds – or a mix!) into small, pebbly pieces. You don't want a fine powder; a bit of texture is key.
- Mix Spices: In a medium bowl, combine the chopped nuts with the granulated sugar and ground cinnamon. If using, add the optional ground clove. Mix well to ensure the `brown sugar and cinnamon` (or rather, granulated sugar and cinnamon) are evenly distributed.
- Build the Layers
- Butter the Pan: Using your pastry brush, generously butter the bottom and sides of your 9×13 inch baking dish.
- Layering Plan (Example Blueprint): The exact number of phyllo sheets can vary slightly depending on the brand, but here’s a common approach for a 16 oz box (typically 20-24 sheets):
- Bottom Layers (Thicker Base): Place 6-8 sheets of phyllo dough in the bottom of the pan, buttering lightly between each sheet. Make sure each sheet is fully brushed with butter.
- First Nut Layer: Spread half of the nut mixture evenly over the buttered phyllo layers.
- Middle Phyllo Layers: Place another 4-6 sheets of phyllo dough over the nut layer, buttering between each sheet.
- Second Nut Layer: Spread the remaining half of the nut mixture evenly over these middle phyllo layers.
- Top Layers (Thickest & Most Robust): Finish with the remaining 8-10 sheets of phyllo dough, buttering generously between each sheet. The top layers should be the thickest to create that beautiful, crisp crust.
- Fit the Pan: If your phyllo sheets are larger than your pan, you can either fold them to fit or carefully trim them with a sharp knife. Don't worry too much about small tears; the butter and subsequent layers will hide them.
- Cut Before Baking
- Diamond or Square Cuts: This is a crucial step! Using a very sharp knife, cut the baklava into diamond shapes or squares. For diamonds, make diagonal cuts in one direction, then diagonal cuts in the opposite direction.
- Cut All the Way Through: It’s important to cut all the way down to the bottom of the pan. This allows the syrup to fully penetrate every layer after baking and helps prevent the top from shattering when you serve it.
- Bake Until Deep Golden
- Bake Time: Place the baking dish in your preheated oven. Bake for about 50-60 minutes, or until the top is a beautiful deep golden brown and the layers are visibly crisp. If it starts browning too quickly, you can loosely tent it with foil.
- Syrup It the Right Way
- Pour Cool Syrup Over Hot Baklava: As soon as you pull the hot baklava out of the oven, immediately and slowly pour the completely cooled syrup evenly over the entire surface. You'll hear a satisfying sizzle! This temperature contrast is what ensures those gloriously crisp layers.
- Let It Absorb and Set: Allow the baklava to rest at room temperature for at least 4-6 hours, or ideally overnight. This resting time is essential for the baklava to fully absorb all that delicious syrup and for the flavors to meld perfectly.
- Cool, Garnish, Serve
- Final Cut-Through: Once fully cooled and absorbed, use your sharp knife to cut through the pre-cut lines again, ensuring each piece is separated.
- Garnish (Optional): For a beautiful presentation, garnish with finely chopped pistachios or a sprinkle of cinnamon just before serving. Enjoy your homemade egg free treats!
You may also like


Hey there! I’m just someone who seriously loves good food and believes that cooking doesn’t have to be complicated to be amazing. Whether it’s a quick weeknight dinner or a cozy weekend meal, I’m all about sharing easy, tasty recipes that actually work.


