
Easy Japanese Golden Curry Rice - Kare Raisu Recipe
Easy Japanese Golden Curry Rice - Kare Raisu Recipe
- Serves: 4 People
- Prepare Time: 15 minutes
- Cooking Time: 25 minutes
- Calories: -
- Difficulty: Easy
Welcome to the ultimate guide for making delicious Japanese Curry Rice (Kare Raisu) right in your own kitchen! Forget fancy restaurant reservations; this cozy, weeknight-friendly dish tastes just like authentic Japanese home cooking. It’s comfort food at its best – rich, savory, and incredibly satisfying.
Now, before we dive in, let’s clear up a common misconception: This recipe is for Japanese curry rice (a thick, savory curry sauce served over rice), not "curried rice" which is often a pilaf-style dish where rice is cooked with curry powder. We’re talking about that wonderfully thick, gravy-like sauce you find in Japan, made super easy with Japanese curry cubes.
Ready to get started?
What makes Japanese curry so wonderfully unique? Unlike its Indian or Thai counterparts, Japanese curry has a distinctively thick, gravy-like texture and a milder, slightly sweeter, and deeply savory flavor profile. This signature taste and consistency come largely from curry roux cubes – a brilliant shortcut that makes this dish incredibly accessible for home cooks. These convenient blocks contain all the spices, flour, and fats needed to create that classic Japanese curry flavor and thickness in one go. It’s truly the secret to quick, authentic flavor!
Ingredients
Directions
- Rinse and Start the Rice: Place your Japanese short-grain rice in a fine-mesh sieve and rinse under cold running water until the water runs clear (this removes excess starch for fluffier rice). Transfer to your rice cooker with 2 cups of water and start cooking, or cook according to your preferred stovetop method.
- Prep Your Ingredients: While the rice cooks, get your other ingredients ready. Cut the onion into medium dice. Cut the chicken thighs into 1-inch bite-sized pieces. Peel and cut the carrots into 1/2-inch thick half-moons. Peel and cut the potatoes into 1-inch chunks. Aim for even sizes so everything cooks uniformly.
- Sauté Onions: Heat the vegetable oil in a medium to large heavy pot or Dutch oven over medium heat. Add the chopped onions and sauté for 5-7 minutes, stirring occasionally, until they soften and turn a light golden color. This caramelization adds a crucial layer of sweetness and depth to your curry. "Light golden" means they've just started to brown around the edges, not fully dark brown.
- Brown Chicken: Add the bite-sized chicken thighs to the pot with the onions. Increase the heat slightly and quickly sear the chicken for 3-4 minutes, stirring occasionally, until lightly browned on the outside. You don't need to cook it through completely; this step is just to build flavor.
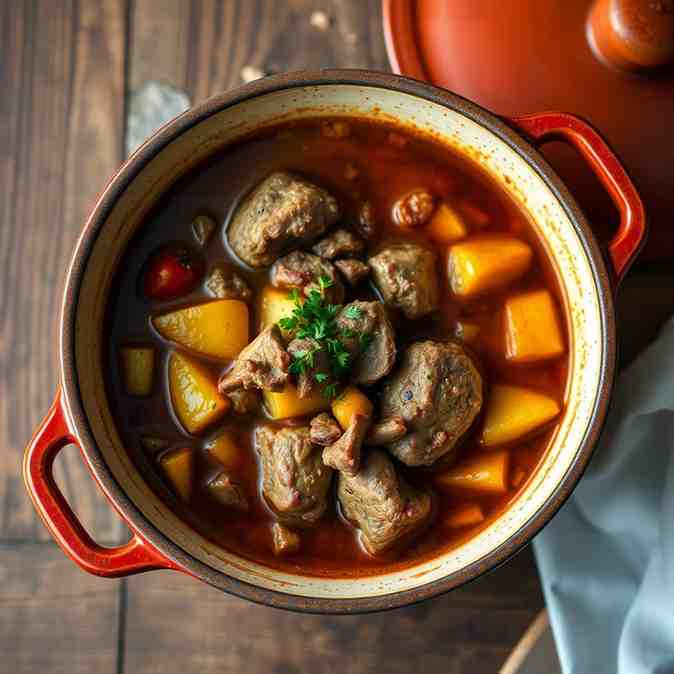
- Add Vegetables & Liquid: Stir in the carrots and potatoes. Pour in the water or chicken stock. Bring the mixture to a gentle simmer. As it heats, a bit of foam might rise to the surface; you can skim this off with a spoon if desired for a clearer curry, but it's not strictly necessary.
- Simmer Until Tender: Reduce the heat to low, cover the pot, and let the curry simmer for 15-20 minutes, or until the vegetables (especially the potatoes) are fork-tender and the chicken is cooked through. Stir occasionally to prevent sticking.
- Add Curry Cubes the Right Way: Turn off the heat or lower it to its absolute minimum. Break the curry roux cubes into smaller pieces and add them to the pot. Stir gently until the cubes are completely dissolved and the sauce begins to thicken. It's important to add the cubes off or on very low heat to prevent scorching and ensure smooth dissolution without lumps.
- Finish & Adjust: Once the cubes are dissolved, the curry will have thickened. Check the consistency – if it's too thick, you can add a tiny splash more water or stock. Taste and adjust seasoning with salt and pepper as needed. This is also the time to stir in any of your optional "secret flavor boosters" if you're using them.
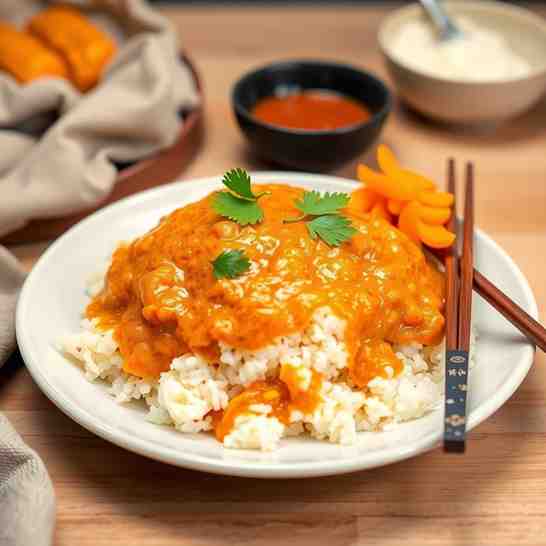
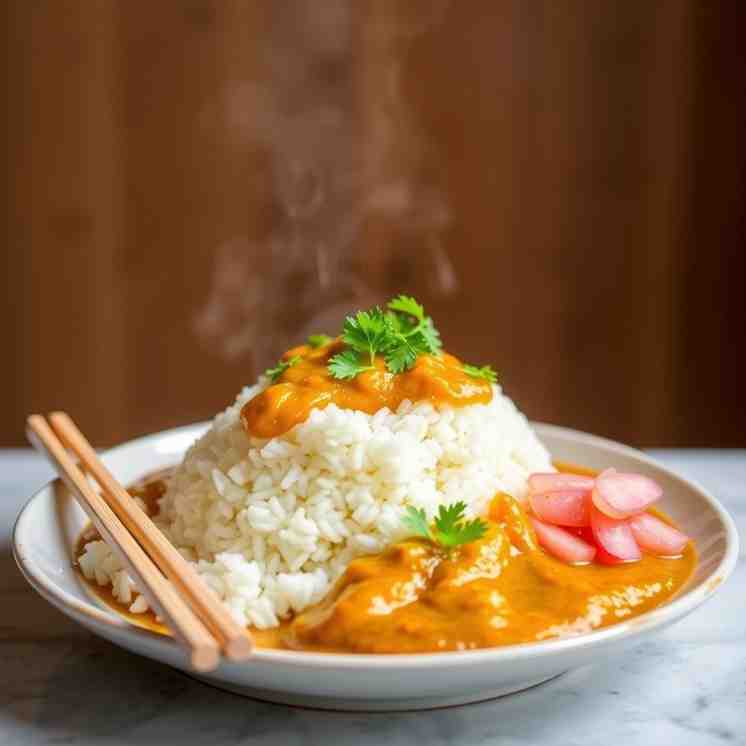
- Serve: Ladle a generous portion of the hot Japanese curry over a bed of fluffy Japanese short-grain rice. Serve with Fukujinzuke or other pickles on the side. For an extra treat, add a fried egg or a piece of Chicken Katsu! Enjoy your homemade Japanese Curry Rice!
Easy Japanese Golden Curry Rice - Kare Raisu Recipe

- Serves: 4 People
- Prepare Time: 15 minutes
- Cooking Time: 25 minutes
- Calories: -
- Difficulty: Easy
Welcome to the ultimate guide for making delicious Japanese Curry Rice (Kare Raisu) right in your own kitchen! Forget fancy restaurant reservations; this cozy, weeknight-friendly dish tastes just like authentic Japanese home cooking. It’s comfort food at its best – rich, savory, and incredibly satisfying.
Now, before we dive in, let’s clear up a common misconception: This recipe is for Japanese curry rice (a thick, savory curry sauce served over rice), not "curried rice" which is often a pilaf-style dish where rice is cooked with curry powder. We’re talking about that wonderfully thick, gravy-like sauce you find in Japan, made super easy with Japanese curry cubes.
Ready to get started?
What makes Japanese curry so wonderfully unique? Unlike its Indian or Thai counterparts, Japanese curry has a distinctively thick, gravy-like texture and a milder, slightly sweeter, and deeply savory flavor profile. This signature taste and consistency come largely from curry roux cubes – a brilliant shortcut that makes this dish incredibly accessible for home cooks. These convenient blocks contain all the spices, flour, and fats needed to create that classic Japanese curry flavor and thickness in one go. It’s truly the secret to quick, authentic flavor!
Ingredients
Directions
- Rinse and Start the Rice: Place your Japanese short-grain rice in a fine-mesh sieve and rinse under cold running water until the water runs clear (this removes excess starch for fluffier rice). Transfer to your rice cooker with 2 cups of water and start cooking, or cook according to your preferred stovetop method.
- Prep Your Ingredients: While the rice cooks, get your other ingredients ready. Cut the onion into medium dice. Cut the chicken thighs into 1-inch bite-sized pieces. Peel and cut the carrots into 1/2-inch thick half-moons. Peel and cut the potatoes into 1-inch chunks. Aim for even sizes so everything cooks uniformly.
- Sauté Onions: Heat the vegetable oil in a medium to large heavy pot or Dutch oven over medium heat. Add the chopped onions and sauté for 5-7 minutes, stirring occasionally, until they soften and turn a light golden color. This caramelization adds a crucial layer of sweetness and depth to your curry. "Light golden" means they've just started to brown around the edges, not fully dark brown.
- Brown Chicken: Add the bite-sized chicken thighs to the pot with the onions. Increase the heat slightly and quickly sear the chicken for 3-4 minutes, stirring occasionally, until lightly browned on the outside. You don't need to cook it through completely; this step is just to build flavor.
- Add Vegetables & Liquid: Stir in the carrots and potatoes. Pour in the water or chicken stock. Bring the mixture to a gentle simmer. As it heats, a bit of foam might rise to the surface; you can skim this off with a spoon if desired for a clearer curry, but it's not strictly necessary.
- Simmer Until Tender: Reduce the heat to low, cover the pot, and let the curry simmer for 15-20 minutes, or until the vegetables (especially the potatoes) are fork-tender and the chicken is cooked through. Stir occasionally to prevent sticking.
- Add Curry Cubes the Right Way: Turn off the heat or lower it to its absolute minimum. Break the curry roux cubes into smaller pieces and add them to the pot. Stir gently until the cubes are completely dissolved and the sauce begins to thicken. It's important to add the cubes off or on very low heat to prevent scorching and ensure smooth dissolution without lumps.
- Finish & Adjust: Once the cubes are dissolved, the curry will have thickened. Check the consistency – if it's too thick, you can add a tiny splash more water or stock. Taste and adjust seasoning with salt and pepper as needed. This is also the time to stir in any of your optional "secret flavor boosters" if you're using them.
- Serve: Ladle a generous portion of the hot Japanese curry over a bed of fluffy Japanese short-grain rice. Serve with Fukujinzuke or other pickles on the side. For an extra treat, add a fried egg or a piece of Chicken Katsu! Enjoy your homemade Japanese Curry Rice!
You may also like


Hey there! I’m just someone who seriously loves good food and believes that cooking doesn’t have to be complicated to be amazing. Whether it’s a quick weeknight dinner or a cozy weekend meal, I’m all about sharing easy, tasty recipes that actually work.


