
Japanese Meal Prep - Make Takoyaki at Home
Japanese Meal Prep - Make Takoyaki at Home
- Serves: 4 People
- Prepare Time: 20 minutes
- Cooking Time: 30 minutes
- Calories: -
- Difficulty: Medium
Ever wondered how to whip up those irresistible, golden-brown spheres of joy known as Takoyaki right in your own kitchen? If you’re a fan of ``Japanese meal prep`` and love the idea of ``make your own food`` that tastes like it came straight from an Osaka street stall, you’re in the right place! Takoyaki, or Japanese octopus balls, are a culinary adventure: crispy on the outside, wonderfully gooey and flavorful on the inside, packed with savory octopus and other goodies. They’re super fun to make and even more fun to eat, making them a fantastic addition to your ``home cooked meals`` repertoire.
Here, we’re not just giving you a recipe; we’re giving you the definitive guide. You’ll get one reliable, easy-to-follow Takoyaki recipe, a simple "flip rhythm" system that’ll have you turning balls like a pro, and even a smart ``meal plan recipes`` approach for ``weekly meal prep`` so you can enjoy these delights any day. Whether you're ``cooking for one`` or feeding a crowd, get ready to dive into the delicious world of Takoyaki!
Takoyaki literally translates to "grilled octopus" and is a beloved street food originating from Osaka, Japan. These bite-sized balls are made from a wheat-flour-based batter, filled with diced octopus, green onions, pickled ginger (beni shoga), and tempura bits (tenkasu), then cooked in a special molded pan. The magic lies in their texture: a perfectly crisp, golden-brown exterior giving way to a wonderfully soft, almost custardy, and gooey interior. Don’t worry, that gooey center isn't undercooked; it's exactly how authentic Takoyaki should be, providing a delightful contrast to the crisp outside!
To make Takoyaki, a few key tools will make your life much easier:
Takoyaki Pan Options:
Electric: Super convenient for beginners! They maintain a consistent heat and often come with nonstick surfaces.
Cast Iron: Offers fantastic heat retention and gives a beautiful crisp crust. Requires a bit more temperature management.
Nonstick: A good middle-ground, easier to clean than cast iron but might not get quite as hot.
Acceptable Substitute: While not ideal, you can try a Danish aebleskiver pan or even a mini muffin pan if you're desperate, but the shape and depth won't be quite right for authentic spheres.
What you’ll use to flip:
Takoyaki Picks: The pros use these! They're sharp, thin metal picks designed for easy turning.
Bamboo Skewers: A great alternative if you don't have picks. Use two at a time for better control.
Chopsticks: Can work in a pinch, but they require a bit more dexterity for the initial flips.
Small helpers that make it easier:
Squeeze Bottle: Perfect for pouring batter neatly and quickly into the pan cavities.
Pastry Brush: Essential for oiling the pan thoroughly.
Cooling Rack: Once cooked, transfer your Takoyaki to a cooling rack. This keeps the bottoms crisp and prevents them from getting soggy.
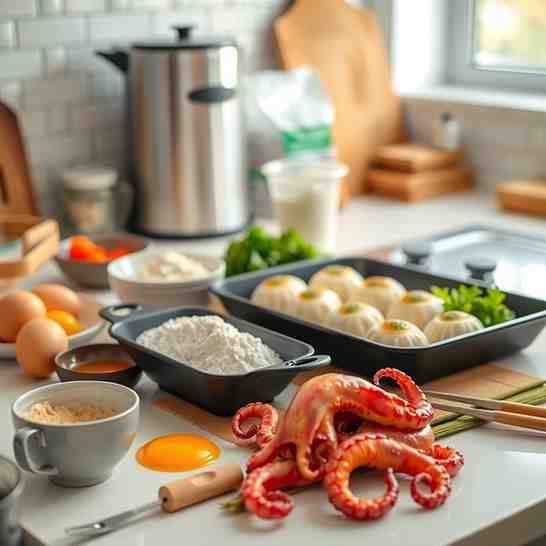
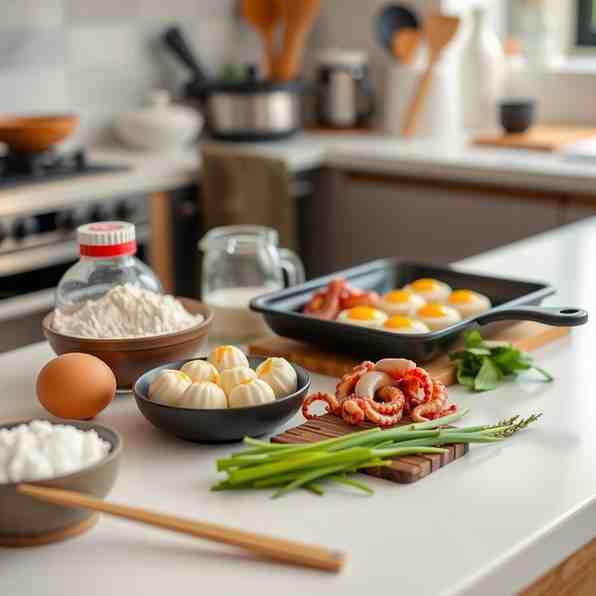
Ingredients
Directions
- Prep Your Station (5 minutes)
- Dice your boiled octopus, green onions, and beni shoga to the right size (about ½ inch for octopus, finely chopped for ginger and onions).
- Get all your toppings ready: open your Takoyaki sauce, Kewpie mayo, katsuobushi, and aonori. Have your oil and takoyaki picks (or skewers/chopsticks) within easy reach. Cooking Takoyaki is fast-paced, so organization is key!
- Make the Batter
- In a large bowl, whisk together the all-purpose flour, baking powder, and salt.
- In a separate bowl, whisk the eggs, dashi, and soy sauce until well combined.
- Gradually pour the wet ingredients into the dry ingredients, whisking until just combined. Don't overmix; a few small lumps are okay. You're aiming for a consistency similar to thin pancake batter or heavy cream – it should be quite thin and pourable.
- Optional: Let the batter rest for 15-30 minutes at room temperature. This allows the flour to fully hydrate, resulting in a smoother batter and potentially a lighter, crisper Takoyaki. Give it a quick whisk before using. If using a squeeze bottle, pour the batter into it now.
- Heat + Oil the Pan (Don’t Skip This!)
- Place your Takoyaki pan over medium-high heat (or turn on your electric pan). Let it heat up for 3-5 minutes until it's good and hot. A good test is to flick a drop of water onto the pan – if it sizzles and evaporates quickly, it’s hot enough.
- Generously oil every single cavity of the pan, plus the flat surface around the cavities, using a pastry brush or a paper towel dipped in oil. You want enough oil to help crisp the outside, but not so much that it's swimming. This step is crucial for preventing sticking and getting that perfect golden crust.
- Cook + Flip: The “Flip Rhythm” Method
- Pour (Yes, Overflow is Good!)
- Working quickly, pour the batter into all the cavities, filling them completely. Don't be shy – let the batter overflow a bit onto the flat surface between the cavities; this "skirt" will be incorporated later.
- Fill (Octopus + Ginger + Onions + Tenkasu)
- Immediately place one piece of diced octopus into each cavity.
- Quickly sprinkle green onions, beni shoga, and tenkasu over all the cavities. The batter will still be wet.
- First Turn (90°) — Visual Cue Checklist
- Wait about 2-3 minutes. The edges of the batter on the flat surface should start to set and look slightly crispy, and bubbles will appear on the surface of the batter in the cavities.
- Using your Takoyaki pick (or two skewers), gently poke around the edge of each ball and turn it 90 degrees. You're aiming to rotate it so the uncooked batter from the bottom of the cavity is now on top, and the partially cooked side is facing up. It won't be a perfect ball yet – it will look like a half-sphere with the fillings exposed.
- Top Up Batter and Tuck in the “Skirt”
- Immediately after the first turn, pour a tiny bit more batter over the exposed, uncooked parts of the half-spheres and the "skirt" of batter around the cavities.
- Using your picks, gently tuck the overflowing batter "skirt" from the flat surface into the cavities, helping to form a rounder shape.
- Keep Turning Until Round and Golden
- Continue to rotate the balls every 30-60 seconds, using your picks to nudge and turn them, ensuring all sides get cooked evenly. They will gradually become rounder as you turn them and the batter cooks. Keep an eye on the heat; adjust if they're browning too quickly or too slowly.
- Final Crisp Phase (How to Avoid Pale, Soggy Balls)
- Once the Takoyaki are mostly round, reduce the heat slightly to medium-low. Continue turning them frequently for another 5-7 minutes. This "final crisp phase" is crucial for developing that beautiful golden-brown, crispy exterior. Don't let them sit too long on one side. If some spots are paler, move them to a hotter part of the pan. They should feel light and firm when poked.
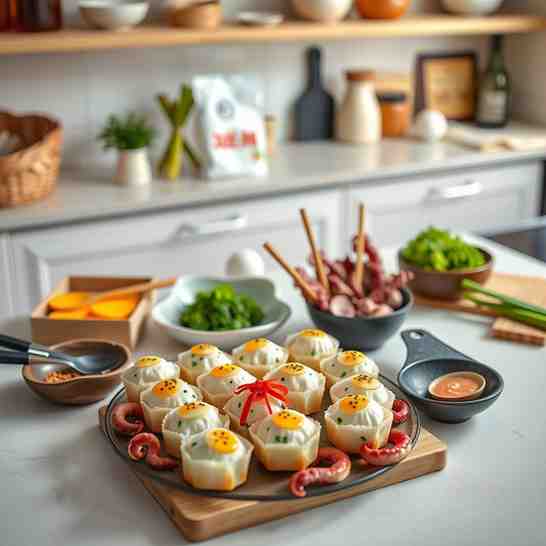
- Finish and Serve
- Once golden and crisp, remove the Takoyaki from the pan and place them on a cooling rack (this helps maintain crispness).
- Arrange them on a plate. Drizzle generously with Takoyaki sauce, then zig-zag with Kewpie mayo.
- Finish with a sprinkle of katsuobushi (watch them dance!) and a dusting of aonori.
- Safety note: The inside of Takoyaki is lava-hot, especially the octopus. Let them cool for a minute or two before taking a bite to avoid burning your tongue!
Japanese Meal Prep - Make Takoyaki at Home
- Serves: 4 People
- Prepare Time: 20 minutes
- Cooking Time: 30 minutes
- Calories: -
- Difficulty: Medium
Ever wondered how to whip up those irresistible, golden-brown spheres of joy known as Takoyaki right in your own kitchen? If you’re a fan of ``Japanese meal prep`` and love the idea of ``make your own food`` that tastes like it came straight from an Osaka street stall, you’re in the right place! Takoyaki, or Japanese octopus balls, are a culinary adventure: crispy on the outside, wonderfully gooey and flavorful on the inside, packed with savory octopus and other goodies. They’re super fun to make and even more fun to eat, making them a fantastic addition to your ``home cooked meals`` repertoire.
Here, we’re not just giving you a recipe; we’re giving you the definitive guide. You’ll get one reliable, easy-to-follow Takoyaki recipe, a simple "flip rhythm" system that’ll have you turning balls like a pro, and even a smart ``meal plan recipes`` approach for ``weekly meal prep`` so you can enjoy these delights any day. Whether you're ``cooking for one`` or feeding a crowd, get ready to dive into the delicious world of Takoyaki!
Takoyaki literally translates to "grilled octopus" and is a beloved street food originating from Osaka, Japan. These bite-sized balls are made from a wheat-flour-based batter, filled with diced octopus, green onions, pickled ginger (beni shoga), and tempura bits (tenkasu), then cooked in a special molded pan. The magic lies in their texture: a perfectly crisp, golden-brown exterior giving way to a wonderfully soft, almost custardy, and gooey interior. Don’t worry, that gooey center isn't undercooked; it's exactly how authentic Takoyaki should be, providing a delightful contrast to the crisp outside!
To make Takoyaki, a few key tools will make your life much easier:
Takoyaki Pan Options:
Electric: Super convenient for beginners! They maintain a consistent heat and often come with nonstick surfaces.
Cast Iron: Offers fantastic heat retention and gives a beautiful crisp crust. Requires a bit more temperature management.
Nonstick: A good middle-ground, easier to clean than cast iron but might not get quite as hot.
Acceptable Substitute: While not ideal, you can try a Danish aebleskiver pan or even a mini muffin pan if you're desperate, but the shape and depth won't be quite right for authentic spheres.
What you’ll use to flip:
Takoyaki Picks: The pros use these! They're sharp, thin metal picks designed for easy turning.
Bamboo Skewers: A great alternative if you don't have picks. Use two at a time for better control.
Chopsticks: Can work in a pinch, but they require a bit more dexterity for the initial flips.
Small helpers that make it easier:
Squeeze Bottle: Perfect for pouring batter neatly and quickly into the pan cavities.
Pastry Brush: Essential for oiling the pan thoroughly.
Cooling Rack: Once cooked, transfer your Takoyaki to a cooling rack. This keeps the bottoms crisp and prevents them from getting soggy.
Ingredients
Directions
- Prep Your Station (5 minutes)
- Dice your boiled octopus, green onions, and beni shoga to the right size (about ½ inch for octopus, finely chopped for ginger and onions).
- Get all your toppings ready: open your Takoyaki sauce, Kewpie mayo, katsuobushi, and aonori. Have your oil and takoyaki picks (or skewers/chopsticks) within easy reach. Cooking Takoyaki is fast-paced, so organization is key!
- Make the Batter
- In a large bowl, whisk together the all-purpose flour, baking powder, and salt.
- In a separate bowl, whisk the eggs, dashi, and soy sauce until well combined.
- Gradually pour the wet ingredients into the dry ingredients, whisking until just combined. Don't overmix; a few small lumps are okay. You're aiming for a consistency similar to thin pancake batter or heavy cream – it should be quite thin and pourable.
- Optional: Let the batter rest for 15-30 minutes at room temperature. This allows the flour to fully hydrate, resulting in a smoother batter and potentially a lighter, crisper Takoyaki. Give it a quick whisk before using. If using a squeeze bottle, pour the batter into it now.
- Heat + Oil the Pan (Don’t Skip This!)
- Place your Takoyaki pan over medium-high heat (or turn on your electric pan). Let it heat up for 3-5 minutes until it's good and hot. A good test is to flick a drop of water onto the pan – if it sizzles and evaporates quickly, it’s hot enough.
- Generously oil every single cavity of the pan, plus the flat surface around the cavities, using a pastry brush or a paper towel dipped in oil. You want enough oil to help crisp the outside, but not so much that it's swimming. This step is crucial for preventing sticking and getting that perfect golden crust.
- Cook + Flip: The “Flip Rhythm” Method
- Pour (Yes, Overflow is Good!)
- Working quickly, pour the batter into all the cavities, filling them completely. Don't be shy – let the batter overflow a bit onto the flat surface between the cavities; this "skirt" will be incorporated later.
- Fill (Octopus + Ginger + Onions + Tenkasu)
- Immediately place one piece of diced octopus into each cavity.
- Quickly sprinkle green onions, beni shoga, and tenkasu over all the cavities. The batter will still be wet.
- First Turn (90°) — Visual Cue Checklist
- Wait about 2-3 minutes. The edges of the batter on the flat surface should start to set and look slightly crispy, and bubbles will appear on the surface of the batter in the cavities.
- Using your Takoyaki pick (or two skewers), gently poke around the edge of each ball and turn it 90 degrees. You're aiming to rotate it so the uncooked batter from the bottom of the cavity is now on top, and the partially cooked side is facing up. It won't be a perfect ball yet – it will look like a half-sphere with the fillings exposed.
- Top Up Batter and Tuck in the “Skirt”
- Immediately after the first turn, pour a tiny bit more batter over the exposed, uncooked parts of the half-spheres and the "skirt" of batter around the cavities.
- Using your picks, gently tuck the overflowing batter "skirt" from the flat surface into the cavities, helping to form a rounder shape.
- Keep Turning Until Round and Golden
- Continue to rotate the balls every 30-60 seconds, using your picks to nudge and turn them, ensuring all sides get cooked evenly. They will gradually become rounder as you turn them and the batter cooks. Keep an eye on the heat; adjust if they're browning too quickly or too slowly.
- Final Crisp Phase (How to Avoid Pale, Soggy Balls)
- Once the Takoyaki are mostly round, reduce the heat slightly to medium-low. Continue turning them frequently for another 5-7 minutes. This "final crisp phase" is crucial for developing that beautiful golden-brown, crispy exterior. Don't let them sit too long on one side. If some spots are paler, move them to a hotter part of the pan. They should feel light and firm when poked.
- Finish and Serve
- Once golden and crisp, remove the Takoyaki from the pan and place them on a cooling rack (this helps maintain crispness).
- Arrange them on a plate. Drizzle generously with Takoyaki sauce, then zig-zag with Kewpie mayo.
- Finish with a sprinkle of katsuobushi (watch them dance!) and a dusting of aonori.
- Safety note: The inside of Takoyaki is lava-hot, especially the octopus. Let them cool for a minute or two before taking a bite to avoid burning your tongue!
You may also like


Hey there! I’m just someone who seriously loves good food and believes that cooking doesn’t have to be complicated to be amazing. Whether it’s a quick weeknight dinner or a cozy weekend meal, I’m all about sharing easy, tasty recipes that actually work.


