
One-Pan Pork Chop Recipes - Juicy Skillet Chops + Sauce
One-Pan Pork Chop Recipes - Juicy Skillet Chops + Sauce
- Serves: 4 People
- Prepare Time: 10 minutes
- Cooking Time: 15 minutes
- Calories: -
- Difficulty: Easy
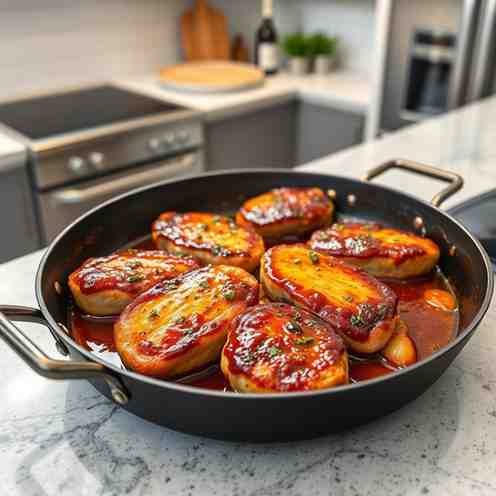
Tired of dry, tough pork chops? Get ready to discover the best pork chops recipe ever for truly juicy pork chops that are bursting with flavor! This `one pan pork chop recipe` isn't just easy, it's a game-changer, promising tender, succulent pork chops with a rich, savory pan sauce, all ready in about 25 minutes. We'll show you how to nail the perfect sear and achieve reliable doneness every time, using simple pantry seasonings and just one skillet. Say goodbye to complicated meals and hello to a classic pork chop recipe that will quickly become a weeknight favorite. Whether you're a beginner or an experienced cook, these tenderized pork chop recipes are designed for success.
Best Chop Thickness: Aim for ~1 inch. (Thinner chops cook faster, adjust accordingly!)
The #1 Rule for Juiciness: Pull pork chops off the heat at 140-145°F and let them rest! Carryover cooking will bring them to a perfect, safe 145°F internal temperature.
Choosing the right pork chops makes all the difference for juiciness.
Bone-in vs. Boneless: Bone-in chops are generally more forgiving because the bone helps insulate the meat, preventing it from drying out as quickly. Boneless chops are great for speed but require a bit more attention to avoid overcooking. For this recipe, either works, but bone-in is a great choice for beginners.
Thickness Recommendation: We recommend pork chops that are about 1 inch thick. This thickness allows for a beautiful sear on the outside and enough time to cook through to a juicy interior without drying out.
What to Avoid: If you're aiming for truly juicy pork chops, try to avoid ultra-thin cut chops (less than 3/4 inch). They cook incredibly fast and are much harder to keep from becoming tough and dry.
You don't need much to make these incredible one-pan pork chops!
Large Heavy Skillet: A 10-12 inch cast iron skillet or a good quality stainless steel pan is ideal. These retain heat well, which is key for a great sear.
Instant-Read Thermometer: Your secret weapon for perfectly cooked pork! This takes all the guesswork out of knowing when your chops are done.
Tongs: Essential for flipping the chops and moving them around the pan.
The right seasoning can transform your pork chops from good to absolutely amazing. This "base blend" is simple, yet incredibly effective for creating a delicious crust and infusing flavor.
Ingredients
Directions
- Prep & Season: Pat the pork chops completely dry with paper towels. In a small bowl, combine the salt, black pepper, garlic powder, onion powder, and smoked paprika. Sprinkle the seasoning blend generously over both sides and the edges of each pork chop.
- Preheat Skillet & Sear First Side: Place your large, heavy skillet over medium-high heat. Add the olive oil and 1/2 tablespoon of butter. Once the butter is melted and sizzling, carefully add the seasoned pork chops to the hot pan. Don't overcrowd the pan; cook in batches if necessary. Sear undisturbed for 3-5 minutes, or until a beautiful golden-brown crust forms. You should see the edges turning opaque about halfway up the chop.
- Flip & Finish Gently: Flip the pork chops to the other side. Reduce the heat to medium. Continue to cook for another 3-5 minutes, or until the internal temperature reaches 140-145°F with an instant-read thermometer. For extra flavor and moisture, you can baste the chops with the pan drippings by tilting the pan and spooning the hot butter/oil over them.
- Pull at the Right Temp & Rest: Once the chops reach 140-145°F, immediately remove them from the skillet and transfer them to a plate or cutting board. Loosely tent them with foil and let them rest for 5-10 minutes. This resting period is crucial for allowing the juices to redistribute, ensuring truly juicy pork chops. The internal temperature will rise to the safe 145°F during this time.
- Quick Pan Sauce: While the chops rest, return the skillet to medium heat. Add the minced garlic and cook for about 30 seconds until fragrant. Pour in the chicken or beef broth, scraping up any browned bits from the bottom of the pan with a wooden spoon – this is where all the flavor is! Bring the sauce to a gentle simmer and cook for 2-3 minutes, or until it slightly reduces.
- Finish & Serve: Remove the pan from the heat. Stir in the remaining 1 tablespoon of butter, Dijon mustard (if using), and lemon juice (if using) until the butter is melted and the sauce is emulsified. Taste and adjust seasoning if needed. Spoon the warm pan sauce generously over the rested pork chops. Garnish with fresh parsley, if desired, and serve immediately.
- How to Know When Pork Chops Are Done (the no-stress guide)The key to juicy pork chops is knowing when to pull them off the heat. Overcooked pork is dry pork!
- Target Internal Temp (Pull vs. Finished):
- Pull Temperature: Remove your pork chops from the heat when an instant-read thermometer inserted into the thickest part (avoiding the bone) reads 140-145°F (60-63°C).
- Finished Temperature: After resting, carryover cooking will bring the temperature up to the USDA-recommended 145°F (63°C), ensuring a safe, tender, and slightly pink center.
- Rest Time and Why It Matters: Letting your pork chops rest for 5-10 minutes after cooking is non-negotiable for juiciness. During cooking, the muscle fibers contract, pushing juices to the center. Resting allows these fibers to relax and the juices to redistribute throughout the meat, preventing them from gushing out when you cut into it.
- Mini Cheat Sheet by Thickness (approximate times):
- 1/2-inch thick: Sear 2-3 minutes per side.
- 1-inch thick (recommended): Sear 3-5 minutes per side.
- 1.5-inch thick: Sear 5-7 minutes per side, then transfer to a 375°F oven for 5-10 minutes if needed to reach target temp.
- One-Pan Dinner Ideas (fast pairings)The beauty of this `one pan pork chop recipe` is how easily you can build a complete meal around it.
- “While they rest…”: Use the 5-10 minutes your pork chops are resting to whip up a super-simple side.
- Quick Veggie Sides: Steam some pre-cut broccoli or green beans in the microwave. Toss a simple salad with your favorite dressing.
- Quick Grains: Heat up some pre-cooked rice or quinoa.
- How to Use the Same Pan (without adding a second workflow):
- Wilt Greens: After you've made the pan sauce and removed it, add a handful of spinach or kale to the warm skillet. It will wilt in seconds using the residual heat and a splash of broth.
- Warm a Quick Veggie Side: Toss in some frozen peas or corn after the sauce is done and let them warm through in the residual heat.
- 2. Recipe Section(s)(This section was integrated directly above, following the outline structure for the main recipe. The "Quick View", "What You'll Need", and "Seasoning" sections from the outline were presented before the main ingredients and instructions as per the "Source of Truth for Structure" and "Source of Truth for Content" directives, ensuring all content is covered while maintaining a logical flow for a recipe article.)
One-Pan Pork Chop Recipes - Juicy Skillet Chops + Sauce

- Serves: 4 People
- Prepare Time: 10 minutes
- Cooking Time: 15 minutes
- Calories: -
- Difficulty: Easy
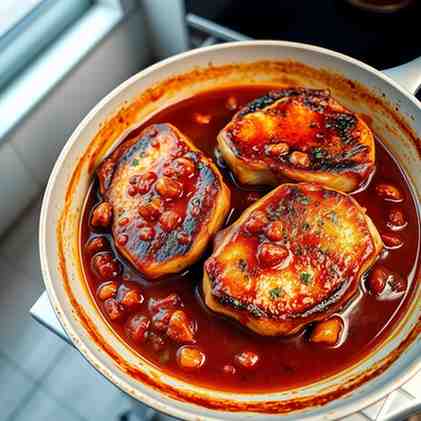
Tired of dry, tough pork chops? Get ready to discover the best pork chops recipe ever for truly juicy pork chops that are bursting with flavor! This `one pan pork chop recipe` isn't just easy, it's a game-changer, promising tender, succulent pork chops with a rich, savory pan sauce, all ready in about 25 minutes. We'll show you how to nail the perfect sear and achieve reliable doneness every time, using simple pantry seasonings and just one skillet. Say goodbye to complicated meals and hello to a classic pork chop recipe that will quickly become a weeknight favorite. Whether you're a beginner or an experienced cook, these tenderized pork chop recipes are designed for success.
Best Chop Thickness: Aim for ~1 inch. (Thinner chops cook faster, adjust accordingly!)
The #1 Rule for Juiciness: Pull pork chops off the heat at 140-145°F and let them rest! Carryover cooking will bring them to a perfect, safe 145°F internal temperature.
Choosing the right pork chops makes all the difference for juiciness.
Bone-in vs. Boneless: Bone-in chops are generally more forgiving because the bone helps insulate the meat, preventing it from drying out as quickly. Boneless chops are great for speed but require a bit more attention to avoid overcooking. For this recipe, either works, but bone-in is a great choice for beginners.
Thickness Recommendation: We recommend pork chops that are about 1 inch thick. This thickness allows for a beautiful sear on the outside and enough time to cook through to a juicy interior without drying out.
What to Avoid: If you're aiming for truly juicy pork chops, try to avoid ultra-thin cut chops (less than 3/4 inch). They cook incredibly fast and are much harder to keep from becoming tough and dry.
You don't need much to make these incredible one-pan pork chops!
Large Heavy Skillet: A 10-12 inch cast iron skillet or a good quality stainless steel pan is ideal. These retain heat well, which is key for a great sear.
Instant-Read Thermometer: Your secret weapon for perfectly cooked pork! This takes all the guesswork out of knowing when your chops are done.
Tongs: Essential for flipping the chops and moving them around the pan.
The right seasoning can transform your pork chops from good to absolutely amazing. This "base blend" is simple, yet incredibly effective for creating a delicious crust and infusing flavor.
Ingredients
Directions
- Prep & Season: Pat the pork chops completely dry with paper towels. In a small bowl, combine the salt, black pepper, garlic powder, onion powder, and smoked paprika. Sprinkle the seasoning blend generously over both sides and the edges of each pork chop.
- Preheat Skillet & Sear First Side: Place your large, heavy skillet over medium-high heat. Add the olive oil and 1/2 tablespoon of butter. Once the butter is melted and sizzling, carefully add the seasoned pork chops to the hot pan. Don't overcrowd the pan; cook in batches if necessary. Sear undisturbed for 3-5 minutes, or until a beautiful golden-brown crust forms. You should see the edges turning opaque about halfway up the chop.
- Flip & Finish Gently: Flip the pork chops to the other side. Reduce the heat to medium. Continue to cook for another 3-5 minutes, or until the internal temperature reaches 140-145°F with an instant-read thermometer. For extra flavor and moisture, you can baste the chops with the pan drippings by tilting the pan and spooning the hot butter/oil over them.
- Pull at the Right Temp & Rest: Once the chops reach 140-145°F, immediately remove them from the skillet and transfer them to a plate or cutting board. Loosely tent them with foil and let them rest for 5-10 minutes. This resting period is crucial for allowing the juices to redistribute, ensuring truly juicy pork chops. The internal temperature will rise to the safe 145°F during this time.
- Quick Pan Sauce: While the chops rest, return the skillet to medium heat. Add the minced garlic and cook for about 30 seconds until fragrant. Pour in the chicken or beef broth, scraping up any browned bits from the bottom of the pan with a wooden spoon – this is where all the flavor is! Bring the sauce to a gentle simmer and cook for 2-3 minutes, or until it slightly reduces.
- Finish & Serve: Remove the pan from the heat. Stir in the remaining 1 tablespoon of butter, Dijon mustard (if using), and lemon juice (if using) until the butter is melted and the sauce is emulsified. Taste and adjust seasoning if needed. Spoon the warm pan sauce generously over the rested pork chops. Garnish with fresh parsley, if desired, and serve immediately.
- How to Know When Pork Chops Are Done (the no-stress guide)The key to juicy pork chops is knowing when to pull them off the heat. Overcooked pork is dry pork!
- Target Internal Temp (Pull vs. Finished):
- Pull Temperature: Remove your pork chops from the heat when an instant-read thermometer inserted into the thickest part (avoiding the bone) reads 140-145°F (60-63°C).
- Finished Temperature: After resting, carryover cooking will bring the temperature up to the USDA-recommended 145°F (63°C), ensuring a safe, tender, and slightly pink center.
- Rest Time and Why It Matters: Letting your pork chops rest for 5-10 minutes after cooking is non-negotiable for juiciness. During cooking, the muscle fibers contract, pushing juices to the center. Resting allows these fibers to relax and the juices to redistribute throughout the meat, preventing them from gushing out when you cut into it.
- Mini Cheat Sheet by Thickness (approximate times):
- 1/2-inch thick: Sear 2-3 minutes per side.
- 1-inch thick (recommended): Sear 3-5 minutes per side.
- 1.5-inch thick: Sear 5-7 minutes per side, then transfer to a 375°F oven for 5-10 minutes if needed to reach target temp.
- One-Pan Dinner Ideas (fast pairings)The beauty of this `one pan pork chop recipe` is how easily you can build a complete meal around it.
- “While they rest…”: Use the 5-10 minutes your pork chops are resting to whip up a super-simple side.
- Quick Veggie Sides: Steam some pre-cut broccoli or green beans in the microwave. Toss a simple salad with your favorite dressing.
- Quick Grains: Heat up some pre-cooked rice or quinoa.
- How to Use the Same Pan (without adding a second workflow):
- Wilt Greens: After you've made the pan sauce and removed it, add a handful of spinach or kale to the warm skillet. It will wilt in seconds using the residual heat and a splash of broth.
- Warm a Quick Veggie Side: Toss in some frozen peas or corn after the sauce is done and let them warm through in the residual heat.
- 2. Recipe Section(s)(This section was integrated directly above, following the outline structure for the main recipe. The "Quick View", "What You'll Need", and "Seasoning" sections from the outline were presented before the main ingredients and instructions as per the "Source of Truth for Structure" and "Source of Truth for Content" directives, ensuring all content is covered while maintaining a logical flow for a recipe article.)
You may also like


Hey there! I’m just someone who seriously loves good food and believes that cooking doesn’t have to be complicated to be amazing. Whether it’s a quick weeknight dinner or a cozy weekend meal, I’m all about sharing easy, tasty recipes that actually work.


