
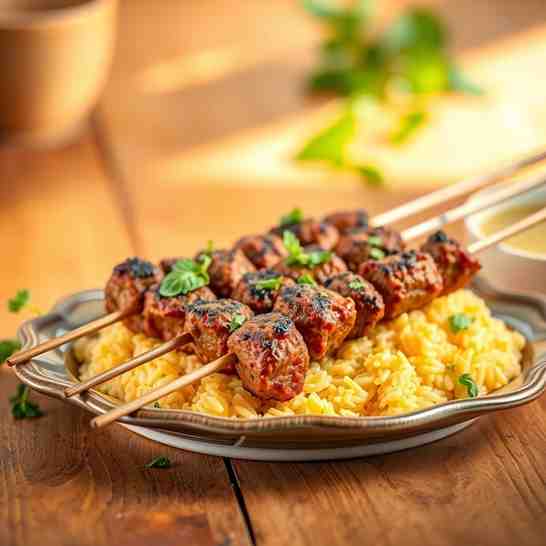
Kabab Koobideh - Persian Food Recipe
Kabab Koobideh - Persian Food Recipe
- Serves: 5 People
- Prepare Time: 30 minutes
- Cooking Time: 20 minutes
- Calories: -
- Difficulty: Medium
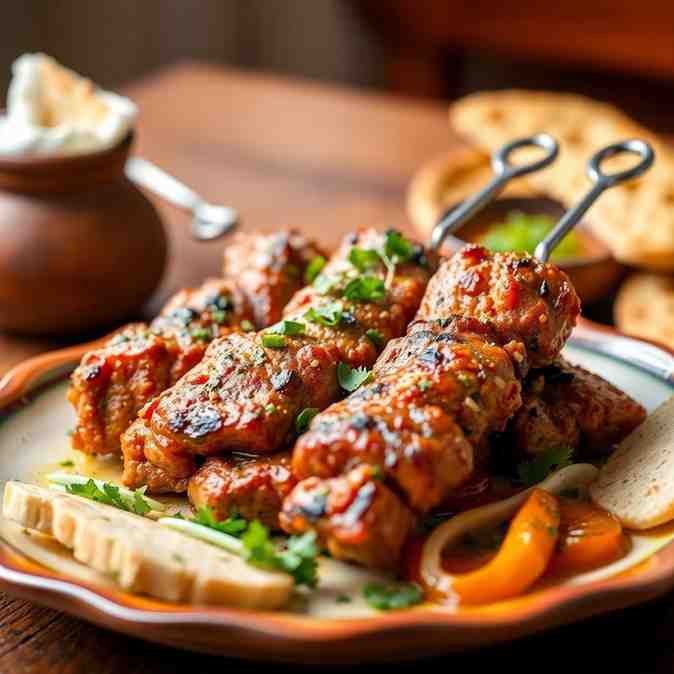
Get ready to dive into one of the most beloved persian food recipes: authentic Kabab Koobideh! This isn't just any grilled meat; it's a flavorful journey of perfectly seasoned ground beef chuck and ground lamb meat, often cooked on a charcoal kabob grill. Many home cooks find Koobideh tricky, especially when the meat decides to fall off the skewer bbq grill – a common mishap often caused by overly wet onions or a grill that’s not hot enough. But don't you worry! This definitive guide is here to solve all those frustrations. We're going to walk you through achieving that incredible, authentic flavor, mastering the charcoal method, and perfecting the shaping technique so your kababs stay juicy and firmly on the skewer. Consider this your quick start to Koobideh success!
Ingredients
Directions
- Prep the Onion (the right way)
- Grate or Process: Peel and roughly chop your yellow onion. Using a food processor meat grinder attachment, or the fine side of a box grater, finely grate or process the onion into a pulp.
- Strain Hard: Place the grated onion into a fine-mesh sieve or a cheesecloth-lined bowl. Press down very hard to squeeze out as much liquid as possible. You should get a significant amount of liquid. The goal is onion pulp that feels almost dry, not soggy. This onion moisture test is critical: if it's too wet, your meat will fall off the skewers.
- Measure Pulp (Optional but Recommended): For consistency, you can lightly pack the squeezed onion pulp and measure it. Aim for about 1/2 to 3/4 cup of tightly packed pulp. This helps keep your ratio consistent for future batches. Discard the onion juice, or save it for another recipe!
- Mix + Knead Until Paste-Like
- Combine Ingredients: In a large mixing bowl, combine the squeezed onion pulp, ground beef chuck and ground lamb meat blend, salt, black pepper, and turmeric. If using, add the optional baking soda/powder and finely minced garlic.
- Knead Thoroughly: This is where the magic happens! With clean hands, begin kneading the mixture vigorously. Don't just mix; you need to knead and smash the meat against the sides of the bowl.
- Achieve Paste-Like Texture: Continue kneading for at least 10-15 minutes, or until the mixture becomes very cohesive, sticky, and paste-like. It should look almost like a dough, with no visible individual strands of meat. This thorough kneading develops the meat proteins, creating the essential binding power.
- Tackiness Test: To check if it's ready, take a small pinch of the meat mixture and press it between your fingers. It should feel very tacky and sticky, not crumbly. If it feels loose, keep kneading!
- Chill/Rest (explain when it’s helpful)
- Short Chill: Once kneaded, cover the bowl tightly with plastic wrap and refrigerate for at least 30 minutes. This short chill helps the meat mixture firm up, making it easier to handle and less likely to fall off the skewers, especially if your kitchen is warm. This is a great time to light your charcoal!
- Shape Koobideh on Skewers (full shaping tutorial)
- Prepare Skewers and Water: Have your wide, flat metal koobideh skewers ready. Also, keep a small bowl of cold water nearby for wetting your hands. This prevents the meat from sticking to your hands.
- Portioning Guidance: Divide your meat mixture into 10 equal portions. Each portion should be roughly the size of a golf ball or slightly larger, enough for one skewer.
- Wrap Meat Around Skewer: Take one portion of meat. Dip your hands in the cold water. Grab a skewer in one hand and firmly press the meat around the top 2/3 of the skewer. Start by creating a thick, even layer, about 1/2 inch thick, along the skewer.
- Thickness and Sealing Ends: Gently but firmly work the meat down the skewer, ensuring an even thickness. Make sure the meat firmly seals around the top and bottom edges of the skewer to prevent it from sliding off.
- Press Ridges/Indentations: Using your thumb and forefinger, create distinct ridges or indentations along the length of the kabab. This traditional technique helps the kabab cook evenly and creates more surface area for that delicious char.
- Place Skewers on a Tray: Carefully place the shaped skewers on a large sheet pan or tray, ensuring the meat doesn't smear or touch. If possible, elevate the skewers slightly by resting them on the edges of the tray or over a wire rack so the meat isn't directly touching the surface.
- Set up the Charcoal Grill for Koobideh
- Charcoal Choice: For authentic flavor, a charcoal kabob grill is best. Use good quality lumpwood charcoal for a cleaner burn and consistent heat. Briquettes can work but might have a slightly different flavor.
- When Coals Are Ready: Use a chimney starter to light your charcoal. The coals are ready when they are mostly grey with a slight red glow, indicating they're hot enough. This usually takes 20-30 minutes.
- Rail Setup and Skewer Position: Arrange your hot coals in an even layer. Use "rails" – these can be metal pipes, two foil-wrapped bricks, or metal bars – placed on either side of the grill grate to elevate the skewers. The idea is for the meat portion of the skewer to hover just above the coals, not resting directly on the grate. This allows for even cooking and prevents sticking.
- Grill (the turning cadence that saves you)
- Place Skewers: Carefully place the skewers onto the rails over the hot coals.
- Turn Within Seconds: This is critical! As soon as you place them, count to 5-10 seconds, then immediately turn all the skewers. Repeat this rapid turning cadence (every 5-10 seconds) for the first 2-3 minutes. This initial rapid turning helps the meat "set" and prevents it from falling off.
- Keep Rotating in Order: After the initial rapid turns, continue to rotate the skewers every 30-60 seconds, ensuring even cooking and charring on all sides.
- Flare-ups: A few flare-ups are normal, especially with the fat dripping. If flames persist and threaten to burn the kababs, briefly move the offending skewer to a cooler spot on the grill or carefully fan the flames down.
- Doneness: Koobideh cooks relatively quickly. Look for a deep brown char on the outside. For internal doneness, aim for an internal temperature of 160°F (71°C) for ground meat. Total grilling time is usually 8-12 minutes, depending on heat.
- Rest Briefly + Serve
- Foil Tent: Once cooked, remove the kababs from the grill. Gently slide the meat off the skewers using a piece of flatbread or a paper towel. Place them on a platter and tent loosely with foil for 2-3 minutes. This short rest allows the juices to redistribute, keeping them super juicy.
- Brush Butter/Saffron Butter (if using): If using, lightly brush the hot kababs with melted butter or saffron butter for an extra layer of richness and aroma.
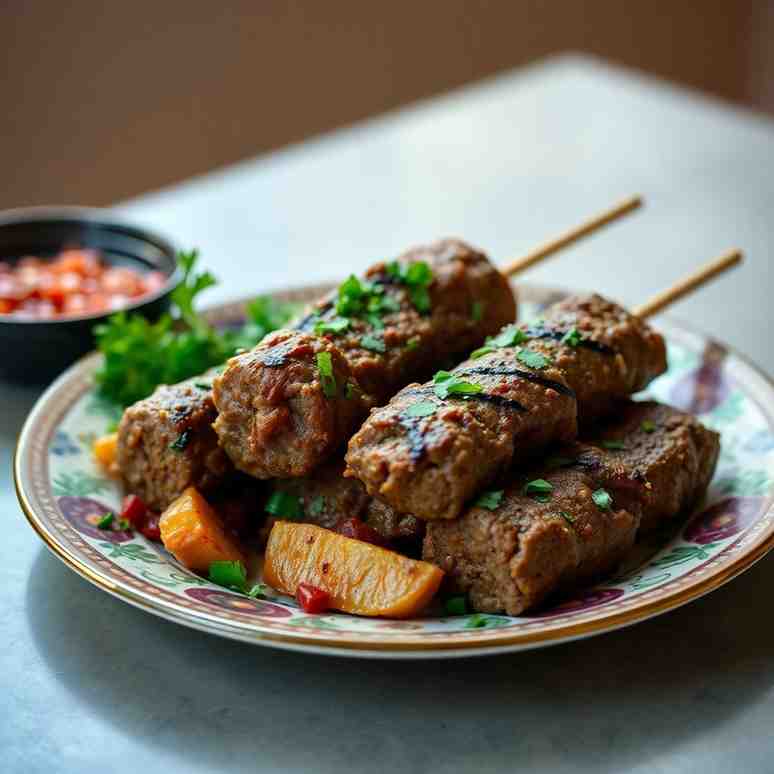
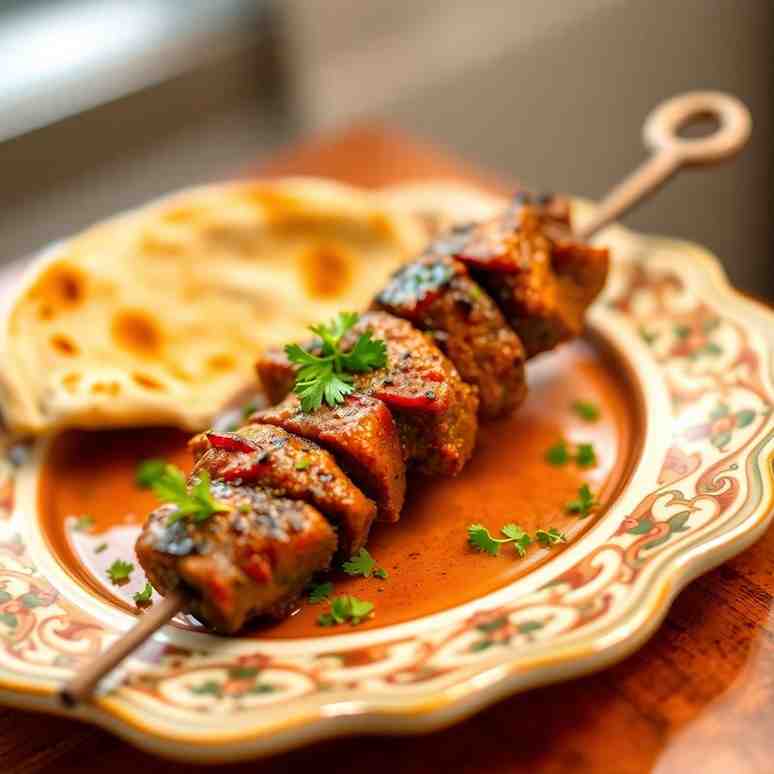
- Serve: Serve immediately with grilled tomatoes (often cooked alongside), raw onion slices, fresh herbs (like basil, mint, tarragon), fluffy Persian rice (chelow), or warm flatbread (naan-e lavash or sangak). A final sprinkle of sumac is a must!
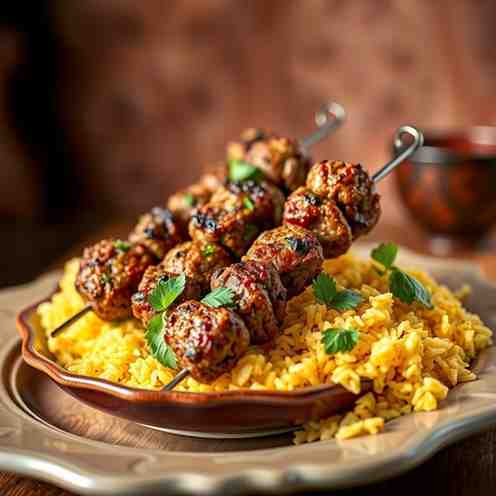
Kabab Koobideh - Persian Food Recipe

- Serves: 5 People
- Prepare Time: 30 minutes
- Cooking Time: 20 minutes
- Calories: -
- Difficulty: Medium
Get ready to dive into one of the most beloved persian food recipes: authentic Kabab Koobideh! This isn't just any grilled meat; it's a flavorful journey of perfectly seasoned ground beef chuck and ground lamb meat, often cooked on a charcoal kabob grill. Many home cooks find Koobideh tricky, especially when the meat decides to fall off the skewer bbq grill – a common mishap often caused by overly wet onions or a grill that’s not hot enough. But don't you worry! This definitive guide is here to solve all those frustrations. We're going to walk you through achieving that incredible, authentic flavor, mastering the charcoal method, and perfecting the shaping technique so your kababs stay juicy and firmly on the skewer. Consider this your quick start to Koobideh success!
Ingredients
Directions
- Prep the Onion (the right way)
- Grate or Process: Peel and roughly chop your yellow onion. Using a food processor meat grinder attachment, or the fine side of a box grater, finely grate or process the onion into a pulp.
- Strain Hard: Place the grated onion into a fine-mesh sieve or a cheesecloth-lined bowl. Press down very hard to squeeze out as much liquid as possible. You should get a significant amount of liquid. The goal is onion pulp that feels almost dry, not soggy. This onion moisture test is critical: if it's too wet, your meat will fall off the skewers.
- Measure Pulp (Optional but Recommended): For consistency, you can lightly pack the squeezed onion pulp and measure it. Aim for about 1/2 to 3/4 cup of tightly packed pulp. This helps keep your ratio consistent for future batches. Discard the onion juice, or save it for another recipe!
- Mix + Knead Until Paste-Like
- Combine Ingredients: In a large mixing bowl, combine the squeezed onion pulp, ground beef chuck and ground lamb meat blend, salt, black pepper, and turmeric. If using, add the optional baking soda/powder and finely minced garlic.
- Knead Thoroughly: This is where the magic happens! With clean hands, begin kneading the mixture vigorously. Don't just mix; you need to knead and smash the meat against the sides of the bowl.
- Achieve Paste-Like Texture: Continue kneading for at least 10-15 minutes, or until the mixture becomes very cohesive, sticky, and paste-like. It should look almost like a dough, with no visible individual strands of meat. This thorough kneading develops the meat proteins, creating the essential binding power.
- Tackiness Test: To check if it's ready, take a small pinch of the meat mixture and press it between your fingers. It should feel very tacky and sticky, not crumbly. If it feels loose, keep kneading!
- Chill/Rest (explain when it’s helpful)
- Short Chill: Once kneaded, cover the bowl tightly with plastic wrap and refrigerate for at least 30 minutes. This short chill helps the meat mixture firm up, making it easier to handle and less likely to fall off the skewers, especially if your kitchen is warm. This is a great time to light your charcoal!
- Shape Koobideh on Skewers (full shaping tutorial)
- Prepare Skewers and Water: Have your wide, flat metal koobideh skewers ready. Also, keep a small bowl of cold water nearby for wetting your hands. This prevents the meat from sticking to your hands.
- Portioning Guidance: Divide your meat mixture into 10 equal portions. Each portion should be roughly the size of a golf ball or slightly larger, enough for one skewer.
- Wrap Meat Around Skewer: Take one portion of meat. Dip your hands in the cold water. Grab a skewer in one hand and firmly press the meat around the top 2/3 of the skewer. Start by creating a thick, even layer, about 1/2 inch thick, along the skewer.
- Thickness and Sealing Ends: Gently but firmly work the meat down the skewer, ensuring an even thickness. Make sure the meat firmly seals around the top and bottom edges of the skewer to prevent it from sliding off.
- Press Ridges/Indentations: Using your thumb and forefinger, create distinct ridges or indentations along the length of the kabab. This traditional technique helps the kabab cook evenly and creates more surface area for that delicious char.
- Place Skewers on a Tray: Carefully place the shaped skewers on a large sheet pan or tray, ensuring the meat doesn't smear or touch. If possible, elevate the skewers slightly by resting them on the edges of the tray or over a wire rack so the meat isn't directly touching the surface.
- Set up the Charcoal Grill for Koobideh
- Charcoal Choice: For authentic flavor, a charcoal kabob grill is best. Use good quality lumpwood charcoal for a cleaner burn and consistent heat. Briquettes can work but might have a slightly different flavor.
- When Coals Are Ready: Use a chimney starter to light your charcoal. The coals are ready when they are mostly grey with a slight red glow, indicating they're hot enough. This usually takes 20-30 minutes.
- Rail Setup and Skewer Position: Arrange your hot coals in an even layer. Use "rails" – these can be metal pipes, two foil-wrapped bricks, or metal bars – placed on either side of the grill grate to elevate the skewers. The idea is for the meat portion of the skewer to hover just above the coals, not resting directly on the grate. This allows for even cooking and prevents sticking.
- Grill (the turning cadence that saves you)
- Place Skewers: Carefully place the skewers onto the rails over the hot coals.
- Turn Within Seconds: This is critical! As soon as you place them, count to 5-10 seconds, then immediately turn all the skewers. Repeat this rapid turning cadence (every 5-10 seconds) for the first 2-3 minutes. This initial rapid turning helps the meat "set" and prevents it from falling off.
- Keep Rotating in Order: After the initial rapid turns, continue to rotate the skewers every 30-60 seconds, ensuring even cooking and charring on all sides.
- Flare-ups: A few flare-ups are normal, especially with the fat dripping. If flames persist and threaten to burn the kababs, briefly move the offending skewer to a cooler spot on the grill or carefully fan the flames down.
- Doneness: Koobideh cooks relatively quickly. Look for a deep brown char on the outside. For internal doneness, aim for an internal temperature of 160°F (71°C) for ground meat. Total grilling time is usually 8-12 minutes, depending on heat.
- Rest Briefly + Serve
- Foil Tent: Once cooked, remove the kababs from the grill. Gently slide the meat off the skewers using a piece of flatbread or a paper towel. Place them on a platter and tent loosely with foil for 2-3 minutes. This short rest allows the juices to redistribute, keeping them super juicy.
- Brush Butter/Saffron Butter (if using): If using, lightly brush the hot kababs with melted butter or saffron butter for an extra layer of richness and aroma.
- Serve: Serve immediately with grilled tomatoes (often cooked alongside), raw onion slices, fresh herbs (like basil, mint, tarragon), fluffy Persian rice (chelow), or warm flatbread (naan-e lavash or sangak). A final sprinkle of sumac is a must!
You may also like

Hey there! I’m just someone who seriously loves good food and believes that cooking doesn’t have to be complicated to be amazing. Whether it’s a quick weeknight dinner or a cozy weekend meal, I’m all about sharing easy, tasty recipes that actually work.


