
Kón - Best Gluten-Free Dairy-Free Micronesian Recipe
Kón - Best Gluten-Free Dairy-Free Micronesian Recipe


- Serves: 4 People
- Prepare Time: 15 minutes
- Cooking Time: 25 minutes
- Calories: -
- Difficulty: Easy
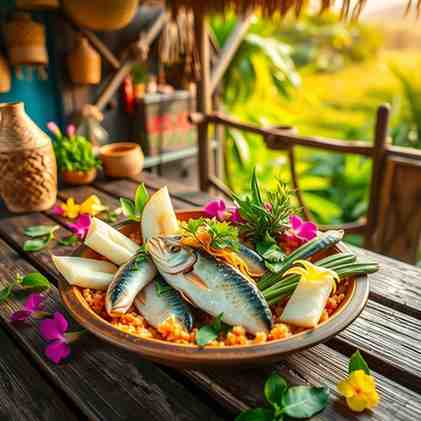
Hey there, food adventurers! Get ready to dive into the heart of Micronesian culinary tradition with Kón – a truly special dish that’s not just delicious but also incredibly wholesome. If you're searching for the best gluten free dairy free recipes that are both easy to make and packed with flavor, you've hit the jackpot. Kón is a warm, comforting dish of mashed taro root, lovingly blended with rich coconut milk. It’s a staple in the Federated States of Micronesia, often served as a fulfilling side dish, and it’s naturally dairy-free, gluten-free, and completely plant-based! Whether you're a seasoned chef or just starting your culinary journey, this easy gluten free dairy free meal is simple to prepare and promises a creamy, subtly sweet, and satisfying texture that will transport your taste buds straight to the Pacific islands.
Ingredients
Directions
- Prep the Taro: Carefully peel the taro root using a sharp knife or vegetable peeler. Cut the peeled taro into evenly sized cubes, about 1 to 1.5 inches. This helps them cook uniformly.
- Cook Until Truly Tender: Place the taro cubes in a pot with a steamer basket, or directly into a pot and cover with water. Bring to a boil, then reduce heat and simmer (or steam) until the taro is fork-tender – meaning a fork slides in easily with no resistance. This usually takes 20-25 minutes.
- Drain & Keep Hot: Once tender, carefully drain the cooked taro. It’s important to mash the taro while it’s still hot; this ensures a smoother, less lumpy consistency.
- Mash/Pound Until Smooth: Transfer the hot taro to a sturdy mixing bowl. Using a potato masher, mash the taro until it's as smooth as you can get it. If you're going for a more traditional approach, a mortar and pestle works wonderfully. You're aiming for a texture that's mostly smooth, with perhaps a few tiny flecks remaining – definitely not chunky.
- Add Coconut Milk Gradually: Pour in about half of the full-fat canned coconut milk. Start mashing and mixing it into the taro. Continue adding the coconut milk gradually, a little at a time, until you reach your desired consistency. You want a thick, creamy paste that’s easily spoonable, but not soupy or runny.
- Season & Rest: Stir in salt to taste. Give the Kón a brief rest for about 5 minutes. This allows the flavors to meld and the texture to settle, often thickening slightly.
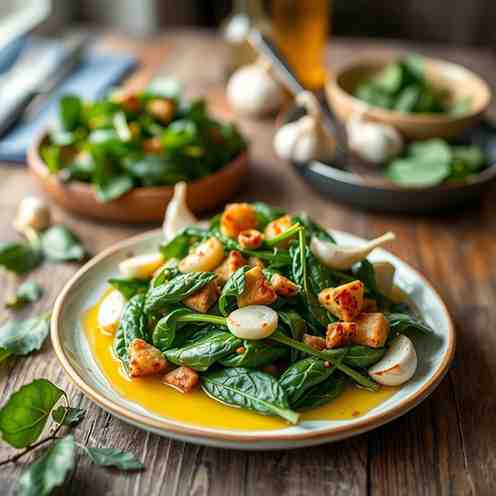
- Serve Warm: Kón is best enjoyed warm. Serve it as a delightful side dish with your favorite grilled fish, chicken, or alongside some sautéed greens for a complete gluten free dairy free meal.
Kón - Best Gluten-Free Dairy-Free Micronesian Recipe
- Serves: 4 People
- Prepare Time: 15 minutes
- Cooking Time: 25 minutes
- Calories: -
- Difficulty: Easy
Hey there, food adventurers! Get ready to dive into the heart of Micronesian culinary tradition with Kón – a truly special dish that’s not just delicious but also incredibly wholesome. If you're searching for the best gluten free dairy free recipes that are both easy to make and packed with flavor, you've hit the jackpot. Kón is a warm, comforting dish of mashed taro root, lovingly blended with rich coconut milk. It’s a staple in the Federated States of Micronesia, often served as a fulfilling side dish, and it’s naturally dairy-free, gluten-free, and completely plant-based! Whether you're a seasoned chef or just starting your culinary journey, this easy gluten free dairy free meal is simple to prepare and promises a creamy, subtly sweet, and satisfying texture that will transport your taste buds straight to the Pacific islands.
Ingredients
Directions
- Prep the Taro: Carefully peel the taro root using a sharp knife or vegetable peeler. Cut the peeled taro into evenly sized cubes, about 1 to 1.5 inches. This helps them cook uniformly.
- Cook Until Truly Tender: Place the taro cubes in a pot with a steamer basket, or directly into a pot and cover with water. Bring to a boil, then reduce heat and simmer (or steam) until the taro is fork-tender – meaning a fork slides in easily with no resistance. This usually takes 20-25 minutes.
- Drain & Keep Hot: Once tender, carefully drain the cooked taro. It’s important to mash the taro while it’s still hot; this ensures a smoother, less lumpy consistency.
- Mash/Pound Until Smooth: Transfer the hot taro to a sturdy mixing bowl. Using a potato masher, mash the taro until it's as smooth as you can get it. If you're going for a more traditional approach, a mortar and pestle works wonderfully. You're aiming for a texture that's mostly smooth, with perhaps a few tiny flecks remaining – definitely not chunky.
- Add Coconut Milk Gradually: Pour in about half of the full-fat canned coconut milk. Start mashing and mixing it into the taro. Continue adding the coconut milk gradually, a little at a time, until you reach your desired consistency. You want a thick, creamy paste that’s easily spoonable, but not soupy or runny.
- Season & Rest: Stir in salt to taste. Give the Kón a brief rest for about 5 minutes. This allows the flavors to meld and the texture to settle, often thickening slightly.
- Serve Warm: Kón is best enjoyed warm. Serve it as a delightful side dish with your favorite grilled fish, chicken, or alongside some sautéed greens for a complete gluten free dairy free meal.
You may also like


Hey there! I’m just someone who seriously loves good food and believes that cooking doesn’t have to be complicated to be amazing. Whether it’s a quick weeknight dinner or a cozy weekend meal, I’m all about sharing easy, tasty recipes that actually work.


