
Holiday Roast Goose - Crispy Skin Delight | Peking Duck
Holiday Roast Goose - Crispy Skin Delight | Peking Duck
- Serves: 6 People
- Prepare Time: 60 minutes
- Cooking Time: 3 hours 30
- Calories: -
- Difficulty: Easy
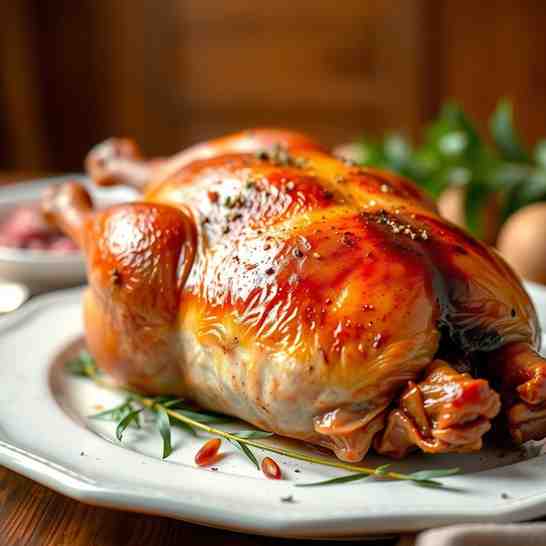
Get ready to transform your holiday table with a show-stopping Christmas Roast Goose that boasts irresistibly crispy skin and incredibly juicy meat! Forget dry turkey or predictable chicken; a perfectly roasted goose offers a richness and depth of flavor that truly embodies the spirit of an indulgent holiday feast. If you've ever wondered how to achieve that golden, crackling skin and tender interior, you’re in the right place.
We're tackling the two biggest challenges of goose roasting head-on: achieving that perfect crispy skin and ensuring every bite of meat is wonderfully juicy. We know goose can be quite fatty, but don't worry – we've got a foolproof plan to manage the fat and even turn it into a delicious asset (think amazing roast potatoes!). With our detailed guide, using the best roast seasoning and a good roasting pan, you'll master this impressive dish, making it a new cherished tradition. This isn't just a recipe; it's your comprehensive guide to perfecting the art of a truly memorable holiday roast.
Ingredients
Directions
- Prep the Goose (The Foundation for Success)
- Remove any visible fat pads from the goose cavity and around the neck opening. Don't discard them; save them for rendering later if you wish!
- Using a small paring knife, a skewer, or a needle, carefully prick the goose skin all over, especially in fatty areas like the breast and thighs. Be careful not to pierce the meat, as this will cause juices to escape. This step is crucial for rendering fat and achieving crispy skin.
- Tighten the Skin (The Scald Secret)
- Place the goose on a rack set inside your large roasting pan.
- Bring a large pot of water to a rolling boil. Carefully pour the boiling water all over the goose skin. You'll see the skin immediately tighten and shrink.
- Immediately pat the goose aggressively dry with paper towels. Ensure there's absolutely no moisture left on the skin.
- Dry Brine Uncovered (The Overnight Win)
- In a small bowl, mix together the Kosher salt, baking powder, black pepper, orange zest, minced garlic, fresh sage, fresh thyme, and brown sugar (if using).
- Rub this mixture generously all over the goose skin and lightly inside the cavity.
- Place the goose back on the rack in the roasting pan and refrigerate it, uncovered, overnight (at least 8-12 hours). This allows the skin to dry out further, which is key for ultimate crispiness.
- Roast in Stages (Render Fat & Finish Evenly)
- Preheat Oven: On the day of roasting, remove the goose from the fridge at least an hour before cooking to bring it closer to room temperature. Preheat your oven to 400°F (200°C).
- Initial High Heat Roast: Place the roasting pan with the goose into the preheated oven. Roast for 30 minutes at 400°F (200°C) to kickstart the fat rendering process.
- Lower Temperature Roast: Reduce the oven temperature to 325°F (160°C). Continue roasting for another 2.5 to 3 hours, or until an instant-read thermometer inserted into the thickest part of the thigh (without touching bone) registers 175°F (80°C).
- Drain Fat: Every 45-60 minutes, carefully remove the roasting pan from the oven and drain the rendered goose fat into a heat-safe jar or bowl. This prevents the goose from frying in its own fat and helps the skin crisp. If you notice smoke, it’s definitely time to drain! This rendered fat is liquid gold for recipes for oven roasted vegetables!
- Rest (Don't Skip This Crucial Step)
- Once the goose reaches the target internal temperature, remove it from the oven. Tent it loosely with foil and let it rest on a carving board for at least 30 minutes (up to 45 minutes). This allows the juices to redistribute, ensuring moist and tender meat.
- Easy Pan Gravy Step-by-Step Instructions
- Separate Fat from Drippings:
- While the goose is resting, carefully pour the pan drippings from the roasting pan into a fat separator. Let it sit for a few minutes to allow the fat to rise to the top.
- Pour off most of the clear, rendered goose fat, reserving about 2-3 tablespoons of the flavorful drippings (the brown liquid at the bottom of the separator). You can save the remaining goose fat for future cooking!
- Build the Gravy Base:
- Place the roasting pan (with any remaining bits) over two burners on your stovetop over medium heat. Add the chopped onion, carrot, and celery to the pan and sauté for 5-7 minutes, scraping up any browned bits from the bottom of the pan, until softened.
- Sprinkle the flour over the vegetables and stir constantly for 1-2 minutes to cook out the raw flour taste, creating a roux.
- Gradually whisk in the low-sodium chicken stock, a little at a time, scraping the bottom of the pan to incorporate all the flavorful bits. Bring to a simmer, whisking constantly to prevent lumps.
- Thicken & Season:
- Stir in the reserved 2-3 tablespoons of separated goose drippings.
- Continue to simmer, whisking occasionally, for 5-10 minutes, until the gravy thickens to your desired consistency. If using a cornstarch slurry, whisk it in now and simmer for 1-2 minutes until thickened.
- Strain the gravy through a fine-mesh sieve into a clean saucepan or gravy boat, pressing on the solids to extract all the liquid. Discard the solids.
- Taste and season with salt and black pepper as needed. Keep warm until ready to serve.
Holiday Roast Goose - Crispy Skin Delight | Peking Duck
- Serves: 6 People
- Prepare Time: 60 minutes
- Cooking Time: 3 hours 30
- Calories: -
- Difficulty: Easy
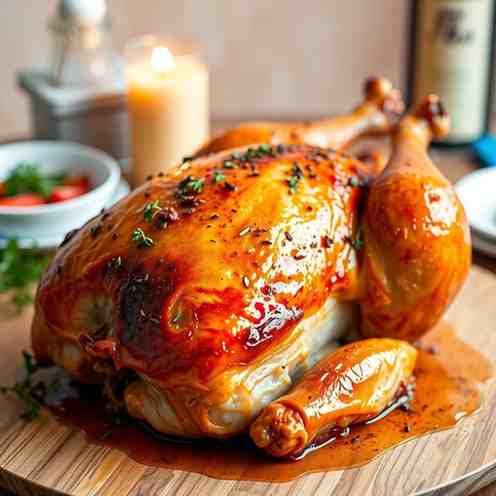
Get ready to transform your holiday table with a show-stopping Christmas Roast Goose that boasts irresistibly crispy skin and incredibly juicy meat! Forget dry turkey or predictable chicken; a perfectly roasted goose offers a richness and depth of flavor that truly embodies the spirit of an indulgent holiday feast. If you've ever wondered how to achieve that golden, crackling skin and tender interior, you’re in the right place.
We're tackling the two biggest challenges of goose roasting head-on: achieving that perfect crispy skin and ensuring every bite of meat is wonderfully juicy. We know goose can be quite fatty, but don't worry – we've got a foolproof plan to manage the fat and even turn it into a delicious asset (think amazing roast potatoes!). With our detailed guide, using the best roast seasoning and a good roasting pan, you'll master this impressive dish, making it a new cherished tradition. This isn't just a recipe; it's your comprehensive guide to perfecting the art of a truly memorable holiday roast.
Ingredients
Directions
- Prep the Goose (The Foundation for Success)
- Remove any visible fat pads from the goose cavity and around the neck opening. Don't discard them; save them for rendering later if you wish!
- Using a small paring knife, a skewer, or a needle, carefully prick the goose skin all over, especially in fatty areas like the breast and thighs. Be careful not to pierce the meat, as this will cause juices to escape. This step is crucial for rendering fat and achieving crispy skin.
- Tighten the Skin (The Scald Secret)
- Place the goose on a rack set inside your large roasting pan.
- Bring a large pot of water to a rolling boil. Carefully pour the boiling water all over the goose skin. You'll see the skin immediately tighten and shrink.
- Immediately pat the goose aggressively dry with paper towels. Ensure there's absolutely no moisture left on the skin.
- Dry Brine Uncovered (The Overnight Win)
- In a small bowl, mix together the Kosher salt, baking powder, black pepper, orange zest, minced garlic, fresh sage, fresh thyme, and brown sugar (if using).
- Rub this mixture generously all over the goose skin and lightly inside the cavity.
- Place the goose back on the rack in the roasting pan and refrigerate it, uncovered, overnight (at least 8-12 hours). This allows the skin to dry out further, which is key for ultimate crispiness.
- Roast in Stages (Render Fat & Finish Evenly)
- Preheat Oven: On the day of roasting, remove the goose from the fridge at least an hour before cooking to bring it closer to room temperature. Preheat your oven to 400°F (200°C).
- Initial High Heat Roast: Place the roasting pan with the goose into the preheated oven. Roast for 30 minutes at 400°F (200°C) to kickstart the fat rendering process.
- Lower Temperature Roast: Reduce the oven temperature to 325°F (160°C). Continue roasting for another 2.5 to 3 hours, or until an instant-read thermometer inserted into the thickest part of the thigh (without touching bone) registers 175°F (80°C).
- Drain Fat: Every 45-60 minutes, carefully remove the roasting pan from the oven and drain the rendered goose fat into a heat-safe jar or bowl. This prevents the goose from frying in its own fat and helps the skin crisp. If you notice smoke, it’s definitely time to drain! This rendered fat is liquid gold for recipes for oven roasted vegetables!
- Rest (Don't Skip This Crucial Step)
- Once the goose reaches the target internal temperature, remove it from the oven. Tent it loosely with foil and let it rest on a carving board for at least 30 minutes (up to 45 minutes). This allows the juices to redistribute, ensuring moist and tender meat.
- Easy Pan Gravy Step-by-Step Instructions
- Separate Fat from Drippings:
- While the goose is resting, carefully pour the pan drippings from the roasting pan into a fat separator. Let it sit for a few minutes to allow the fat to rise to the top.
- Pour off most of the clear, rendered goose fat, reserving about 2-3 tablespoons of the flavorful drippings (the brown liquid at the bottom of the separator). You can save the remaining goose fat for future cooking!
- Build the Gravy Base:
- Place the roasting pan (with any remaining bits) over two burners on your stovetop over medium heat. Add the chopped onion, carrot, and celery to the pan and sauté for 5-7 minutes, scraping up any browned bits from the bottom of the pan, until softened.
- Sprinkle the flour over the vegetables and stir constantly for 1-2 minutes to cook out the raw flour taste, creating a roux.
- Gradually whisk in the low-sodium chicken stock, a little at a time, scraping the bottom of the pan to incorporate all the flavorful bits. Bring to a simmer, whisking constantly to prevent lumps.
- Thicken & Season:
- Stir in the reserved 2-3 tablespoons of separated goose drippings.
- Continue to simmer, whisking occasionally, for 5-10 minutes, until the gravy thickens to your desired consistency. If using a cornstarch slurry, whisk it in now and simmer for 1-2 minutes until thickened.
- Strain the gravy through a fine-mesh sieve into a clean saucepan or gravy boat, pressing on the solids to extract all the liquid. Discard the solids.
- Taste and season with salt and black pepper as needed. Keep warm until ready to serve.
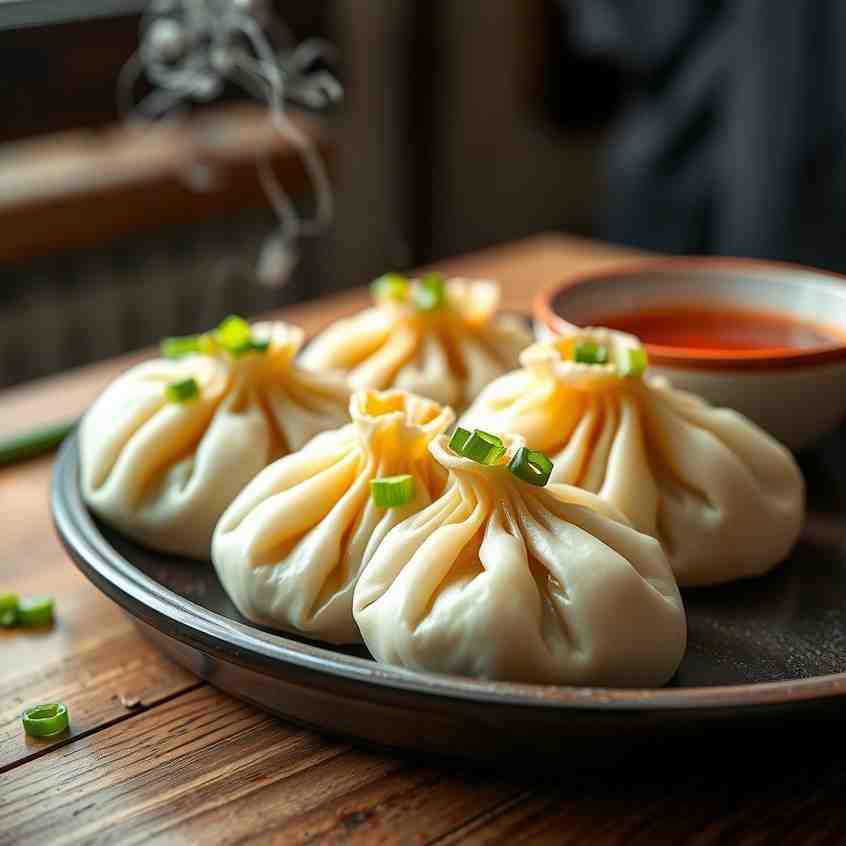
You may also like


Hey there! I’m just someone who seriously loves good food and believes that cooking doesn’t have to be complicated to be amazing. Whether it’s a quick weeknight dinner or a cozy weekend meal, I’m all about sharing easy, tasty recipes that actually work.


