
Portuguese Custard Tarts - Hong Kong Egg Tart Recipe
Portuguese Custard Tarts - Hong Kong Egg Tart Recipe
- Serves: 12 People
- Prepare Time: 60 minutes
- Cooking Time: 25 minutes
- Calories: -
- Difficulty: Medium
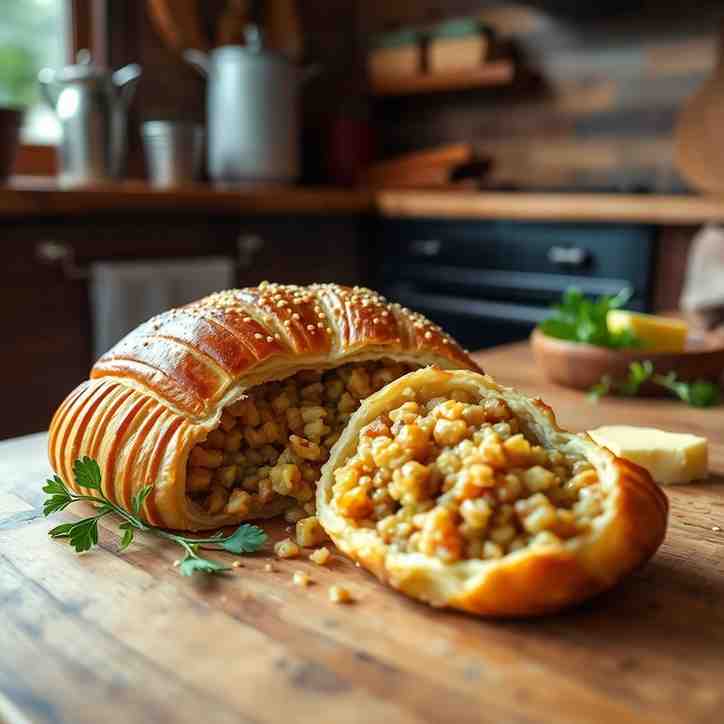
Ever dreamed of biting into a perfectly golden, impossibly flaky Hong Kong egg tart straight from a bustling bakery? You know, the kind with that silky, smooth custard that practically melts in your mouth? Well, get ready, because today we’re making that dream a delicious reality! While our primary keyword is Portuguese custard tarts, we're diving deep into the distinct charm of their Hong Kong cousins. This guide isn't just another recipe; it's your definitive step-by-step recipe for achieving bakery-style flaky puff pastry tart shells and a smooth, glassy custard right in your own kitchen. Whether you're a seasoned baker looking for new chinese home cooking recipes or a beginner eager to try one of the best tart recipes, we’ll walk you through every detail, from making your own mini tart shells to baking with absolute confidence. Prepare to impress everyone with these delightful chinese dishes to cook at home!
Ingredients
Directions
- Make the Sugar Syrup (Custard Base) In a small saucepan, combine the granulated sugar and hot water. Stir constantly over low heat until the sugar is completely dissolved and the syrup is clear. Remove from heat and let it cool completely to room temperature. This step is crucial for preventing scrambled eggs in your custard!
- Success checkpoint: Your syrup is perfectly clear, with no visible sugar crystals, and it’s no longer hot to the touch.
- Mix the Custard (No Foam) In a large bowl, gently whisk the room temperature eggs until just combined, being careful not to incorporate too much air (this prevents bubbles later). Stir in the cooled sugar syrup, evaporated milk, whole milk, and optional vanilla extract. Mix until everything is just combined. Now, the most important part: strain the custard mixture through a fine-mesh sieve at least twice into a measuring cup with a spout. This removes any eggy bits or air bubbles, ensuring a silky-smooth custard. Let the strained custard rest for 15-30 minutes at room temperature; this allows any remaining small bubbles to dissipate.
- Success checkpoint: Your custard looks perfectly smooth, like liquid silk, with minimal to no bubbles on its surface.
- Make the Pastry Dough (Bakery-Style Laminated Method) In a large bowl, combine the flour and salt. In a separate bowl, whisk together the cold water and 1 tbsp granulated sugar until the sugar dissolves. Add the cold butter cubes to the flour mixture and use your fingertips or a pastry blender to cut the butter into the flour until it resembles coarse crumbs with some pea-sized pieces. Gradually add the sugar-water mixture, mixing until a shaggy dough forms. Turn it out onto a lightly floured surface and gently knead just until it comes together into a cohesive ball. Do not overmix. Flatten the dough into a disc, wrap it tightly in plastic wrap, and refrigerate for at least 30 minutes.
- Success checkpoint: Your dough is pliable and smooth, not sticky or greasy, and doesn't crack when gently pressed.
- Laminate (Roll + Fold) On a lightly floured surface, roll the chilled dough into a rectangle about 8x16 inches. Place your flattened, cold butter block (1 cup butter) directly in the center of the dough. Fold one side of the dough over the butter block to cover it completely, then fold the other side over, sealing the butter inside. Pinch the edges to seal. You should now have a "package" of dough encasing the butter. Rotate the dough 90 degrees. Gently roll it out again into a roughly 8x16 inch rectangle. Perform a "single fold": fold one-third of the dough over the middle, then fold the remaining one-third over that, like folding a letter. Wrap tightly in plastic wrap and refrigerate for 30 minutes. Repeat this roll-and-fold process (a total of three times), chilling for 30 minutes between each fold.
- Success checkpoint: After the folds, your dough clearly shows visible layers when you look at the cut edges, and it rolls out smoothly without tearing or butter oozing.
- Roll, Cut, and Line the Pans On a lightly floured surface, roll the chilled laminated dough into a large, thin rectangle, about ⅛ inch thick. Aim for a consistent thickness. Using a 3-inch round cookie cutter or the rim of a glass, cut out circles of dough. Gently press each circle into your egg tart molds (or muffin tin), allowing the dough to sit flush against the bottom and sides without stretching it too much. The rim of the dough should sit slightly above the edge of the mold. Prick the bottom of each shell a few times with a fork.
- Success checkpoint: Each shell sits perfectly flush in its mold with no holes or tears, and the rim of the pastry extends just slightly above the mold's edge, ready to hold the custard.
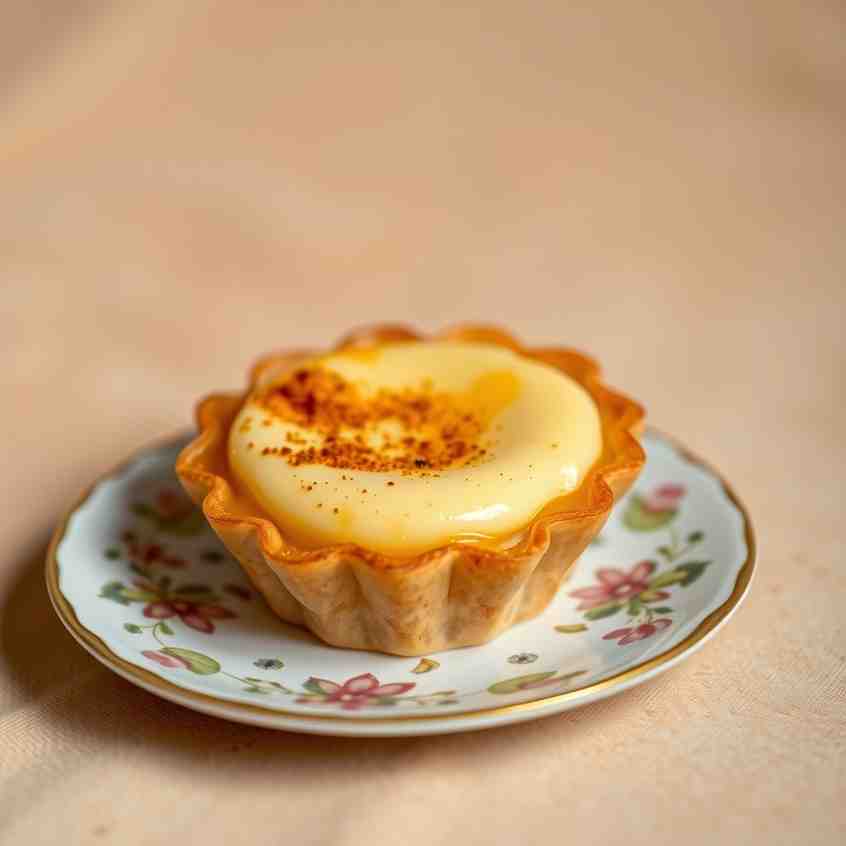
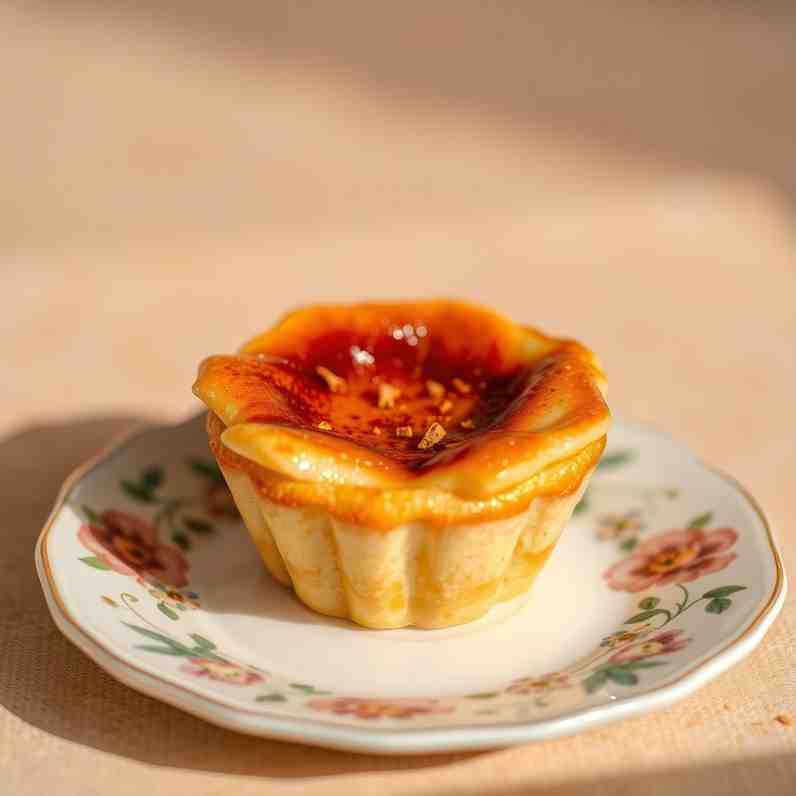
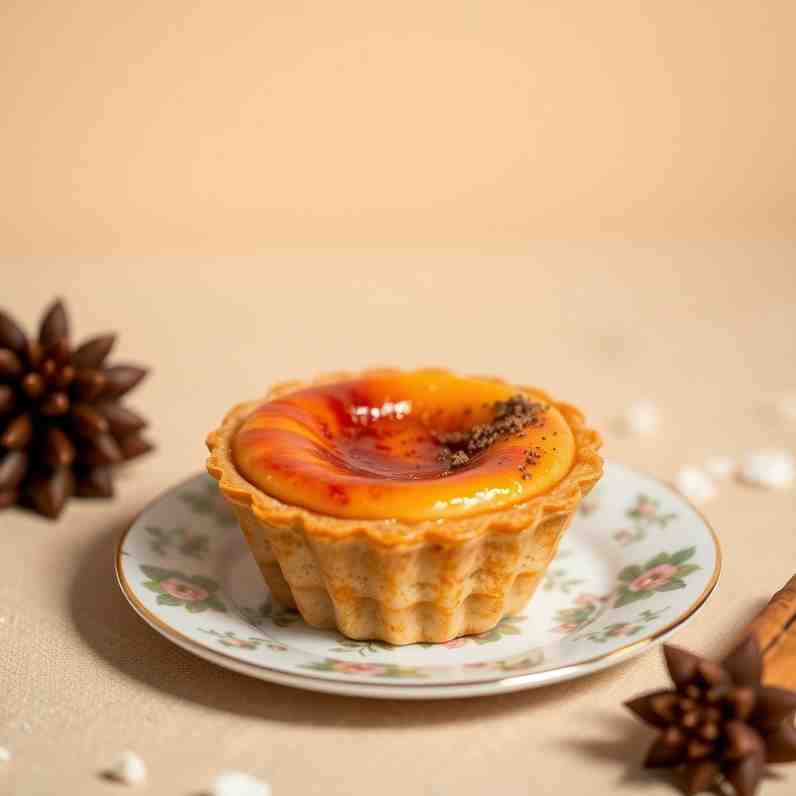
- Fill and Bake Preheat your oven to 400°F (200°C). Place the tart shells on a baking sheet. Carefully pour the strained custard mixture into each prepared tart shell, filling them about 80-90% full. Do not overfill, or they will spill during baking. Place the baking sheet on the middle rack of your preheated oven. Bake for 15-25 minutes, or until the pastry is golden brown and the custard is set but still has a gentle wobble in the very center when lightly shaken. The tops should be smooth, not heavily browned or caramelized.
- Success checkpoint: The center of your custard has a slight, gentle jiggle (like firm jello) but isn't liquid, the top is smooth and pale yellow, and the crust is beautifully golden and baked through.
- Cool and Unmold Once baked, carefully remove the egg tarts from the oven. Let them cool in their molds on a wire rack for at least 15-20 minutes. This allows the custard to fully set and the pastry to firm up. Once slightly cooled, gently unmold the tarts. If using metal molds, a gentle twist or nudge from the bottom usually works. If using a muffin tin, a small offset spatula can help loosen them. Serve warm or at room temperature.
Portuguese Custard Tarts - Hong Kong Egg Tart Recipe
- Serves: 12 People
- Prepare Time: 60 minutes
- Cooking Time: 25 minutes
- Calories: -
- Difficulty: Medium
Ever dreamed of biting into a perfectly golden, impossibly flaky Hong Kong egg tart straight from a bustling bakery? You know, the kind with that silky, smooth custard that practically melts in your mouth? Well, get ready, because today we’re making that dream a delicious reality! While our primary keyword is Portuguese custard tarts, we're diving deep into the distinct charm of their Hong Kong cousins. This guide isn't just another recipe; it's your definitive step-by-step recipe for achieving bakery-style flaky puff pastry tart shells and a smooth, glassy custard right in your own kitchen. Whether you're a seasoned baker looking for new chinese home cooking recipes or a beginner eager to try one of the best tart recipes, we’ll walk you through every detail, from making your own mini tart shells to baking with absolute confidence. Prepare to impress everyone with these delightful chinese dishes to cook at home!
Ingredients
Directions
- Make the Sugar Syrup (Custard Base) In a small saucepan, combine the granulated sugar and hot water. Stir constantly over low heat until the sugar is completely dissolved and the syrup is clear. Remove from heat and let it cool completely to room temperature. This step is crucial for preventing scrambled eggs in your custard!
- Success checkpoint: Your syrup is perfectly clear, with no visible sugar crystals, and it’s no longer hot to the touch.
- Mix the Custard (No Foam) In a large bowl, gently whisk the room temperature eggs until just combined, being careful not to incorporate too much air (this prevents bubbles later). Stir in the cooled sugar syrup, evaporated milk, whole milk, and optional vanilla extract. Mix until everything is just combined. Now, the most important part: strain the custard mixture through a fine-mesh sieve at least twice into a measuring cup with a spout. This removes any eggy bits or air bubbles, ensuring a silky-smooth custard. Let the strained custard rest for 15-30 minutes at room temperature; this allows any remaining small bubbles to dissipate.
- Success checkpoint: Your custard looks perfectly smooth, like liquid silk, with minimal to no bubbles on its surface.
- Make the Pastry Dough (Bakery-Style Laminated Method) In a large bowl, combine the flour and salt. In a separate bowl, whisk together the cold water and 1 tbsp granulated sugar until the sugar dissolves. Add the cold butter cubes to the flour mixture and use your fingertips or a pastry blender to cut the butter into the flour until it resembles coarse crumbs with some pea-sized pieces. Gradually add the sugar-water mixture, mixing until a shaggy dough forms. Turn it out onto a lightly floured surface and gently knead just until it comes together into a cohesive ball. Do not overmix. Flatten the dough into a disc, wrap it tightly in plastic wrap, and refrigerate for at least 30 minutes.
- Success checkpoint: Your dough is pliable and smooth, not sticky or greasy, and doesn't crack when gently pressed.
- Laminate (Roll + Fold) On a lightly floured surface, roll the chilled dough into a rectangle about 8x16 inches. Place your flattened, cold butter block (1 cup butter) directly in the center of the dough. Fold one side of the dough over the butter block to cover it completely, then fold the other side over, sealing the butter inside. Pinch the edges to seal. You should now have a "package" of dough encasing the butter. Rotate the dough 90 degrees. Gently roll it out again into a roughly 8x16 inch rectangle. Perform a "single fold": fold one-third of the dough over the middle, then fold the remaining one-third over that, like folding a letter. Wrap tightly in plastic wrap and refrigerate for 30 minutes. Repeat this roll-and-fold process (a total of three times), chilling for 30 minutes between each fold.
- Success checkpoint: After the folds, your dough clearly shows visible layers when you look at the cut edges, and it rolls out smoothly without tearing or butter oozing.
- Roll, Cut, and Line the Pans On a lightly floured surface, roll the chilled laminated dough into a large, thin rectangle, about ⅛ inch thick. Aim for a consistent thickness. Using a 3-inch round cookie cutter or the rim of a glass, cut out circles of dough. Gently press each circle into your egg tart molds (or muffin tin), allowing the dough to sit flush against the bottom and sides without stretching it too much. The rim of the dough should sit slightly above the edge of the mold. Prick the bottom of each shell a few times with a fork.
- Success checkpoint: Each shell sits perfectly flush in its mold with no holes or tears, and the rim of the pastry extends just slightly above the mold's edge, ready to hold the custard.
- Fill and Bake Preheat your oven to 400°F (200°C). Place the tart shells on a baking sheet. Carefully pour the strained custard mixture into each prepared tart shell, filling them about 80-90% full. Do not overfill, or they will spill during baking. Place the baking sheet on the middle rack of your preheated oven. Bake for 15-25 minutes, or until the pastry is golden brown and the custard is set but still has a gentle wobble in the very center when lightly shaken. The tops should be smooth, not heavily browned or caramelized.
- Success checkpoint: The center of your custard has a slight, gentle jiggle (like firm jello) but isn't liquid, the top is smooth and pale yellow, and the crust is beautifully golden and baked through.
- Cool and Unmold Once baked, carefully remove the egg tarts from the oven. Let them cool in their molds on a wire rack for at least 15-20 minutes. This allows the custard to fully set and the pastry to firm up. Once slightly cooled, gently unmold the tarts. If using metal molds, a gentle twist or nudge from the bottom usually works. If using a muffin tin, a small offset spatula can help loosen them. Serve warm or at room temperature.
You may also like


Hey there! I’m just someone who seriously loves good food and believes that cooking doesn’t have to be complicated to be amazing. Whether it’s a quick weeknight dinner or a cozy weekend meal, I’m all about sharing easy, tasty recipes that actually work.


