
Bake Perfect Portuguese Custard Tarts - Easy Recipe
Bake Perfect Portuguese Custard Tarts - Easy Recipe


- Serves: 12 People
- Prepare Time: 45 minutes
- Cooking Time: 12 minutes
- Calories: -
- Difficulty: Medium
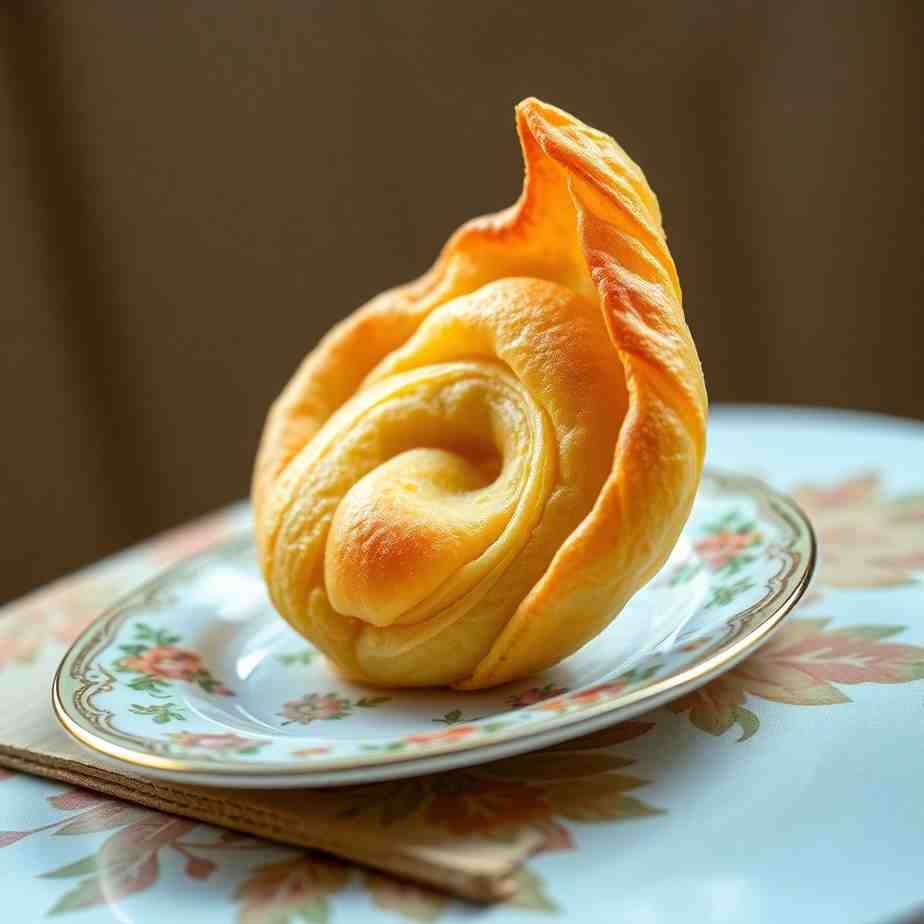
Welcome to the irresistible world of Portuguese custard tarts! Known globally as Pastéis de Nata, these little golden gems are more than just a dessert; they're a bite of history, especially if you've ever wandered the charming streets of Lisbon. Originating centuries ago in the Jerónimos Monastery, these tarts were a delicious way to use up leftover egg yolks from the clarification of wines and starching of habits. What makes a true pastel de nata recipe stand out? It's that perfect harmony of a rich, unbelievably creamy custard filling nestled in a shatteringly flaky, impossibly thin pastry shell, often sporting beautifully blistered, caramelized tops. Get ready to discover how to bring the magic of these famous tarts right into your own kitchen with our ultimate recipe for pasteis de nata. Whether you're a beginner baker or looking to perfect your technique, we'll guide you through every step to achieve that authentic taste and texture you've been dreaming of!
Ingredients
Directions
- Prepare the Custard Base:
- In a medium saucepan, combine the granulated sugar, water, cinnamon stick, and lemon peel. Bring this mixture to a boil over medium-high heat, stirring until the sugar dissolves. Once boiling, stop stirring and let it bubble gently for about 3-5 minutes, until it reaches 220°F (100°C) on a candy thermometer. If you don't have a thermometer, aim for a slightly thickened syrup. Remove from heat and carefully remove the cinnamon stick and lemon peel. Stir in the vanilla extract and set aside to cool slightly.
- In a separate small saucepan, whisk together the milk and flour until completely smooth and no lumps remain. Place over medium heat and cook, stirring constantly, until the mixture thickens to a consistency similar to a thin béchamel sauce, about 3-5 minutes. It should coat the back of a spoon. Remove from heat.
- Once the sugar syrup has cooled for a few minutes (it should still be warm but not scalding hot), slowly pour it into the thickened milk-flour mixture, whisking continuously to combine. This is your custard base. Strain the mixture through a fine-mesh sieve into a clean bowl to ensure it’s silky smooth.
- In a separate small bowl, lightly whisk the egg yolks. Gradually temper the egg yolks by slowly whisking a small amount (about ¼ cup) of the warm custard base into the yolks. This prevents the yolks from scrambling. Once tempered, pour the yolk mixture back into the main custard base, whisking until fully incorporated. Set the custard aside.
- Prepare the Pastry Shells:
- Lightly flour a clean work surface. Unroll your puff pastry sheet. If using a rectangular sheet, you might want to gently fold it in half lengthwise and then gently roll it into a log. If it's already a log, you're good to go!
- Using a sharp knife, cut the pastry log into 12 equal slices, each about ¾-inch thick.
- Grease a 12-cup standard muffin tin or, ideally, use specific pasteis de nata tin molds. Take one pastry slice and place it cut-side down into a muffin cup.
- Now for the fun part: using your thumbs, dipped in a little cold water to prevent sticking, firmly press the dough from the center outwards, spreading it evenly and thinly up the sides of the muffin cup. You want the bottom to be very thin and the sides to be slightly thicker and ruffled at the top edge. This creates that signature flaky, crispy crust. Repeat for all 12 cups.
- Assemble & Bake Your Tarts:
- Preheat your oven to the highest possible temperature, ideally 550°F (290°C), or as hot as your oven can go. This extreme heat is crucial for achieving the characteristic blistered, caramelized tops and crispy pastry.
- Carefully pour the prepared custard into each pastry shell, filling them about ¾ full. Don't overfill, as the custard will puff up during baking.
- Place the muffin tin on the top rack of your preheated oven. Bake for 10-12 minutes. Keep a close eye on them! The tarts are done when the custard is beautifully blistered, deeply golden brown, and slightly puffed, and the pastry is golden and flaky.
- Once baked, carefully remove the tin from the oven. Let the tarts cool in the tin for a few minutes before gently removing them to a wire rack to cool slightly.
Bake Perfect Portuguese Custard Tarts - Easy Recipe

- Serves: 12 People
- Prepare Time: 45 minutes
- Cooking Time: 12 minutes
- Calories: -
- Difficulty: Medium
Welcome to the irresistible world of Portuguese custard tarts! Known globally as Pastéis de Nata, these little golden gems are more than just a dessert; they're a bite of history, especially if you've ever wandered the charming streets of Lisbon. Originating centuries ago in the Jerónimos Monastery, these tarts were a delicious way to use up leftover egg yolks from the clarification of wines and starching of habits. What makes a true pastel de nata recipe stand out? It's that perfect harmony of a rich, unbelievably creamy custard filling nestled in a shatteringly flaky, impossibly thin pastry shell, often sporting beautifully blistered, caramelized tops. Get ready to discover how to bring the magic of these famous tarts right into your own kitchen with our ultimate recipe for pasteis de nata. Whether you're a beginner baker or looking to perfect your technique, we'll guide you through every step to achieve that authentic taste and texture you've been dreaming of!
Ingredients
Directions
- Prepare the Custard Base:
- In a medium saucepan, combine the granulated sugar, water, cinnamon stick, and lemon peel. Bring this mixture to a boil over medium-high heat, stirring until the sugar dissolves. Once boiling, stop stirring and let it bubble gently for about 3-5 minutes, until it reaches 220°F (100°C) on a candy thermometer. If you don't have a thermometer, aim for a slightly thickened syrup. Remove from heat and carefully remove the cinnamon stick and lemon peel. Stir in the vanilla extract and set aside to cool slightly.
- In a separate small saucepan, whisk together the milk and flour until completely smooth and no lumps remain. Place over medium heat and cook, stirring constantly, until the mixture thickens to a consistency similar to a thin béchamel sauce, about 3-5 minutes. It should coat the back of a spoon. Remove from heat.
- Once the sugar syrup has cooled for a few minutes (it should still be warm but not scalding hot), slowly pour it into the thickened milk-flour mixture, whisking continuously to combine. This is your custard base. Strain the mixture through a fine-mesh sieve into a clean bowl to ensure it’s silky smooth.
- In a separate small bowl, lightly whisk the egg yolks. Gradually temper the egg yolks by slowly whisking a small amount (about ¼ cup) of the warm custard base into the yolks. This prevents the yolks from scrambling. Once tempered, pour the yolk mixture back into the main custard base, whisking until fully incorporated. Set the custard aside.
- Prepare the Pastry Shells:
- Lightly flour a clean work surface. Unroll your puff pastry sheet. If using a rectangular sheet, you might want to gently fold it in half lengthwise and then gently roll it into a log. If it's already a log, you're good to go!
- Using a sharp knife, cut the pastry log into 12 equal slices, each about ¾-inch thick.
- Grease a 12-cup standard muffin tin or, ideally, use specific pasteis de nata tin molds. Take one pastry slice and place it cut-side down into a muffin cup.
- Now for the fun part: using your thumbs, dipped in a little cold water to prevent sticking, firmly press the dough from the center outwards, spreading it evenly and thinly up the sides of the muffin cup. You want the bottom to be very thin and the sides to be slightly thicker and ruffled at the top edge. This creates that signature flaky, crispy crust. Repeat for all 12 cups.
- Assemble & Bake Your Tarts:
- Preheat your oven to the highest possible temperature, ideally 550°F (290°C), or as hot as your oven can go. This extreme heat is crucial for achieving the characteristic blistered, caramelized tops and crispy pastry.
- Carefully pour the prepared custard into each pastry shell, filling them about ¾ full. Don't overfill, as the custard will puff up during baking.
- Place the muffin tin on the top rack of your preheated oven. Bake for 10-12 minutes. Keep a close eye on them! The tarts are done when the custard is beautifully blistered, deeply golden brown, and slightly puffed, and the pastry is golden and flaky.
- Once baked, carefully remove the tin from the oven. Let the tarts cool in the tin for a few minutes before gently removing them to a wire rack to cool slightly.
You may also like


Hey there! I’m just someone who seriously loves good food and believes that cooking doesn’t have to be complicated to be amazing. Whether it’s a quick weeknight dinner or a cozy weekend meal, I’m all about sharing easy, tasty recipes that actually work.


