
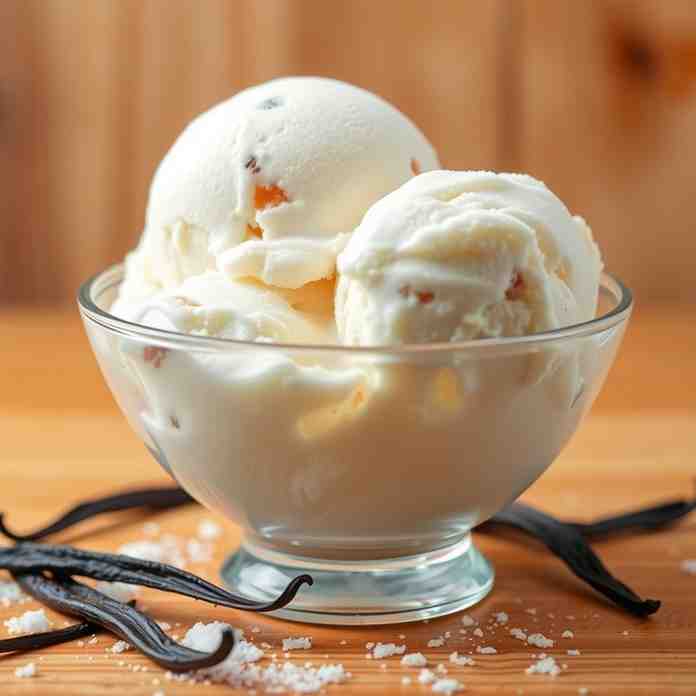
Creamy Vanilla Bean Ice Cream Recipe - Make it at Home
Creamy Vanilla Bean Ice Cream Recipe - Make it at Home
- Serves: 8 People
- Prepare Time: 25 minutes
- Cooking Time: 15 minutes
- Calories: -
- Difficulty: Medium
Get ready to churn up the creamiest, most decadent homemade vanilla ice cream recipe you've ever tasted! Forget those icy, bland store-bought versions – we're talking about a rich, scoopable, "ice cream shop" quality treat right from your own kitchen. This isn't just any vanilla ice cream; we’re diving into vanilla bean ice cream with a special nod to Jersey-style richness, focusing on a silky ice cream smooth texture that melts perfectly on your tongue.
Whether you're a beginner eager to master the art of frozen desserts or an experienced baker looking for that definitive recipe to make vanilla ice cream, you've come to the right place. We'll guide you through a single, foolproof method designed for repeatable results, even incorporating a clever food processor ice cream trick for ultimate smoothness. Prepare to impress everyone with this truly unforgettable frozen delight!
Ingredients
Directions
- Freeze the Bowl (Make-Ahead) This is crucial! Place the freezer bowl of your ice cream maker in the coldest part of your freezer for at least 24 hours, or even longer. A simple test: if you shake it and don't hear liquid sloshing around, it's cold enough. The colder the bowl, the faster and smoother your ice cream will churn.
- Set Up the Vanilla Bean Using a small, sharp knife, carefully split the vanilla bean lengthwise down the middle. Don't cut all the way through; you want two halves that are still connected at one end. Use the back of your knife to scrape out the tiny, fragrant seeds. Add both the scraped seeds and the empty vanilla bean pod to your medium saucepan with the heavy cream, whole milk, granulated sugar, and salt. This ensures maximum vanilla flavor infusion.
- Make the Custard Base (Safe + Smooth)
- In a separate medium bowl, whisk the egg yolks until they are pale yellow and slightly thickened (this will take about 1-2 minutes).
- Place the saucepan with the cream, milk, sugar, salt, vanilla seeds, and pod over medium heat. Stir occasionally until the mixture is steaming and small bubbles form around the edges, but do not let it boil. This typically takes about 5-7 minutes.
- Now, to temper the yolks: slowly, in a thin stream, pour about ½ cup of the warm dairy mixture into the whisked egg yolks while continuously whisking the yolks. This gently raises the temperature of the yolks without scrambling them.
- Pour the tempered yolk mixture back into the saucepan with the remaining warm dairy. Continue to cook over medium-low heat, stirring constantly with a wooden spoon or spatula, until the custard thickens enough to coat the back of the spoon (when you run your finger across the spoon, it should leave a clear line). Use an instant-read thermometer to ensure the custard reaches 170-175°F (77-79°C). Do not boil.
- Strain + Chill (This is Where Smooth Texture Happens)
- Immediately pour the hot custard through a fine-mesh strainer into a clean bowl. This removes any tiny bits of cooked egg or vanilla pod, ensuring a perfectly smooth base.
- To chill quickly, you can set the bowl over an ice bath (a larger bowl filled with ice and a little water), stirring occasionally until it reaches room temperature.
- Cover the bowl with plastic wrap, pressing it directly onto the surface of the custard to prevent a skin from forming. Refrigerate for at least 4 hours, or preferably overnight (8-12 hours). This "aging" process allows the flavors to meld and the fat to fully chill, contributing significantly to a creamier final product.
- Food Processor / Blender Smoothness Step (Built into the Main Method) Just before churning, retrieve your fully chilled ice cream base from the fridge. Pour it into a food processor or high-speed blender. Process for 10-15 seconds until the mixture is completely smooth and appears slightly aerated. This quick blend helps to emulsify the fat and water molecules, preventing ice crystals and creating an incredibly silky texture. If the base warms up significantly during this step, pop it back into the fridge for another 10-15 minutes to re-chill before churning.
- Churn Pour the super-chilled, blended ice cream base into your frozen ice cream maker bowl. Churn according to your manufacturer's instructions, typically for 20-30 minutes, until the ice cream has the consistency of soft-serve. It should be thick and creamy, but still soft.
- Harden + Store Immediately transfer the soft ice cream from the churner into a pre-chilled airtight container (a loaf pan or shallow freezer-safe container works well). For best results, press a piece of parchment paper or plastic wrap directly onto the surface of the ice cream before sealing the container. This prevents freezer burn. Freeze for at least 4-6 hours, or until it reaches your desired scoopable firmness.
Creamy Vanilla Bean Ice Cream Recipe - Make it at Home

- Serves: 8 People
- Prepare Time: 25 minutes
- Cooking Time: 15 minutes
- Calories: -
- Difficulty: Medium
Get ready to churn up the creamiest, most decadent homemade vanilla ice cream recipe you've ever tasted! Forget those icy, bland store-bought versions – we're talking about a rich, scoopable, "ice cream shop" quality treat right from your own kitchen. This isn't just any vanilla ice cream; we’re diving into vanilla bean ice cream with a special nod to Jersey-style richness, focusing on a silky ice cream smooth texture that melts perfectly on your tongue.
Whether you're a beginner eager to master the art of frozen desserts or an experienced baker looking for that definitive recipe to make vanilla ice cream, you've come to the right place. We'll guide you through a single, foolproof method designed for repeatable results, even incorporating a clever food processor ice cream trick for ultimate smoothness. Prepare to impress everyone with this truly unforgettable frozen delight!
Ingredients
Directions
- Freeze the Bowl (Make-Ahead) This is crucial! Place the freezer bowl of your ice cream maker in the coldest part of your freezer for at least 24 hours, or even longer. A simple test: if you shake it and don't hear liquid sloshing around, it's cold enough. The colder the bowl, the faster and smoother your ice cream will churn.
- Set Up the Vanilla Bean Using a small, sharp knife, carefully split the vanilla bean lengthwise down the middle. Don't cut all the way through; you want two halves that are still connected at one end. Use the back of your knife to scrape out the tiny, fragrant seeds. Add both the scraped seeds and the empty vanilla bean pod to your medium saucepan with the heavy cream, whole milk, granulated sugar, and salt. This ensures maximum vanilla flavor infusion.
- Make the Custard Base (Safe + Smooth)
- In a separate medium bowl, whisk the egg yolks until they are pale yellow and slightly thickened (this will take about 1-2 minutes).
- Place the saucepan with the cream, milk, sugar, salt, vanilla seeds, and pod over medium heat. Stir occasionally until the mixture is steaming and small bubbles form around the edges, but do not let it boil. This typically takes about 5-7 minutes.
- Now, to temper the yolks: slowly, in a thin stream, pour about ½ cup of the warm dairy mixture into the whisked egg yolks while continuously whisking the yolks. This gently raises the temperature of the yolks without scrambling them.
- Pour the tempered yolk mixture back into the saucepan with the remaining warm dairy. Continue to cook over medium-low heat, stirring constantly with a wooden spoon or spatula, until the custard thickens enough to coat the back of the spoon (when you run your finger across the spoon, it should leave a clear line). Use an instant-read thermometer to ensure the custard reaches 170-175°F (77-79°C). Do not boil.
- Strain + Chill (This is Where Smooth Texture Happens)
- Immediately pour the hot custard through a fine-mesh strainer into a clean bowl. This removes any tiny bits of cooked egg or vanilla pod, ensuring a perfectly smooth base.
- To chill quickly, you can set the bowl over an ice bath (a larger bowl filled with ice and a little water), stirring occasionally until it reaches room temperature.
- Cover the bowl with plastic wrap, pressing it directly onto the surface of the custard to prevent a skin from forming. Refrigerate for at least 4 hours, or preferably overnight (8-12 hours). This "aging" process allows the flavors to meld and the fat to fully chill, contributing significantly to a creamier final product.
- Food Processor / Blender Smoothness Step (Built into the Main Method) Just before churning, retrieve your fully chilled ice cream base from the fridge. Pour it into a food processor or high-speed blender. Process for 10-15 seconds until the mixture is completely smooth and appears slightly aerated. This quick blend helps to emulsify the fat and water molecules, preventing ice crystals and creating an incredibly silky texture. If the base warms up significantly during this step, pop it back into the fridge for another 10-15 minutes to re-chill before churning.
- Churn Pour the super-chilled, blended ice cream base into your frozen ice cream maker bowl. Churn according to your manufacturer's instructions, typically for 20-30 minutes, until the ice cream has the consistency of soft-serve. It should be thick and creamy, but still soft.
- Harden + Store Immediately transfer the soft ice cream from the churner into a pre-chilled airtight container (a loaf pan or shallow freezer-safe container works well). For best results, press a piece of parchment paper or plastic wrap directly onto the surface of the ice cream before sealing the container. This prevents freezer burn. Freeze for at least 4-6 hours, or until it reaches your desired scoopable firmness.
You may also like

Hey there! I’m just someone who seriously loves good food and believes that cooking doesn’t have to be complicated to be amazing. Whether it’s a quick weeknight dinner or a cozy weekend meal, I’m all about sharing easy, tasty recipes that actually work.


