
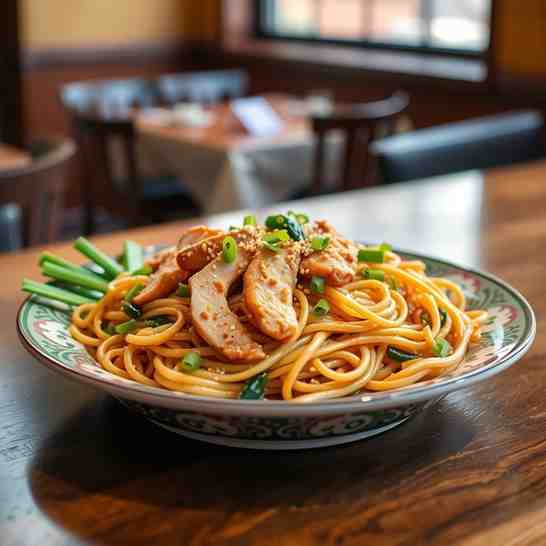
Restaurant-Style Chicken Chow Mein - Pan-Fried Noodles
Restaurant-Style Chicken Chow Mein - Pan-Fried Noodles
- Serves: 4 People
- Prepare Time: 15 minutes
- Cooking Time: 20 minutes
- Calories: -
- Difficulty: Easy
Forget soggy takeout! If you've been searching for that perfect plate of Restaurant-Style Chicken Chow Mein (Pan-Fried Noodles), you've landed in the right spot. This isn't just another noodle dish; it's a culinary journey to recreate those irresistible, crispy-edged, chewy noodles you crave from your favorite American-Chinese restaurant. While some might confuse it with chinese lo mein noodles, we're diving deep into the art of true chow mein: where the noodles are beautifully pan fried noodles to perfection before being tossed in a savory, balanced sauce with tender chicken and crisp veggies. Ready in about 30-35 minutes, this recipe uses everyday ingredients but teaches you the authentic techniques to achieve that sought-after texture and flavor. Get ready to impress your taste buds and say goodbye to delivery menus!
Crispy-Edged, Chewy Noodles: Experience that satisfying texture that tastes just like your favorite takeout, with perfectly pan-fried noodles.
Quick & Easy: Ready in about 30–35 minutes, all cooked up in one pan for minimal fuss.
Authentic-Leaning Technique: Uses easy-to-find ingredients, but respects the real chow mein method for superior results.
Flexible & Customizable: Easily swap in different veggies and proteins without needing a whole new recipe.
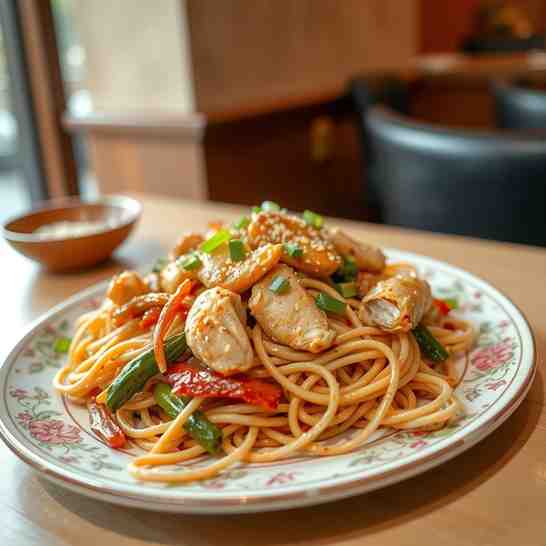
This is an authentic-leaning, American-Chinese restaurant style chow mein with pan-fried noodles and a balanced, customizable sauce.
The term “chow mein” literally translates to “fried noodles,” and that’s exactly what sets it apart! At its heart, chow mein features egg noodles that are cooked, then stir-fried at high heat to achieve a light crispness and chewy texture. These noodles are then tossed with fresh veggies, your chosen protein, and a glossy sauce.
Chow Mein vs. Lo Mein: While often used interchangeably, there's a key difference:
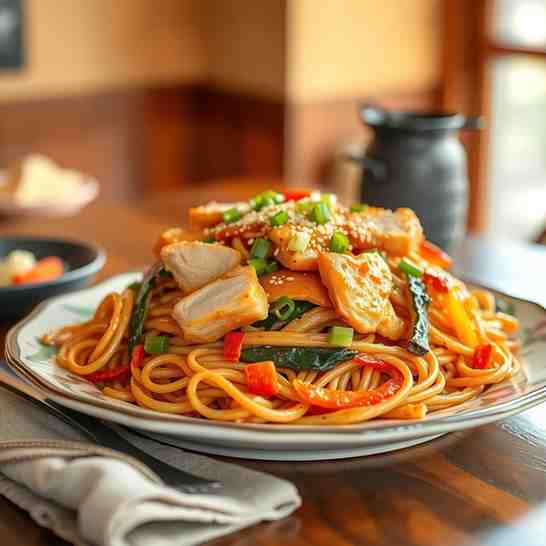
Chow Mein: The noodles are pan-fried in oil, often in batches, to develop a lightly crisp, golden exterior before being combined with the sauce and other ingredients. This gives them a distinct chewy-crispy texture.
Lo Mein: The noodles are typically softer, boiled until tender, and then mostly tossed directly with the sauce and other ingredients at the very end. Lo mein tends to be more "saucy" and lacks the crisp texture of chow mein.
One small note: If you prefer a lo-mein-style texture, you can use slightly thicker noodles and skip the crisping step – but this recipe is specifically written for an incredible chow mein experience!
Ingredients
Directions
- Prep Everything Before You Turn on the Heat
- Slice Chicken: Cut chicken breast (or thigh) into thin, bite-sized strips, slicing across the grain for tenderness.
- Prepare Veggies: Shred the cabbage, julienne the carrots, and slice the green onions, keeping the white and green parts separate. If using bean sprouts, have them ready.
- Mix Sauce: In a small bowl, combine the low-sodium soy sauce, oyster sauce, chicken broth, light sesame oil, sugar, and cornstarch. Whisk until the cornstarch is completely dissolved and the sauce is smooth.
- Mise-en-place: Arrange all your prepped ingredients near your stovetop. Once the wok is hot, everything moves fast!
- Cook and Dry the Noodles
- Boil Noodles: Bring a large pot of water to a rolling boil. Add the chow mein noodles and cook until just shy of al dente – typically 1–2 minutes less than the package instructions. They will finish cooking in the pan.
- Drain & Dry: Drain the noodles very well in a colander. Rinse briefly only if they are excessively starchy or if you're using spaghetti as a substitute.
- Prevent Sticking: Toss the drained noodles with a tiny splash (about 1 teaspoon) of neutral oil to prevent them from sticking together.
- Steam-Dry: Let the noodles sit in the colander for a few minutes, or spread them out in a single layer on a baking sheet or tray. This crucial step allows them to steam-dry, ensuring they will crisp up beautifully instead of steaming in the hot pan later.
- Stir-Fry the Chicken
- Heat Wok: Place a wok or large 12-inch skillet over high heat. Let it heat for 1-2 minutes until it's very hot and a drop of water sizzles instantly.
- Add Oil: Add 1 tablespoon of neutral high-heat oil to the hot pan, swirling to coat.
- Cook Chicken: Add the chicken strips to the hot oil. Season lightly with a pinch of salt and pepper. Stir-fry for 3-5 minutes, tossing frequently, until the chicken is golden brown in spots and just cooked through. It should be opaque with a slight sear.
- Remove Chicken: Transfer the cooked chicken to a clean plate and set aside. Keep the pan on medium-high heat.
- Stir-Fry the Vegetables
- Add Oil: If needed, add another teaspoon of oil to the hot pan.
- Cook Cabbage & Carrots: Add the shredded cabbage and julienned carrots. Stir-fry for 2-3 minutes until they are slightly wilted but still retain a crisp-tender bite.
- Add Aromatics: Push the vegetables to one side of the pan. Add the minced garlic and ginger to the clear space and stir-fry for 30-60 seconds until fragrant. Avoid burning.
- Add Green Onion Whites: Toss in the white parts of the green onions and stir-fry for another 30 seconds.
- Remove Veggies: Transfer the stir-fried vegetables to the plate with the chicken. The pan should remain hot and lightly oiled – if anything starts to scorch, lower the heat slightly.
- Pan-Fry the Noodles
- Prepare Pan: Add another thin layer of neutral oil (about 1-2 tablespoons) to the now-empty, hot pan. Ensure the bottom is lightly coated.
- Spread Noodles: Add the dried noodles to the pan, spreading them into an even layer.
- Crisp Noodles: Let the noodles sit undisturbed for 1–2 minutes to develop a light crisp on the bottom. You should hear a gentle sizzle, not boiling.
- Toss & Repeat: After 1-2 minutes, use tongs or chopsticks to gently toss and flip the noodles. Spread them out again and let them sit for another 1-2 minutes. Repeat this process once or twice until some strands are lightly golden at the edges and slightly crisp, while still remaining flexible and chewy in the center.
- Sauce & Finish
- Stir Sauce: Give the prepared sauce a quick stir again (cornstarch tends to settle at the bottom).
- Add Sauce: Pour the sauce mixture around the edges of the pan, allowing it to hit the hot metal first, then quickly toss with the pan-fried noodles until they are evenly coated and glossy. The sauce will thicken almost immediately.
- Combine Ingredients: Return the cooked chicken and stir-fried vegetables to the pan. Toss everything together for 1–2 minutes, ensuring all ingredients are heated through and the sauce lightly clings to everything.
- Final Touches: Toss in the bean sprouts (if using) and the green parts of the green onions right at the very end.
- Taste & Adjust: Taste the chow mein. If it needs more salt, add a splash of soy sauce. If it needs a touch more balance or sweetness, a pinch of sugar or a dash of rice vinegar can do wonders.
- Serve immediately and enjoy your homemade restaurant-style chow mein!
Restaurant-Style Chicken Chow Mein - Pan-Fried Noodles
- Serves: 4 People
- Prepare Time: 15 minutes
- Cooking Time: 20 minutes
- Calories: -
- Difficulty: Easy
Forget soggy takeout! If you've been searching for that perfect plate of Restaurant-Style Chicken Chow Mein (Pan-Fried Noodles), you've landed in the right spot. This isn't just another noodle dish; it's a culinary journey to recreate those irresistible, crispy-edged, chewy noodles you crave from your favorite American-Chinese restaurant. While some might confuse it with chinese lo mein noodles, we're diving deep into the art of true chow mein: where the noodles are beautifully pan fried noodles to perfection before being tossed in a savory, balanced sauce with tender chicken and crisp veggies. Ready in about 30-35 minutes, this recipe uses everyday ingredients but teaches you the authentic techniques to achieve that sought-after texture and flavor. Get ready to impress your taste buds and say goodbye to delivery menus!
Crispy-Edged, Chewy Noodles: Experience that satisfying texture that tastes just like your favorite takeout, with perfectly pan-fried noodles.
Quick & Easy: Ready in about 30–35 minutes, all cooked up in one pan for minimal fuss.
Authentic-Leaning Technique: Uses easy-to-find ingredients, but respects the real chow mein method for superior results.
Flexible & Customizable: Easily swap in different veggies and proteins without needing a whole new recipe.
This is an authentic-leaning, American-Chinese restaurant style chow mein with pan-fried noodles and a balanced, customizable sauce.
The term “chow mein” literally translates to “fried noodles,” and that’s exactly what sets it apart! At its heart, chow mein features egg noodles that are cooked, then stir-fried at high heat to achieve a light crispness and chewy texture. These noodles are then tossed with fresh veggies, your chosen protein, and a glossy sauce.
Chow Mein vs. Lo Mein: While often used interchangeably, there's a key difference:
Chow Mein: The noodles are pan-fried in oil, often in batches, to develop a lightly crisp, golden exterior before being combined with the sauce and other ingredients. This gives them a distinct chewy-crispy texture.
Lo Mein: The noodles are typically softer, boiled until tender, and then mostly tossed directly with the sauce and other ingredients at the very end. Lo mein tends to be more "saucy" and lacks the crisp texture of chow mein.
One small note: If you prefer a lo-mein-style texture, you can use slightly thicker noodles and skip the crisping step – but this recipe is specifically written for an incredible chow mein experience!
Ingredients
Directions
- Prep Everything Before You Turn on the Heat
- Slice Chicken: Cut chicken breast (or thigh) into thin, bite-sized strips, slicing across the grain for tenderness.
- Prepare Veggies: Shred the cabbage, julienne the carrots, and slice the green onions, keeping the white and green parts separate. If using bean sprouts, have them ready.
- Mix Sauce: In a small bowl, combine the low-sodium soy sauce, oyster sauce, chicken broth, light sesame oil, sugar, and cornstarch. Whisk until the cornstarch is completely dissolved and the sauce is smooth.
- Mise-en-place: Arrange all your prepped ingredients near your stovetop. Once the wok is hot, everything moves fast!
- Cook and Dry the Noodles
- Boil Noodles: Bring a large pot of water to a rolling boil. Add the chow mein noodles and cook until just shy of al dente – typically 1–2 minutes less than the package instructions. They will finish cooking in the pan.
- Drain & Dry: Drain the noodles very well in a colander. Rinse briefly only if they are excessively starchy or if you're using spaghetti as a substitute.
- Prevent Sticking: Toss the drained noodles with a tiny splash (about 1 teaspoon) of neutral oil to prevent them from sticking together.
- Steam-Dry: Let the noodles sit in the colander for a few minutes, or spread them out in a single layer on a baking sheet or tray. This crucial step allows them to steam-dry, ensuring they will crisp up beautifully instead of steaming in the hot pan later.
- Stir-Fry the Chicken
- Heat Wok: Place a wok or large 12-inch skillet over high heat. Let it heat for 1-2 minutes until it's very hot and a drop of water sizzles instantly.
- Add Oil: Add 1 tablespoon of neutral high-heat oil to the hot pan, swirling to coat.
- Cook Chicken: Add the chicken strips to the hot oil. Season lightly with a pinch of salt and pepper. Stir-fry for 3-5 minutes, tossing frequently, until the chicken is golden brown in spots and just cooked through. It should be opaque with a slight sear.
- Remove Chicken: Transfer the cooked chicken to a clean plate and set aside. Keep the pan on medium-high heat.
- Stir-Fry the Vegetables
- Add Oil: If needed, add another teaspoon of oil to the hot pan.
- Cook Cabbage & Carrots: Add the shredded cabbage and julienned carrots. Stir-fry for 2-3 minutes until they are slightly wilted but still retain a crisp-tender bite.
- Add Aromatics: Push the vegetables to one side of the pan. Add the minced garlic and ginger to the clear space and stir-fry for 30-60 seconds until fragrant. Avoid burning.
- Add Green Onion Whites: Toss in the white parts of the green onions and stir-fry for another 30 seconds.
- Remove Veggies: Transfer the stir-fried vegetables to the plate with the chicken. The pan should remain hot and lightly oiled – if anything starts to scorch, lower the heat slightly.
- Pan-Fry the Noodles
- Prepare Pan: Add another thin layer of neutral oil (about 1-2 tablespoons) to the now-empty, hot pan. Ensure the bottom is lightly coated.
- Spread Noodles: Add the dried noodles to the pan, spreading them into an even layer.
- Crisp Noodles: Let the noodles sit undisturbed for 1–2 minutes to develop a light crisp on the bottom. You should hear a gentle sizzle, not boiling.
- Toss & Repeat: After 1-2 minutes, use tongs or chopsticks to gently toss and flip the noodles. Spread them out again and let them sit for another 1-2 minutes. Repeat this process once or twice until some strands are lightly golden at the edges and slightly crisp, while still remaining flexible and chewy in the center.
- Sauce & Finish
- Stir Sauce: Give the prepared sauce a quick stir again (cornstarch tends to settle at the bottom).
- Add Sauce: Pour the sauce mixture around the edges of the pan, allowing it to hit the hot metal first, then quickly toss with the pan-fried noodles until they are evenly coated and glossy. The sauce will thicken almost immediately.
- Combine Ingredients: Return the cooked chicken and stir-fried vegetables to the pan. Toss everything together for 1–2 minutes, ensuring all ingredients are heated through and the sauce lightly clings to everything.
- Final Touches: Toss in the bean sprouts (if using) and the green parts of the green onions right at the very end.
- Taste & Adjust: Taste the chow mein. If it needs more salt, add a splash of soy sauce. If it needs a touch more balance or sweetness, a pinch of sugar or a dash of rice vinegar can do wonders.
- Serve immediately and enjoy your homemade restaurant-style chow mein!
You may also like


Hey there! I’m just someone who seriously loves good food and believes that cooking doesn’t have to be complicated to be amazing. Whether it’s a quick weeknight dinner or a cozy weekend meal, I’m all about sharing easy, tasty recipes that actually work.


