
Scallops & Bacon Recipes - Perfect Seared Sea Scallops
Scallops & Bacon Recipes - Perfect Seared Sea Scallops
- Serves: 2 People
- Prepare Time: 20 minutes
- Cooking Time: 15 minutes
- Calories: -
- Difficulty: Medium
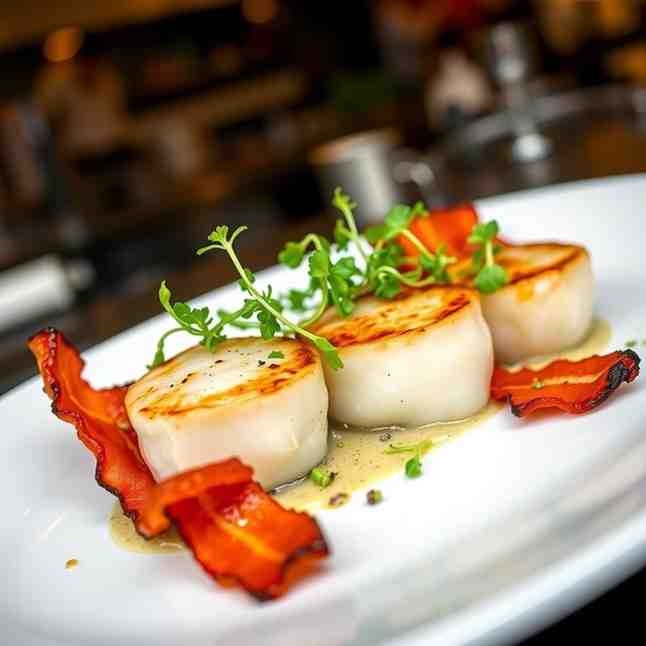
Ever dreamed of making restaurant-quality scallops right in your own kitchen? Well, get ready to make that dream a delicious reality with our Bacon-Fat Seared Sea Scallops recipe! This isn't just any scallop dish; it's a game-changer for anyone craving that perfect golden crust and tender, sweet interior. We're talking about large, plump sea scallops, kissed by the savory magic of bacon fat, and finished with a super simple, bright garlic-basil pan sauce. It’s elegant, it’s impressive, and honestly, it’s way easier than you might think. Whether you're a beginner looking to impress or an experienced home cook seeking a reliable method for sensational scallops and bacon recipes, you've found your new go-to.
Our secret to success lies in a few simple, yet crucial, steps: starting with dry-packed scallops, getting your pan screaming hot, giving those beauties plenty of space, and knowing just when to pull them off the heat. No complicated techniques, no endless ingredient lists – just pure, unadulterated scallop perfection. So, let's dive in and unlock the secrets to perfectly seared fresh sea scallops that will have everyone asking for more!
Bacon fat adds savory depth without needing a heavy sauce, creating an incredible base flavor.
A tiny butter finish gives these scallops a beautiful shine and extra richness without turning greasy.
Dry-packed scallop prep is key; it prevents steaming and guarantees that gorgeous, caramelized crust.
The garlic-basil pan sauce comes together in minutes, adding fresh, aromatic flavor that perfectly complements the rich scallops.
Before we get cooking, let's talk about the tools you'll need and how to pick and prep your scallops like a pro. These steps are crucial for that perfect sear!
Cast iron or stainless skillet: This is your best friend for getting a beautiful brown crust. Nonstick pans fight against browning, so save them for eggs!
Tongs: Essential for flipping scallops without losing their crust and for managing bacon.
Paper towels: You'll need plenty for drying those scallops.
Plate: For holding your prepped scallops and cooked bacon.
Getting your scallops ready is half the battle for a perfect sear. Don't skip these steps!
When you're buying scallops, you'll often see them labeled as "dry-packed" or "wet-packed." Always, always go for dry-packed sea scallops.
What "dry-packed" means for searing: These scallops are shucked and flash-frozen (or sold fresh) without any added water or chemicals. They have a naturally firm texture and are ready to brown beautifully.
Why wet scallops weep and won’t brown well: Wet-packed scallops are treated with a phosphate solution that makes them absorb water. This extra moisture makes them plump up and look bigger, but it also means they'll steam in the pan instead of searing, preventing that delicious crust. They'll also often shrink significantly during cooking.
1. Remove side muscle: Look for a small, tough, crescent-shaped muscle on the side of each scallop. It's usually easy to pull off with your fingers. If it's there, remove it; it can get chewy.
2. Pat dry aggressively (top/bottom/sides): This is the MOST important step! Lay your scallops on a few layers of paper towels, then place more paper towels on top and press firmly. Repeat this process until they feel completely dry to the touch. Any moisture means no sear!
3. Quick fridge air-dry (10–20 minutes uncovered if you have time): If you have a little extra time, place your dried scallops on a plate, uncovered, in the fridge for 10-20 minutes. This extra air exposure helps draw out any remaining surface moisture.
4. Season right before the pan: Don't season too early, as salt can draw out moisture. Wait until just before they hit the hot pan.
Ingredients
Directions
- Render the bacon: Place your cut bacon pieces in a cold cast iron or stainless steel skillet. Turn the heat to medium-low and cook slowly, stirring occasionally, until the bacon is crisp and most of its fat has rendered out, about 8-10 minutes. This low and slow method ensures crispy bacon and maximum fat extraction. Remove the crispy bacon to a paper towel-lined plate and set aside.Manage the fat: You should have a good amount of bacon fat in the pan. Pour off all but 2-3 tablespoons of the rendered fat. If you have less than that, add a little extra high smoke-point oil (like avocado or grapeseed) to make up the difference. This oil helps raise the smoke point of the bacon fat, preventing it from burning.
- Heat the pan correctly: Increase the heat to medium-high to high. You want the pan screaming hot! The fat should be shimmering and almost smoking. This high heat is essential for a beautiful sear.
- Sear scallops (side 1): While the pan heats, season your thoroughly dried scallops generously with salt and pepper. Carefully place the scallops into the hot pan in a single layer, making sure they have plenty of space between them. Do not overcrowd the pan; work in batches if necessary. Let them sear undisturbed for 2-3 minutes. Resist the urge to peek or move them! This is where the crust forms.
- Flip and finish (side 2): After 2-3 minutes, use your tongs to flip each scallop. You should see a gorgeous, golden-brown crust. Continue to cook on the second side for another 1-2 minutes until they are just opaque in the center. Don't overcook! Immediately remove the scallops from the pan and transfer them to a clean plate.
- Build the pan sauce: Reduce the heat to low. Add 1 tablespoon of unsalted butter to the pan. Once melted, add the minced garlic and optional red pepper flakes. Sauté for about 30 seconds until fragrant (don't let the garlic brown!). If using, add a splash of dry white wine or chicken broth to deglaze the pan, scraping up any delicious browned bits from the bottom. Let it reduce for a minute.
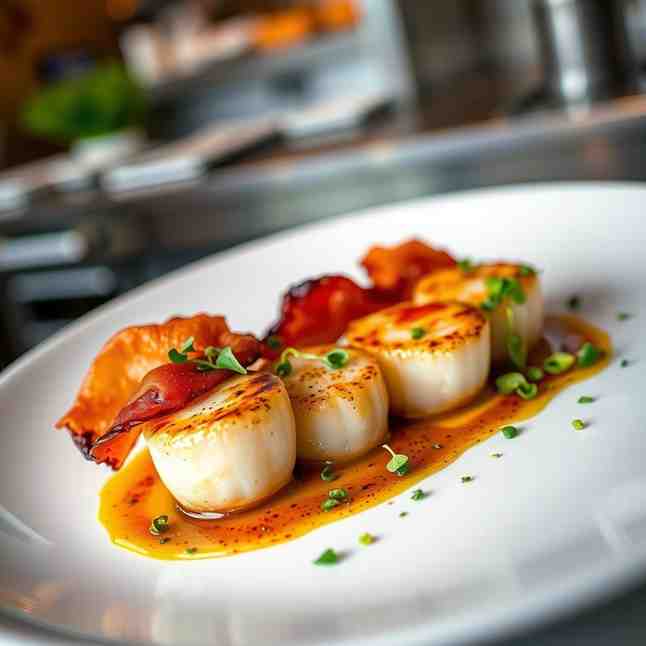
- Finish the sauce and serve: Remove the pan from the heat. Stir in the remaining 1 tablespoon of butter, the fresh basil, and the juice from half a lemon. Swirl until the butter is melted and the sauce is emulsified. Taste and adjust seasoning if needed. Spoon the warm pan sauce over the seared scallops, top with the reserved crispy bacon pieces, and serve immediately with lemon wedges on the side.
- Doneness cues (super practical)
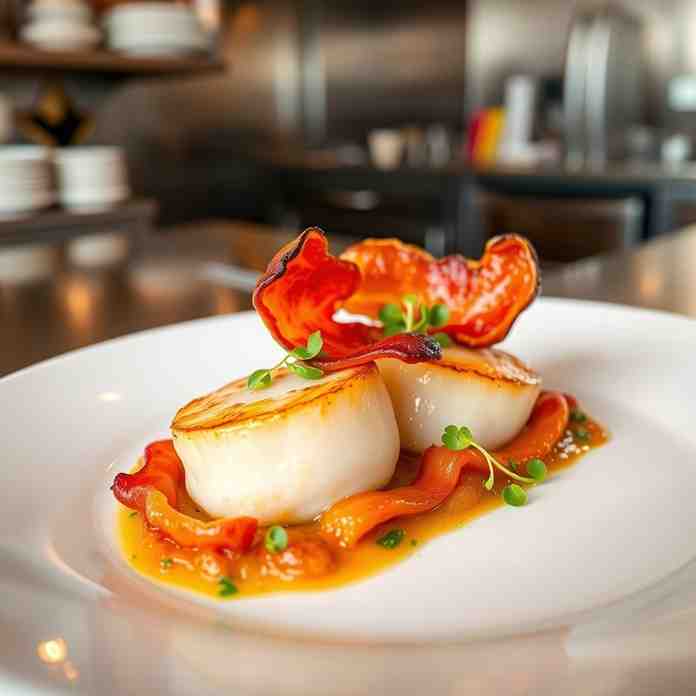
- What “just opaque” looks like: When cooked, scallops turn from translucent to a milky white or opaque color throughout. You'll see this change from the outside in.
- Springy feel cue: Gently press a scallop with your finger or tongs. A perfectly cooked scallop will feel firm but still slightly springy, not mushy or rock-hard.
- Why overcooking turns scallops rubbery: Scallops have very little connective tissue, meaning they cook incredibly fast. Overcooking causes their proteins to seize up and squeeze out moisture, resulting in a tough, rubbery texture. Pull them off the heat as soon as they reach doneness!
Scallops & Bacon Recipes - Perfect Seared Sea Scallops
- Serves: 2 People
- Prepare Time: 20 minutes
- Cooking Time: 15 minutes
- Calories: -
- Difficulty: Medium
Ever dreamed of making restaurant-quality scallops right in your own kitchen? Well, get ready to make that dream a delicious reality with our Bacon-Fat Seared Sea Scallops recipe! This isn't just any scallop dish; it's a game-changer for anyone craving that perfect golden crust and tender, sweet interior. We're talking about large, plump sea scallops, kissed by the savory magic of bacon fat, and finished with a super simple, bright garlic-basil pan sauce. It’s elegant, it’s impressive, and honestly, it’s way easier than you might think. Whether you're a beginner looking to impress or an experienced home cook seeking a reliable method for sensational scallops and bacon recipes, you've found your new go-to.
Our secret to success lies in a few simple, yet crucial, steps: starting with dry-packed scallops, getting your pan screaming hot, giving those beauties plenty of space, and knowing just when to pull them off the heat. No complicated techniques, no endless ingredient lists – just pure, unadulterated scallop perfection. So, let's dive in and unlock the secrets to perfectly seared fresh sea scallops that will have everyone asking for more!
Bacon fat adds savory depth without needing a heavy sauce, creating an incredible base flavor.
A tiny butter finish gives these scallops a beautiful shine and extra richness without turning greasy.
Dry-packed scallop prep is key; it prevents steaming and guarantees that gorgeous, caramelized crust.
The garlic-basil pan sauce comes together in minutes, adding fresh, aromatic flavor that perfectly complements the rich scallops.
Before we get cooking, let's talk about the tools you'll need and how to pick and prep your scallops like a pro. These steps are crucial for that perfect sear!
Cast iron or stainless skillet: This is your best friend for getting a beautiful brown crust. Nonstick pans fight against browning, so save them for eggs!
Tongs: Essential for flipping scallops without losing their crust and for managing bacon.
Paper towels: You'll need plenty for drying those scallops.
Plate: For holding your prepped scallops and cooked bacon.
Getting your scallops ready is half the battle for a perfect sear. Don't skip these steps!
When you're buying scallops, you'll often see them labeled as "dry-packed" or "wet-packed." Always, always go for dry-packed sea scallops.
What "dry-packed" means for searing: These scallops are shucked and flash-frozen (or sold fresh) without any added water or chemicals. They have a naturally firm texture and are ready to brown beautifully.
Why wet scallops weep and won’t brown well: Wet-packed scallops are treated with a phosphate solution that makes them absorb water. This extra moisture makes them plump up and look bigger, but it also means they'll steam in the pan instead of searing, preventing that delicious crust. They'll also often shrink significantly during cooking.
1. Remove side muscle: Look for a small, tough, crescent-shaped muscle on the side of each scallop. It's usually easy to pull off with your fingers. If it's there, remove it; it can get chewy.
2. Pat dry aggressively (top/bottom/sides): This is the MOST important step! Lay your scallops on a few layers of paper towels, then place more paper towels on top and press firmly. Repeat this process until they feel completely dry to the touch. Any moisture means no sear!
3. Quick fridge air-dry (10–20 minutes uncovered if you have time): If you have a little extra time, place your dried scallops on a plate, uncovered, in the fridge for 10-20 minutes. This extra air exposure helps draw out any remaining surface moisture.
4. Season right before the pan: Don't season too early, as salt can draw out moisture. Wait until just before they hit the hot pan.
Ingredients
Directions
- Render the bacon: Place your cut bacon pieces in a cold cast iron or stainless steel skillet. Turn the heat to medium-low and cook slowly, stirring occasionally, until the bacon is crisp and most of its fat has rendered out, about 8-10 minutes. This low and slow method ensures crispy bacon and maximum fat extraction. Remove the crispy bacon to a paper towel-lined plate and set aside.Manage the fat: You should have a good amount of bacon fat in the pan. Pour off all but 2-3 tablespoons of the rendered fat. If you have less than that, add a little extra high smoke-point oil (like avocado or grapeseed) to make up the difference. This oil helps raise the smoke point of the bacon fat, preventing it from burning.
- Heat the pan correctly: Increase the heat to medium-high to high. You want the pan screaming hot! The fat should be shimmering and almost smoking. This high heat is essential for a beautiful sear.
- Sear scallops (side 1): While the pan heats, season your thoroughly dried scallops generously with salt and pepper. Carefully place the scallops into the hot pan in a single layer, making sure they have plenty of space between them. Do not overcrowd the pan; work in batches if necessary. Let them sear undisturbed for 2-3 minutes. Resist the urge to peek or move them! This is where the crust forms.
- Flip and finish (side 2): After 2-3 minutes, use your tongs to flip each scallop. You should see a gorgeous, golden-brown crust. Continue to cook on the second side for another 1-2 minutes until they are just opaque in the center. Don't overcook! Immediately remove the scallops from the pan and transfer them to a clean plate.
- Build the pan sauce: Reduce the heat to low. Add 1 tablespoon of unsalted butter to the pan. Once melted, add the minced garlic and optional red pepper flakes. Sauté for about 30 seconds until fragrant (don't let the garlic brown!). If using, add a splash of dry white wine or chicken broth to deglaze the pan, scraping up any delicious browned bits from the bottom. Let it reduce for a minute.
- Finish the sauce and serve: Remove the pan from the heat. Stir in the remaining 1 tablespoon of butter, the fresh basil, and the juice from half a lemon. Swirl until the butter is melted and the sauce is emulsified. Taste and adjust seasoning if needed. Spoon the warm pan sauce over the seared scallops, top with the reserved crispy bacon pieces, and serve immediately with lemon wedges on the side.
- Doneness cues (super practical)
- What “just opaque” looks like: When cooked, scallops turn from translucent to a milky white or opaque color throughout. You'll see this change from the outside in.
- Springy feel cue: Gently press a scallop with your finger or tongs. A perfectly cooked scallop will feel firm but still slightly springy, not mushy or rock-hard.
- Why overcooking turns scallops rubbery: Scallops have very little connective tissue, meaning they cook incredibly fast. Overcooking causes their proteins to seize up and squeeze out moisture, resulting in a tough, rubbery texture. Pull them off the heat as soon as they reach doneness!
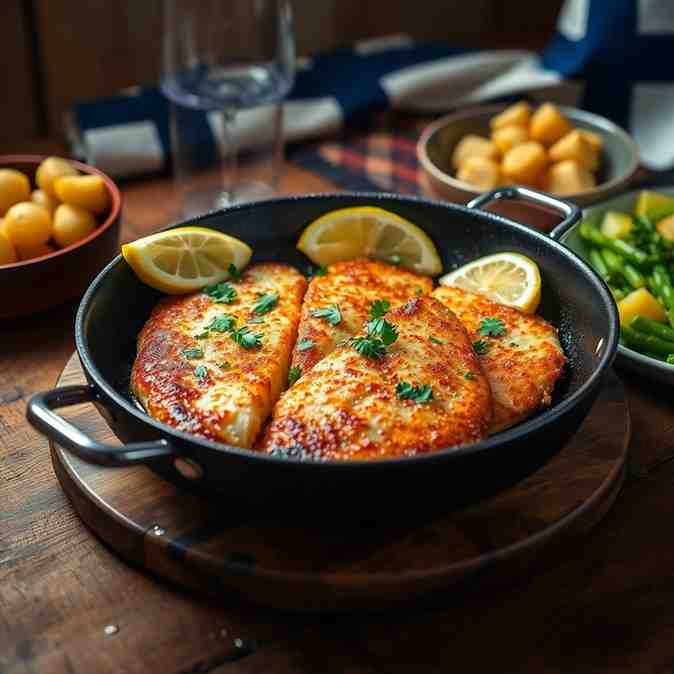
You may also like


Hey there! I’m just someone who seriously loves good food and believes that cooking doesn’t have to be complicated to be amazing. Whether it’s a quick weeknight dinner or a cozy weekend meal, I’m all about sharing easy, tasty recipes that actually work.


