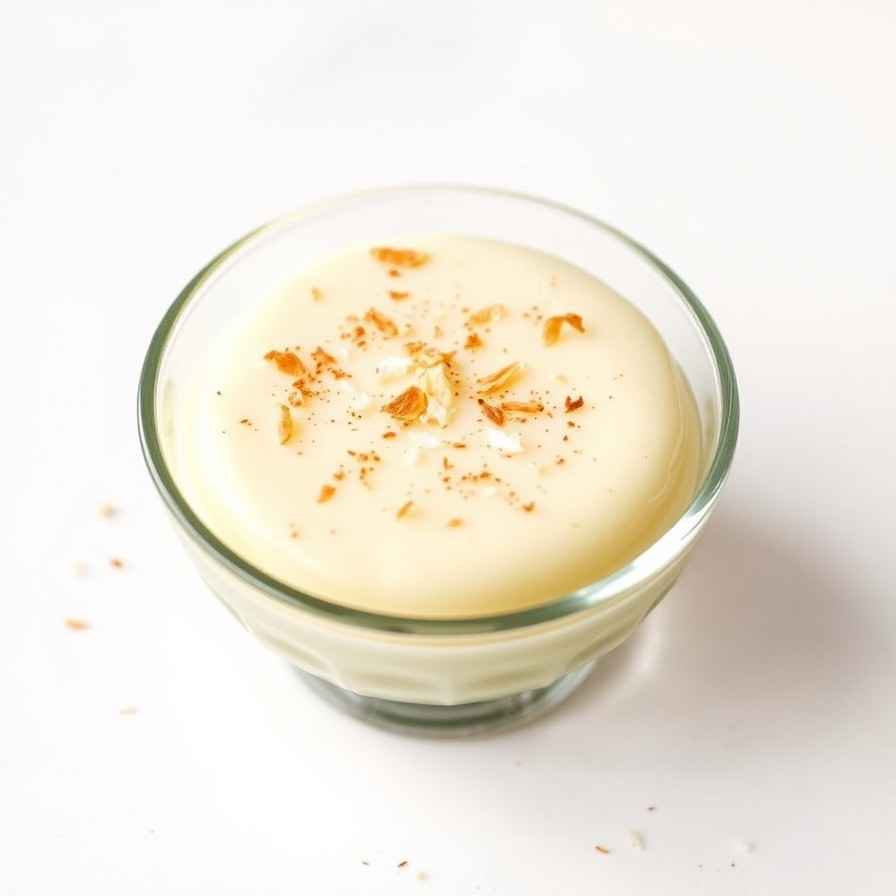
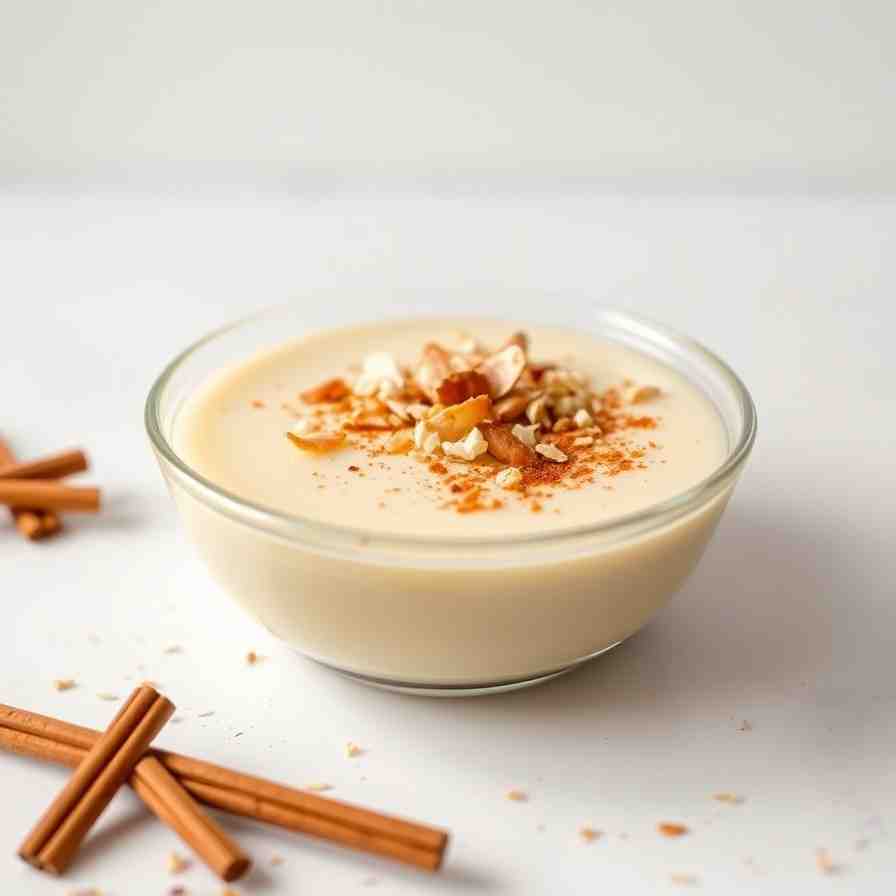
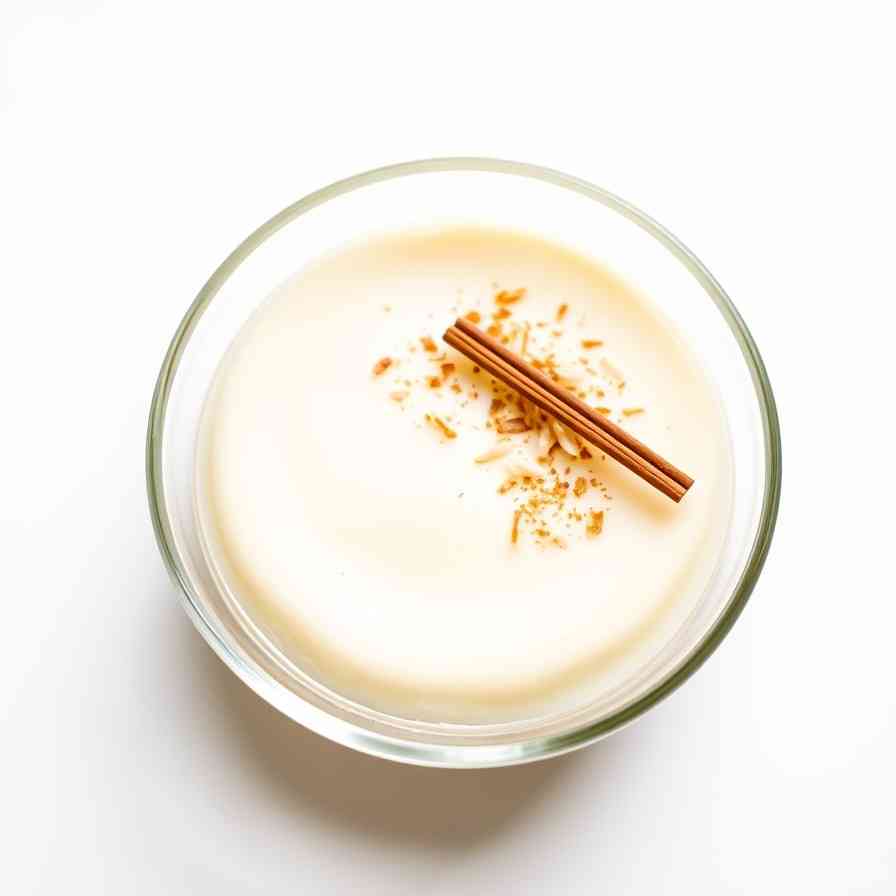
Sugar-Free Coconut Pudding Flan - Healthy, Easy & Gluten-Free
Sugar-Free Coconut Pudding Flan - Healthy, Easy & Gluten-Free
- Serves: 6 People
- Prepare Time: 20 minutes
- Cooking Time: 45 minutes
- Calories: -
- Difficulty: Medium
Welcome to your new favorite dessert! If you're searching for a delicious, creamy treat that feels indulgent but fits a health-conscious lifestyle, you've found it. This sugar free coconut pudding recipe is a game-changer, offering the best of both worlds: a rich, satisfying gluten free dessert recipe that's naturally sweetened and incredibly versatile.
Imagine a velvety baked custard recipe easy enough for any home cook, with the option to enjoy it as a spoonable coconut cream pudding right from the ramekin, or elegantly unmold it like a classic flan, complete with a light, health-conscious caramel. We've stripped away the refined sugars and gluten, focusing on wholesome ingredients like full-fat coconut milk and eggs, to create a dessert that truly satisfies. Whether you're avoiding sugar, following a gluten-free diet, or simply adore coconut, this "Healthy Coconut Flan" is for you. It's an accessible flan recipe with condensed milk optionality (we'll show you how to adapt it!), ensuring everyone can enjoy a luscious, guilt-free indulgence.
Ingredients
Directions
- Prep the ramekins + oven
- Arrange 6-8 small (4-6 oz) ramekins in a deep roasting pan.
- Preheat your oven to a gentle 325°F (160°C). A lower, gentler heat is crucial for custards; it helps them cook evenly, prevents curdling, and ensures a silky texture. Boil a kettle of water – you'll need it hot for the water bath.
- Make the light caramel layer
- In a small, heavy-bottomed saucepan, combine the erythritol (or sugar-free brown sugar substitute) and 2 tablespoons of water.
- Heat over medium-low heat, stirring gently until the sweetener dissolves. Stop stirring once it starts to bubble.
- Cook without stirring, swirling the pan occasionally, until it turns a light amber color and smells faintly toasted. This should take 5-8 minutes. It won't get as dark as traditional caramel, but it will develop a lovely flavor.
- Work quickly! Carefully pour a small amount (about 1-2 teaspoons) of the hot caramel into the bottom of each ramekin, swirling to coat the bottom evenly. If it starts to seize, gently warm it again over low heat.
- Mix the coconut custard (no bubbles)
- In a large mixing bowl, gently whisk together the full-fat coconut milk, whole eggs, egg yolks, sweetener, vanilla extract, and salt.
- Whisk just enough to combine everything thoroughly, but avoid creating excessive froth or bubbles. Too many bubbles can lead to an aerated, holey texture in your finished custard.
- Strain the custard: Pour the custard mixture through a fine-mesh strainer into a clean bowl or a large liquid measuring cup. This crucial step removes any bits of cooked egg, chalazae (the white stringy bits in eggs), or undissolved sweetener, guaranteeing a super smooth, luxurious custard.
- Fill + bake in a water bath
- Carefully pour the strained custard mixture into the prepared ramekins, filling each almost to the top.
- Place the roasting pan with the ramekins into the preheated oven.
- Carefully pour the hot water from your kettle into the roasting pan, around the ramekins, until it comes about halfway up their sides. This water bath (bain-marie) insulates the custard, ensuring it bakes gently and evenly, preventing the edges from overcooking before the center sets.
- Bake for 40-50 minutes, or until the custards are mostly set. The edges should appear firm, but the centers should still have a slight, delicate "jiggle zone" when gently shaken. They will continue to set as they cool.
- Chill (the non-negotiable step)
- Carefully remove the roasting pan from the oven. Let the ramekins cool in the water bath for about 15-20 minutes.
- Once cool enough to handle, remove the ramekins from the water bath, wipe them dry, and cover each tightly with plastic wrap or foil.
- Refrigerate for a minimum of 4 hours, but ideally overnight. This chilling time is absolutely non-negotiable for flan; it allows the custard to fully set, firm up, and develop its perfect texture, making it easy to unmold cleanly. Before chilling, they will seem quite loose!
- Serve: pudding-style or unmolded flan
- Option A: Eat directly from ramekin: For a simple, elegant dessert, just grab a spoon and enjoy your creamy coconut cream pudding straight from the ramekin.
- Option B: Unmold cleanly: To serve as a classic flan, run a thin, sharp knife around the inside edge of each ramekin to loosen the custard. Place the bottom of the ramekin in a shallow bowl of warm water for 10-15 seconds (this helps loosen the caramel). Invert a serving plate over the ramekin, then confidently flip both together. Give a gentle shake, and the flan should release with its beautiful caramel sauce flowing over the top.
You may also like

Hey there! I’m just someone who seriously loves good food and believes that cooking doesn’t have to be complicated to be amazing. Whether it’s a quick weeknight dinner or a cozy weekend meal, I’m all about sharing easy, tasty recipes that actually work.